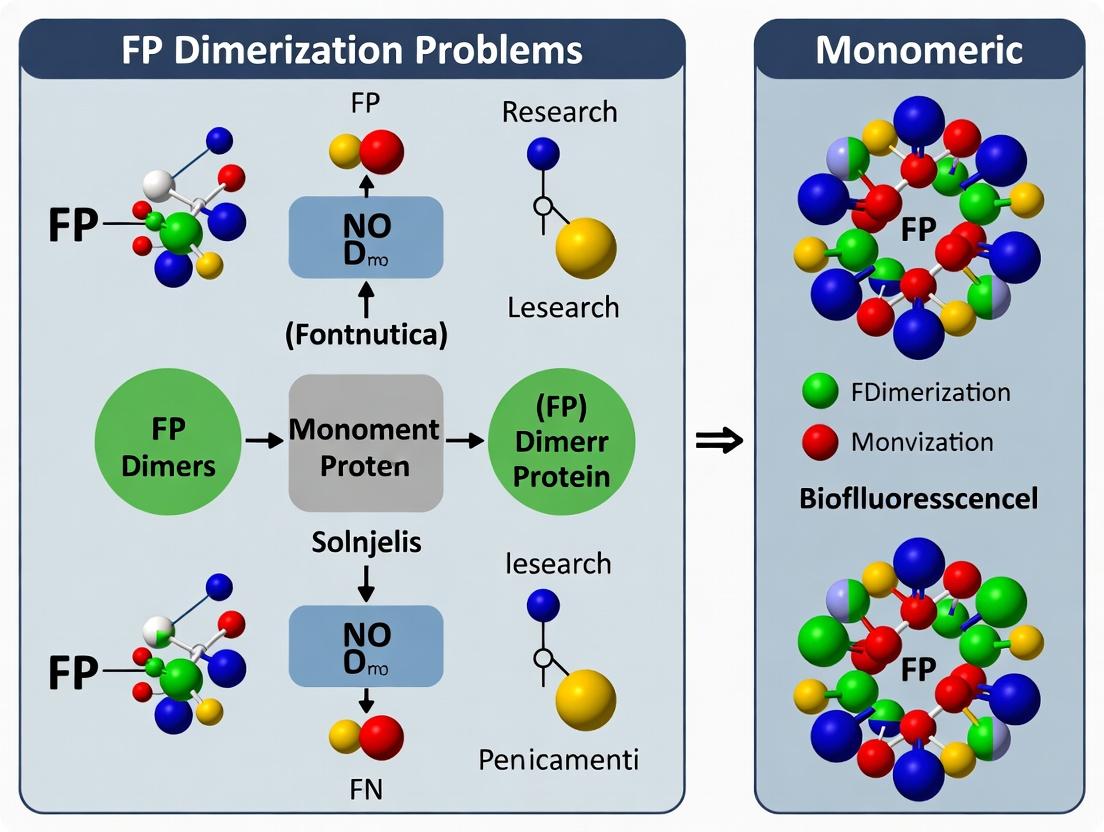
Monomeric FP Revolution: Overcoming Dimerization Artifacts in Live-Cell Imaging and Drug Discovery
Fluorescent protein (FP) dimerization has long been a major source of experimental artifacts in live-cell imaging, protein interaction studies, and biosensor design, leading to false positives and misleading biological interpretations.
Monomeric FP Revolution: Overcoming Dimerization Artifacts in Live-Cell Imaging and Drug Discovery
Abstract
Fluorescent protein (FP) dimerization has long been a major source of experimental artifacts in live-cell imaging, protein interaction studies, and biosensor design, leading to false positives and misleading biological interpretations. This comprehensive review addresses the core problems of FP dimerization, exploring the structural basis of these unwanted interactions and detailing the engineering breakthroughs that have produced truly monomeric FPs across the color spectrum. We systematically compare the latest generation of monomeric FPs (e.g., mNeonGreen2, mScarlet3, mTurquoise2) against their dimeric/tetrameric ancestors, provide optimized protocols for their application in FRET, super-resolution microscopy, and protein tagging, and offer troubleshooting guidance for common pitfalls. For researchers and drug development professionals, this article serves as an essential guide for selecting, validating, and implementing monomeric FPs to enhance data fidelity in biomedical research.
The Dimerization Dilemma: How FP Self-Association Compromises Biomedical Data Fidelity
Fluorescent Protein (FP) dimerization is the tendency of many FPs, even those engineered to be "monomeric," to form weak, non-covalent dimers or higher-order oligomers at high concentrations. This occurs due to conserved hydrophobic interfaces on the FP β-barrel structure. This artifact is problematic because it can cause aberrant localization, disrupt protein function and trafficking, and lead to false conclusions in fluorescence-based assays.
Troubleshooting Guides & FAQs
Q1: How can I tell if FP dimerization is affecting my experiment? A: Key symptoms include:
- Punctate or aggregated fluorescence instead of smooth, expected localization.
- Co-localization artifacts where proteins that do not interact appear to co-localize.
- Altered biological function of the fusion protein (e.g., loss of activity, mislocalization).
- Concentration-dependent artifacts where effects change with expression level.
Q2: What are the most critical experiments to test for dimerization artifacts? A: Perform these control experiments:
- Tag-swapping: Fuse your protein of interest to the opposite end (N- vs. C-terminus) of the FP. If localization/function changes, dimerization may be forcing interactions.
- Co-expression with untagged protein: Express your FP-tagged protein with an excess of its untagged version. If the untagged version displaces the FP signal from structures, it suggests oligomerization is driving localization.
- Use a validated monomeric FP control: Repeat the experiment with a proven monomeric FP (e.g., mCherry2, mNeonGreen) and compare results.
Q3: Which FPs are truly monomeric and recommended for fusion protein work? A: Based on recent literature, the following are considered robustly monomeric under most cellular conditions:
| FP Name | Excitation/Emission (nm) | Brightness (Relative to EGFP) | Recommended For | Dimerization Tendency |
|---|---|---|---|---|
| mNeonGreen | 506/517 | ~2-3x | General tagging, super-resolution | Very low, benchmark monomer |
| mScarlet3 | 569/593 | ~1.5x | General tagging, red channel | Extremely low |
| mCherry2 | 587/610 | ~0.5x | Red tagging, when brightness is less critical | Very low |
| mTurquoise2 | 434/474 | ~1.3x | Cyan channel, FRET | Very low |
| mAzurite2 | 384/450 | ~0.5x | Blue channel | Very low |
Research Reagent Solutions
| Reagent | Function & Rationale |
|---|---|
| Validated Monomeric FP Vectors (e.g., pmNeonGreen-N1, pmScarlet3-C) | Provide a reliable, benchmarked starting point to rule out dimerization. |
| A206K Mutant FP Plasmids | The A206K point mutation in GFP-like FPs (e.g., EGFP, EYFP) reduces dimerization. Use as an intermediate control. |
| FP Dimerization Reporter Cell Lines | Engineered lines expressing cytosolic FPs that fluoresce only upon dimerization. Use to screen for oligomerizing FPs. |
| SNAP/CLIP or HaloTag Systems | Use fluorescent chemical ligands with these monomeric protein tags to avoid FP-based artifacts entirely. |
| BirA*/APEX Proximity Labeling Kits | For interaction studies, use these enzymatic tags instead of FP-FRET to avoid fluorescence-driven artifacts. |
Experimental Protocol: Dimerization Artifact Control via Tag-Swapping & Competition
Objective: Determine if observed fusion protein localization is intrinsic or driven by FP dimerization.
Materials:
- Construct A: Gene of Interest (GOI)-FP (e.g., GOI-mNeonGreen)
- Construct B: FP-GOI (e.g., mNeonGreen-GOI)
- Construct C: Untagged GOI in expression vector
- Appropriate cell line and transfection reagents.
Methodology:
- Transfect cells separately with Construct A and Construct B.
- Image live or fixed cells using identical settings. Note any differences in localization pattern (e.g., diffuse vs. punctate) between N- and C-terminal fusions.
- Co-transfect cells with Construct A (GOI-FP) and a 5-10 fold excess of Construct C (untagged GOI).
- Image and analyze. If the untagged GOI competes with and alters the localization of the FP-tagged GOI (e.g., reduces aggregation), it indicates that FP-mediated interactions were driving the initial artifact.
Visualization: FP Dimerization Artifact Pathway
Title: How FP Dimerization Causes Experimental Artifacts
Visualization: Experimental Workflow for Dimerization Testing
Title: Experimental Workflow to Diagnose FP Dimerization
Troubleshooting Guides & FAQs
Q1: My FP fusion protein shows incorrect subcellular localization (e.g., aggregation, nuclear exclusion) in my mammalian cell experiment. What could be the cause? A: This is a classic symptom of fluorescent protein (FP) dimerization artifact. Wild-type GFP and many early derivatives (e.g., YFP, CFP) form weak but physiologically relevant dimers. When fused to your target protein, these FPs can cause artificial oligomerization, mislocalization, and altered function.
- Solution: Use a verified monomeric FP variant. mGFP (monomeric GFP), mCherry, mTurquoise2, and mScarlet are engineered to prevent dimerization. For critical localization studies, always validate with two different monomeric FPs.
- Experimental Protocol (Validation):
- Transfert cells with your FP-tagged construct and the appropriate monomeric FP control (FP alone).
- Perform fluorescence recovery after photobleaching (FRAP). A monomeric fusion should recover fully, while a dimerizing/aggregating one will show incomplete recovery.
- Co-express with an untagged version of your target protein. Dimerizing FPs can cause hetero-dimerization and dominant-negative effects.
Q2: I observe aberrant signaling in my BRET/FRET-based receptor activation assay. Could my FP be the issue? A: Yes. In protein-protein interaction assays like BRET and FRET, FP dimerization can create false-positive signals by forcing proximity irrelevant to the biological interaction.
- Solution: Replace dimer-prone FPs (e.g., original YFP/CFP pair) with optimized monomeric FRET pairs (e.g., mTurquoise2/mNeonGreen or mCerulean/mCitrine).
- Experimental Protocol (Control for Dimerization Artifact):
- Express your donor and acceptor FP constructs without the interacting protein partners.
- Measure the baseline BRET/FRET ratio. A significant signal indicates direct FP-FP interaction (dimerization).
- The positive control should use a flexible linker to fuse the FPs directly; your experimental construct's signal should be significantly lower than this.
Q3: My FP-tagged construct exhibits reduced biological activity or toxicity. How do I troubleshoot this? A: FP dimerization or structural perturbation can interfere with the native function of the fused protein, especially with sensitive enzymes or G-proteins.
- Solution:
- Linker Optimization: Use a longer, more flexible linker (e.g., (GGGGS)n, where n=3-4) between your protein and the FP to increase separation.
- Tag Position: Test fusions at both the N- and C-terminus, as one may be less disruptive.
- FP Selection: Use smaller, monomeric FPs like mCherry or mEGFP to minimize steric hindrance.
Q4: How do I choose the right monomeric FP for my multi-color imaging experiment? A: Selection criteria include brightness, photostability, maturation time, and spectral separation. See the quantitative comparison table below.
Quantitative Data: Common Monomeric Fluorescent Proteins
| FP Name | Ex/Em Max (nm) | Brightness (Relative to EGFP) | Maturation Half-time (min, 37°C) | Photostability | Primary Application |
|---|---|---|---|---|---|
| mTurquoise2 | 434 / 474 | 0.93 | ~10 | High | Cyan; FRET donor |
| mNeonGreen | 506 / 517 | 1.8 | ~10 | Very High | Green; brightest monomer |
| mCherry | 587 / 610 | 0.47 | ~15 | High | Red; rapid maturation |
| mScarlet | 569 / 594 | 0.99 | ~5.5 | High | Red; bright & fast |
| mTagBFP2 | 399 / 454 | 0.61 | ~6 | Medium | Blue; good separation |
The Scientist's Toolkit: Research Reagent Solutions
| Item | Function & Rationale |
|---|---|
| Monomeric FP Vectors | Backbone plasmids (e.g., pmTurquoise2-C1, mCherry-N1) for creating reliable, non-dimerizing fusions. |
| Flexible Linker Oligos | DNA sequences encoding (GGGGS)n linkers for PCR cloning, reducing steric interference. |
| FRAP-Compatible Cell Lines | Stable cell lines (e.g., HeLa, HEK293) suitable for live-cell imaging and photobleaching assays. |
| Validated Monomeric FP Antibodies | Antibodies specific to monomeric FPs for Western blot validation of fusion protein integrity. |
| Commercial Monomeric FP-Tagged Organelle Markers | Reliable positive controls for subcellular localization (e.g., mCherry-LifeAct, mGFP-Tubulin). |
Key Experimental Protocols
Protocol 1: Testing for Dimerization Artifact via Size-Exclusion Chromatography (SEC)
- Express & Purify: Express and purify your FP-tagged protein from E. coli or mammalian cells.
- Run SEC: Load sample onto a calibrated SEC column (e.g., Superdex 200) in physiological buffer.
- Analyze: Compare the elution volume to protein standards. A monomeric FP fusion will elute at its predicted molecular weight. Dimerization will cause an earlier elution (higher apparent MW).
- Control: Run the monomeric FP alone as a control.
Protocol 2: FRAP Assay for Protein Mobility
- Cell Preparation: Seed cells expressing your FP-fusion construct in a glass-bottom dish.
- Imaging: Use a confocal microscope with a 488nm or 561nm laser. Define a region of interest (ROI) in the cytoplasm or on a structure.
- Bleach: Apply high-intensity laser pulses to bleach the ROI.
- Recovery: Image at low laser power every 0.5-1 second to monitor fluorescence recovery into the bleached area.
- Analysis: Plot normalized fluorescence intensity over time. Fit the curve to calculate the mobile fraction and halftime of recovery. A low mobile fraction suggests aggregation/oligomerization.
Visualization: From Dimerization Artifact to Monomeric Solution
Title: Evolution of Understanding FP Dimerization Artifacts
Title: Troubleshooting Flowchart for FP Artifacts
Technical Support Center
FAQ & Troubleshooting Guides
Q1: My FRET experiment shows high efficiency between two different FPs, even when the target proteins are not known to interact. Is this indicative of unwanted oligomerization? A1: Yes, this is a classic symptom. Apparent FRET can be caused by direct interaction of the FP tags themselves via their hydrophobic interfaces, rather than true biomolecular interaction of the tagged proteins. To troubleshoot:
- Control Experiment: Express the two FP constructs alone (without target proteins) in your cell line. Measure FRET efficiency. A significant signal confirms direct FP-FP interaction.
- Use Monomeric FPs: Switch to validated monomeric variants (e.g., mNeonGreen2, mScarlet3, mTurquoise2). Repeat the experiment.
- Dilution Test: Co-express your FP-tagged proteins with a large excess of untagged target protein. True biological interaction will be competed away, reducing FRET. Oligomerization-driven FRET will be unaffected.
Q2: My FP-tagged protein shows aberrant localization (e.g., aggregation, nuclear exclusion) not observed with immunostaining. What could be the cause? A2: This is likely caused by FP oligomerization (dimerization or higher-order) creating artificial clusters or sequestering the fusion protein. The hydrophobic interfaces can mediate these non-physical interactions.
- Troubleshooting Steps:
- Check the oligomerization state of your specific FP (see Table 1). Many "monomeric" variants are engineered from dimeric parents.
- Shorten or lengthen the linker between the FP and your protein of interest. A longer, more flexible linker can sometimes reduce steric interference.
- Test an alternative, more rigorously monomeric FP from a different phylogenetic origin (e.g., switch from an Aequorea-derived GFP to a Lancelet-derived FP).
Q3: During drug screening, my FP-based biosensor shows a high baseline signal and low dynamic range, masking the drug effect. How can I improve this? A3: A high baseline is often due to constitutive biosensor activity driven by FP oligomerization bringing sensor domains into proximity. This saturates the signal.
- Solution: Implement the "steric monomerization" strategy. Use FPs that have been engineered not just for reduced affinity, but that also carry charged mutations (e.g., A206K, L221K, F223R in GFP variants) at the dimer interface to create electrostatic repulsion. This further destabilizes unwanted interactions.
Experimental Protocol: Assessing FP Oligomerization via SEC-MALS
Purpose: To quantitatively determine the oligomeric state of a purified FP or FP-fusion protein in solution. Methodology:
- Protein Purification: Express and purify your FP construct using standard chromatography (e.g., Ni-NTA for His-tagged proteins).
- Sample Preparation: Concentrate the protein in a suitable buffer (e.g., PBS, pH 7.4) and filter through a 0.1 µm centrifugal filter.
- SEC-MALS Setup: Equilibrate a Size-Exclusion Chromatography (SEC) column (e.g., Superdex 200 Increase) connected in-line with a Multi-Angle Light Scattering (MALS) detector and a refractive index (RI) detector.
- Injection & Run: Inject 50-100 µg of your protein. Run isocratic elution at 0.5 mL/min.
- Data Analysis: The MALS detector measures absolute molecular weight independently of elution volume. Use the manufacturer's software (e.g., ASTRA) to calculate the molar mass across the eluting peak. Compare to the theoretical monomer mass.
Key Research Reagent Solutions
| Reagent / Material | Function in FP Oligomerization Research |
|---|---|
| Validated Monomeric FPs (e.g., mEGFP, mCherry2, mNeptune2) | Engineered control proteins with suppressed hydrophobic interfaces for comparison in assays. |
| Dimeric Control FPs (e.g., EGFP, tdTomato) | Positive controls for oligomerization-dependent artifacts in experiments. |
| PBS (Phosphate Buffered Saline), pH 7.4 | Standard physiological buffer for in vitro characterization of FP interactions. |
| Size-Exclusion Chromatography Column (e.g., Superdex 75/200 Increase) | Separates protein species by hydrodynamic radius to assess oligomeric state. |
| MALS (Multi-Angle Light Scattering) Detector | Provides absolute measurement of molar mass in solution, critical for confirming oligomerization. |
| FRET Pair Donor/Acceptor FPs (e.g., mTurquoise2/mNeonGreen2) | Validated monomeric pairs for measuring true biological proximity without artifact. |
Quantitative Data Summary
Table 1: Oligomerization States and Dissociation Constants (Kd) of Common FPs
| Fluorescent Protein | Parent/Origin | Reported Oligomeric State | Interface Kd (Dimerization) | Key Interface Mutations for Monomerization |
|---|---|---|---|---|
| EGFP | Aequorea victoria GFP | Weak Dimer | ~100 µM | A206K, L221K, F223R |
| mCherry | Discosoma sp. DsRed | Monomer (weak dimerizer) | >1 mM | — |
| tdTomato | Discosoma sp. DsRed | Tandem Dimer | Irreversible | — |
| mNeonGreen | Branchiostoma lanceolatum | Monomer | Undetectable | Native |
| mScarlet-I | Discosoma sp. DsRed derivative | Monomer | >500 µM | T58Q, V59T, A61V, etc. |
Table 2: Impact of Oligomerization on Experimental Metrics
| Experimental Assay | Metric | Dimeric FP Artifact | Monomeric FP Improvement |
|---|---|---|---|
| FRET Biosensing | Signal-to-Background Ratio | Low (High baseline) | High (3-10 fold increase common) |
| Protein Localization | Accuracy of Subcellular Targeting | Low (Aggregation/Sequestration) | High (True diffusion) |
| Protein-Protein Interaction | False Positive Rate in Pulldown | High | Significantly Reduced |
| In vivo Imaging | Photobleaching Recovery (Half-time) | Slower (Trapped) | Faster (True dynamics) |
Visualizations
Diagram 1: FP Hydrophobic Interface Drives Artifact
Diagram 2: Troubleshooting FP Oligomerization Workflow
Diagram 3: Engineering Strategies for Monomeric FPs
Troubleshooting Guides & FAQs
Q1: We observe strong FRET signal in our negative control (non-interacting protein pair). What are the most common causes? A1: Common causes include: 1) Overexpression & Crowding: High local concentration of fluorophores leads to random, proximity-based FRET. Titrate expression levels down. 2) Fluorophore Dimerization: Especially with older CFP/YFP pairs; use monomeric variants (e.g., mTurquoise2/mNeonGreen). 3) Incomplete Spectral Unmixing: Correct for bleed-through and cross-excitation using appropriate control samples. 4) pH Sensitivity: YFP derivatives are pH-sensitive; ensure consistent intracellular pH.
Q2: In our BiFC assay, we see reconstituted fluorescence even when we express one fragment alone. Why? A2: This indicates "self-assembly" or "promiscuous fragment association." Solutions: 1) Use optimized fragment pairs: Split Venus/YFP at residues 155/173 or 210/210 have lower intrinsic affinity. 2) Shorten incubation/expression time: BiFC is irreversible; long times increase chance of random collision. 3) Include a mutated fragment control: Use a fragment with a core mutation (e.g., L68H for YFP) that prevents proper maturation.
Q3: Our co-immunoprecipitation (co-IP) validates an interaction, but FRET does not. What could explain the discrepancy? A3: This suggests a weak, transient, or indirect interaction. Co-IP captures stable complexes, while FRET requires close (<10 nm) and prolonged proximity. Consider: 1) Interaction may be bridged by a third party caught in the IP. 2) The fluorophores may be improperly oriented (dipole misalignment), reducing FRET efficiency. Try a flexible linker. 3) The interaction may occur in a subcellular compartment where your FRET pair does not fold/mature correctly.
Detailed Methodologies
Protocol 1: Validating Fluorophore Monomeric State via Size-Exclusion Chromatography (SEC)
- Cloning: Express the FP (e.g., mVenus, mCherry2) with a 6xHis tag in E. coli.
- Purification: Use nickel-affinity chromatography followed by dialysis into SEC buffer (e.g., 20 mM Tris-HCl, 150 mM NaCl, pH 7.5).
- SEC Calibration: Run a standard protein mixture (e.g., Gel Filtration Markers Kit) on a Superdex 75 or 200 column.
- Sample Run: Inject 50-100 µg of purified FP at 0.5 mL/min. Collect 0.5 mL fractions.
- Analysis: Measure A280 and fluorescence (FP-specific excitation/emission). Plot elution volume vs. log(MW). A monomeric FP should elute at its predicted molecular weight; dimers will elute earlier.
Protocol 2: FRET Efficiency Calculation (Acceptor Photobleaching Method)
- Image Acquisition: Capture donor (CFP) and FRET (YFP) channel images before and after bleaching the acceptor (YFP) in a defined ROI.
- Background Subtraction: Subtract background intensity from all images.
- Calculate: FRET Efficiency (E) = 1 – (Donorpre / Donorpost), where Donorpre and Donorpost are the donor intensities in the bleached ROI before and after acceptor bleaching.
- Controls: Include donor-only and acceptor-only cells to correct for bleed-through. Repeat ≥10 cells per condition.
Data Presentation
Table 1: Common FP Dimerization Propensities & Monomeric Solutions
| Fluorophore (Old) | Dimerization K_d (µM) | Monomeric Variant | Dimerization K_d (µM) | Recommended Use |
|---|---|---|---|---|
| EYFP | ~0.11 | mVenus, mCitrine | >100 | FRET acceptor, BiFC fragment |
| ECFP | ~0.10 | mTurquoise2 | >100 | FRET donor |
| Venus | ~0.14 | mVenus | >100 | Bright BiFC/FRET |
| TagRFP | ~0.10 | mTagRFP2 | >100 | Rationetric FRET pair |
| Note: K_d values are approximate and context-dependent. Use monomeric variants for all quantitative PPI studies. |
Table 2: Troubleshooting Matrix for False Positives
| Artifact Symptom | Primary Cause | Diagnostic Test | Corrective Action |
|---|---|---|---|
| High FRET in controls | FP Dimerization | SEC of purified FP | Switch to validated monomeric FP |
| BiFC signal with one fragment | Fragment Self-Assembly | Express fragment alone | Use less-associating split site (e.g., splitVenus 155/173) |
| Signal varies by cell region | pH Sensitivity | Image with pH control probe (e.g., pHluorin) | Use pH-resistant FP (e.g., mNeonGreen) |
| Co-IP positive, FRET negative | Indirect/Transient Interaction | FRET-FLIM for lifetime measurement | Use cross-linking or proximity ligation assays |
Diagrams
Title: Sources and Mitigation of False Positives in BiFC Assays
Title: Rigorous FRET Experimental Workflow to Minimize False Positives
The Scientist's Toolkit: Research Reagent Solutions
| Reagent/Material | Function & Rationale |
|---|---|
| mTurquoise2 (donor) | Bright, photostable, truly monomeric cyan FP for FRET. Replaces dimer-prone ECFP/CFP. |
| mNeonGreen/mVenus (acceptor) | Monomeric yellow-green FPs with reduced pH sensitivity. Critical for FRET & BiFC. |
| Optimized BiFC Fragments (e.g., splitVenus 155-173) | Fragments with low intrinsic affinity, reducing self-assembly false positives. |
| pH Buffer/Indicator Dyes (e.g., BCECF) | To monitor and control intracellular pH, ruling out pH-induced fluorescence changes. |
| Gel Filtration Standards | For calibrating SEC to definitively confirm the monomeric state of purified FPs. |
| Acceptor Photobleaching/FLIM Module | Microscope attachment for the most direct FRET efficiency measurement, reducing crosstalk artifacts. |
| Controlled Expression Vectors (e.g., low-copy, inducible) | To titrate protein expression levels, preventing crowding-induced false positives. |
Technical Support Center: Troubleshooting Biosensor Performance
FAQs & Troubleshooting Guides
Q1: My FRET biosensor shows a very low dynamic range (ΔF/F). What could be the cause and how can I fix it? A: A low dynamic range is frequently caused by altered kinetics due to unintended dimerization of fluorescent protein (FP) pairs. This forces the biosensor into a constitutive high-FRET state, dampening its response.
- Troubleshooting Steps:
- Verify Construct Design: Ensure you are using truly monomeric FPs (e.g., mTurquoise2, mNeonGreen, mScarlet-I) instead of old, weak-dimerizing variants (e.g., ECFP, EYFP, mRFP).
- Check Linker Length/Composition: The linker between the FP and the sensing domain is critical. Short or rigid linkers can hinder conformational change. Clone in a longer, flexible linker (e.g., (GGGGS)n) or an optimized cleavable linker.
- Test Expression Levels: High overexpression can lead to aggregation and false-positive FRET. Titrate transfection reagent/DNA amount and use a weaker promoter.
Q2: My biosensor exhibits incorrect or aberrant subcellular localization (e.g., nuclear aggregation, puncta). What should I do? A: This is a classic sign of expression toxicity and misfolding, often stemming from FP aggregation propensity.
- Troubleshooting Steps:
- Switch to Advanced Monomeric FPs: Immediately replace FPs with the latest generation engineered for enhanced solubility and monometricity (see Reagent Table).
- Add a Localization Sequence: Ensure a clear, strong localization sequence (e.g., myristoylation-palmitoylation for plasma membrane) is present and positioned correctly to override non-specific aggregation.
- Lower Expression & Temperature: Reduce expression level and consider culturing cells at 30°C for 24-48 hours post-transfection to improve folding.
Q3: I observe cytotoxicity upon biosensor expression. How can I reduce expression toxicity? A: Cytotoxicity is commonly linked to proteostatic stress from misfolding FPs or overly active signaling domains.
- Troubleshooting Steps:
- Prioritize Monomeric FPs: Weakly dimerizing FPs can form higher-order aggregates, stressing the cellular machinery.
- Use Inducible Systems: Switch from constitutive (CMV) to inducible (Tet-On) or weaker (EF1α, PGK) promoters for controlled, lower expression.
- Fragment the Biosensor: Consider a split-biosensor design where FP halves are expressed separately, reducing the folding burden.
Q4: The biosensor response is too slow or too fast for my biological process. How can I modulate its kinetics? A: Kinetics are dictated by the sensing domain and the FPs. Dimerization can artificially slow dynamics.
- Troubleshooting Steps:
- Engineer the Sensing Domain: Introduce point mutations in the sensing domain known to alter ligand binding affinity (on-rate/off-rate).
- Optimize Linkers: As in Q1, linker design is key. Shorter/stiffer linkers may speed up response; longer/flexible ones may slow it.
- Validate with Monomeric FPs: Ensure observed kinetics are not limited by FP interaction strength.
Experimental Protocols
Protocol 1: Validating FP Monometricity via SEC-MALS
- Purpose: To rigorously assess the oligomeric state of your FP or FP-fused biosensor in vitro.
- Methodology:
- Expression & Purification: Express His-tagged FP/biosensor in HEK293T or E. coli cells. Purify using Ni-NTA affinity chromatography.
- Sample Preparation: Concentrate the protein in a suitable buffer (e.g., PBS, pH 7.4). Centrifuge at 100,000×g to remove aggregates.
- SEC-MALS Analysis: Inject ~100 µg of sample onto a size-exclusion chromatography (SEC) column (e.g., Superdex 200 Increase) coupled to a Multi-Angle Light Scattering (MALS) detector. Use the instrument's software to calculate the absolute molecular weight across the elution peak.
- Interpretation: A monodisperse peak with a molecular weight matching the expected monomer mass confirms monometricity. Higher masses indicate dimerization/oligomerization.
Protocol 2: Quantifying Biosensor Dynamic Range in Live Cells
- Purpose: To accurately measure the FRET response (ΔF/F) of your biosensor under controlled conditions.
- Methodology:
- Cell Preparation: Plate cells in an imaging dish. Transfect with the biosensor construct using optimized, low-DNA conditions.
- Imaging Setup: Use a confocal or widefield microscope with controlled environment (37°C, 5% CO2). Set up sequential imaging for donor (e.g., mTurquoise2: Ex 430-455nm, Em 470-500nm) and FRET (Ex 430-455nm, Em 525-550nm) channels.
- Calibration & Stimulation: Acquire a 1-minute baseline. Apply a saturating dose of activator/inhibitor (e.g., Forskolin/IBMX for cAMP biosensors; Ionomycin for Ca2+ biosensors). Acquire images until signal stabilizes.
- Analysis: Calculate the FRET ratio (FRET channel intensity / Donor channel intensity) for each cell over time. ΔF/F = (Rmax - Rmin) / R_min.
Data Presentation
Table 1: Performance Comparison of Key Monomeric Fluorescent Proteins
| FP Name | Color | Excitation/Emission (nm) | Brightness (Relative to EGFP) | Oligomeric State (Confirmed by SEC-MALS) | Key Advantage for Biosensors |
|---|---|---|---|---|---|
| mTurquoise2 | Cyan | 434/474 | 0.90 | Monomer | High quantum yield, excellent FRET donor |
| mNeonGreen | Green | 506/517 | 2.7 | Monomer | Extremely bright, photostable |
| mScarlet-I | Red | 569/594 | 1.5 | Monomer | Bright, red, ideal for FRET acceptor |
| mCherry2 | Red | 587/610 | 1.1 | Monomer | Mature, reliable red monomer |
| mCyRFP1 | Far-Red | 651/674 | 0.6 | Monomer | Ideal for multiplexing, low background |
Table 2: Troubleshooting Matrix for Common Biosensor Issues
| Symptom | Primary Suspect | Secondary Checks | Recommended Solution |
|---|---|---|---|
| Low ΔF/F | FP Dimerization | Linker rigidity, Expression level | Switch to verified monomeric FPs (Table 1) |
| Aberrant Puncta | FP Aggregation | Localization sequence, Cell health | Use more soluble FP; Add strong localization signal |
| Cytotoxicity | Proteostatic Stress | Promoter strength, FP vintage | Use inducible promoter; Use modern FPs |
| Slow Kinetics | Sensor Domain | Linker length, Dimerization artifact | Engineer sensing domain; Optimize linker |
Mandatory Visualizations
Diagram 1: FP Dimerization Impacts Biosensor Function
Diagram 2: Biosensor Troubleshooting Experimental Workflow
The Scientist's Toolkit: Research Reagent Solutions
| Reagent / Material | Function & Importance in Biosensor Research |
|---|---|
| Monomeric FPs (mTurquoise2, mNeonGreen, mScarlet-I) | Core building blocks that prevent artifactic dimerization, ensuring kinetics reflect only sensor domain activity. |
| Long, Flexible Linkers (e.g., (GGGGS)3) | Provide necessary spacing and rotational freedom between FP and sensor domain for optimal conformational change. |
| Inducible Expression System (Tet-On) | Allows control over biosensor expression level, minimizing aggregation and cytotoxicity from overexpression. |
| SEC-MALS Instrument | Gold-standard method for in vitro validation of FP monomeric state and overall biosensor complex stability. |
| Saturation Ligands (e.g., Forskolin, Ionomycin) | Used during live-cell calibration to determine the maximum possible biosensor response (ΔF/F_max). |
Technical Support Center
Troubleshooting Guides & FAQs
Q1: My monomeric fluorescent protein (mFP) construct shows unexpectedly high Förster Resonance Energy Transfer (FRET) in my negative control. What could be the cause?
A: This is a classic artifact of residual dimerization or adventitious interaction. First, confirm your construct is truly monomeric by performing a co-immunoprecipitation assay with a known monomeric vs. dimeric control (see Protocol 1). Second, check your linker sequence between the mFP and your protein of interest; short, rigid linkers can force proximity. Use a flexible linker (e.g., (GGGGS)n, where n≥3). Finally, ensure your expression levels are not causing crowding-induced pseudo-FRET.
Q2: I am observing photobleaching heterogeneity in my mFP-tagged receptor during single-molecule imaging. How should I proceed?
A: Heterogeneous photobleaching steps often indicate undetected oligomerization. Perform a stepwise photobleaching analysis on immobilized molecules. Pure monomers will exhibit a single photobleaching step. The presence of two or more steps per punctum suggests dimer/oligomer contamination. This can be quantified using N&B (Number and Brightness) analysis (see Protocol 2). Consider switching to a more rigorously validated mFP (e.g., mNeonGreen, mScarlet) and verify your cloning did not create an aggregation-prone sequence.
Q3: My quantitative imaging data using mFPs shows poor correlation with biochemical (e.g., Western blot) data. Why?
A: This discrepancy frequently stems from the dimerization tendency of traditional FPs (like eGFP, Venus) used in biochemical assays as fusion tags. Dimerization can alter protein mobility, stability, and interaction kinetics. To resolve:
- For Imaging: Use validated monomeric FPs (mFPs).
- For Biochemistry: Use the same mFP tag or a small epitope tag (HA, FLAG) for consistency.
- Control: Run a side-by-side experiment comparing your mFP construct to one tagged with a dimeric FP (e.g., eGFP). The dimeric FP will likely show shifted migration on native-PAGE and altered quantification.
Q4: During live-cell tracking, my mFP-tagged cytosolic protein shows anomalous confinement, suggesting unwanted binding. What's wrong?
A: Even "monomeric" FPs can have weak, residual hydrophobic patches that interact with cellular structures. Perform a control experiment: image the mFP alone (without fusion partner) in your cell line. If the mFP alone shows non-uniform distribution, it has problematic sticky interactions. Choose an mFP from a different phylogenetic clade (e.g., if using a GFP derivative, try a TagRFP-derived mScarlet). Also, ensure the pH stability of your mFP matches your cellular compartment to avoid aggregation at suboptimal pH.
Experimental Protocols
Protocol 1: Co-Immunoprecipitation Assay for Validating Monomericity Purpose: To test for self-association of an FP-tagged protein. Steps:
- Transfect cells with two constructs: your protein of interest tagged with FP-A (e.g., mEGFP) and the same protein tagged with FP-B (e.g., mCherry). Include a positive control (known dimeric FP pair) and negative control (two unrelated monomeric proteins).
- After 24-48 hours, lyse cells in a mild, non-denaturing lysis buffer (e.g., 1% Triton X-100, 150 mM NaCl, 25 mM Tris pH 7.4).
- Incubate lysate with anti-GFP nanobody beads for 1 hour at 4°C.
- Wash beads 3x with lysis buffer.
- Elute proteins and analyze by SDS-PAGE and Western blot, probing for both FP-A and FP-B. Interpretation: Signal for FP-B in the FP-A pull-down indicates interaction. A true monomer should show no more signal than the unrelated protein negative control.
Protocol 2: Number and Brightness (N&B) Analysis for Detecting Oligomers Purpose: To quantify molecular brightness and detect oligomers in live cells via confocal microscopy. Steps:
- Transfert cells with your mFP-tagged construct. Keep expression low.
- Acquire a time-series stack (~100 frames) of a image region using a confocal microscope, keeping imaging settings constant.
- Use the formula: Average Intensity (〈I〉) = Mean pixel intensity over time. Variance (σ²) = Variance of pixel intensity over time.
- Calculate Brightness (B):
B = σ² / 〈I〉. The apparent brightness is proportional to the oligomeric state. - Compare the measured B value to a calibration curve generated from known monomeric and dimeric FP standards expressed under identical conditions. Interpretation: A brightness value significantly higher than the monomer standard indicates oligomerization of your construct.
Table 1: Comparison of Common Fluorescent Proteins and Their Oligomeric States
| Fluorescent Protein | Typical Oligomeric State | Apparent Molecular Weight (kDa) by SEC* | Relative Brightness | Key Artifact in Quantitative Imaging | |
|---|---|---|---|---|---|
| eGFP | Weak Dimer | ~54 | 1.0 (reference) | Dimerization-induced false FRET/co-localization | |
| Venus | Weak Dimer | ~55 | 1.2 | Altered protein complex stoichiometry | |
| TagRFP | Dimer | ~110 | 0.8 | Significant mislocalization & clustering | |
| mNeonGreen | Monomer | ~27 | 1.5 | Minimal | Optimal for quantification |
| mCherry2 | Monomer | ~28 | 0.6 | Minimal | Optimal, but lower brightness |
| mScarlet-I | Monomer | ~28 | 1.5 | Minimal | Optimal for quantification & brightness |
*Size Exclusion Chromatography under non-denaturing conditions.
Table 2: Impact of FP Oligomericity on Common Assay Readouts
| Assay Type | Dimeric/Weakly Dimeric FP Artifact | Monomeric FP Advantage |
|---|---|---|
| FRET / Biosensors | High false positive rate from forced proximity | Accurate reporting of true molecular proximity |
| Protein Localization | Mislocalization due to cross-linking & clustering | Fidelity to endogenous protein distribution |
| Single-Molecule Tracking | Anomalous confinement, reduced diffusion coefficient | Accurate diffusion kinetics & complex stoichiometry |
| Super-Resolution (PALM/STORM) | Over-counting of clusters, inflated cluster size | Precise single-molecule localization & counting |
Visualizations
The Scientist's Toolkit: Research Reagent Solutions
| Reagent / Material | Function & Importance in Monomeric FP Research |
|---|---|
| mNeonGreen plasmid | A very bright, truly monomeric GFP variant. Essential as a reference standard for monomeric performance in fusion constructs. |
| mScarlet-I plasmid | A bright, monomeric red fluorescent protein. Enables two-color, artifact-free co-localization and interaction studies. |
| Anti-GFP Nanobody Agarose | For highly specific Co-IP with minimal steric hindrance. Critical for validating lack of interaction between mFP fusion pairs. |
| SNAP-tag / HaloTag plasmids | Small, monomeric protein tags for covalent labeling with organic dyes. Provides an alternative labeling strategy to circumvent all FP-related issues. |
| Flexible Linker Oligos (GGGGS)n | DNA sequences encoding flexible peptide linkers. Used to separate the FP from the protein of interest, minimizing interference and forced proximity. |
| Dimeric FP Control (e.g., TagRFP) | A known dimeric FP construct. Serves as a crucial positive control in experiments designed to detect oligomerization artifacts. |
| Size Exclusion Chromatography (SEC) Standard | Protein standards of known molecular weight and oligomeric state. Required for in vitro validation of mFP monomericity via SEC. |
| Photobleaching Step Analysis Software | Custom or commercial software (e.g., in ImageJ). Necessary for analyzing single-molecule photobleaching steps to determine oligomeric state in situ. |
Engineering and Deploying Monomeric FPs: A Toolkit for Modern Bioscience
Technical Support Center: Troubleshooting Monomeric FP Experiments
Frequently Asked Questions (FAQs)
Q1: I introduced the A206K mutation into my GFP variant, but I still observe dimerization in size-exclusion chromatography. What could be the issue? A: The A206K mutation is highly effective in many backgrounds (e.g., GFP, YFP) but can be insufficient in some protein contexts. First, verify your chromatographic conditions; use a low-ionic strength buffer (e.g., 20 mM Tris-HCl, pH 7.4) to avoid non-specific interactions. Second, check if your FP backbone already has predisposing dimeric interactions. Combining A206K with a second-site mutation like F223R is often necessary for complete monomerization, especially in CFP and some photoactivatable variants.
Q2: Why does the F223R mutation sometimes reduce fluorescence intensity, and how can I mitigate this? A: The F223R mutation introduces a positive charge near the chromophore, which can subtly perturb the electronic environment, potentially reducing quantum yield. To mitigate this:
- Screen F223R Combinations: Test it alongside stabilizing mutations like A206K or L221K. The combined effect can restore brightness while ensuring monomericity.
- Optimize Expression Conditions: Use a lower temperature (e.g., 18°C) during protein expression to improve folding fidelity.
- Consider Alternative Mutations: For your specific application, L221K might be a brighter, though sometimes slightly less effective, monomeric alternative.
Q3: When should I use L221K over A206K or F223R? A: L221K is particularly useful when engineering monomeric variants of red and far-red fluorescent proteins (e.g., mCherry, mRuby), where the A206K equivalent is less effective. It disrupts a different hydrophobic interface. Use L221K as a first-line mutation for red FPs and as a combinatorial mutation with A206K for challenging green/yellow variants where dimerization is strong.
Q4: My monomeric FP fusion protein shows aberrant localization or aggregation in cells. How do I troubleshoot this? A: This is a common problem when moving from in vitro to cellular systems.
- Verify Monomericity In Vivo: Perform a Fluorescence Resonance Energy Transfer (FRET) negative control experiment with two identical FPs fused to interacting domains. True monomers should show minimal FRET.
- Check the Fusion Partner: The aggregation may be from your protein of interest. Create a control fusion with a well-behaved, neutral protein.
- Optimize Linker Length: Ensure a flexible, sufficiently long linker (e.g., (GGGGS)n, where n=2-4) is placed between the FP and your protein to prevent steric interference.
Experimental Protocols
Protocol 1: In Vitro Assessment of Dimer Disruption via Size-Exclusion Chromatography (SEC)
- Objective: Quantitatively assess the oligomeric state of FP mutants.
- Materials: Purified wild-type and mutant FP proteins, SEC column (e.g., Superdex 75 Increase 10/300 GL), FPLC system, low-ionic strength buffer (20 mM Tris-HCl, 150 mM NaCl, pH 7.4).
- Method:
- Equilibrate the SEC column with at least 1.5 column volumes of buffer.
- Concentrate purified FPs to 2-5 mg/mL in 500 µL.
- Inject sample and run isocratic elution at 0.5 mL/min.
- Record elution volumes (Ve) for each peak.
- Calculate the partition coefficient (Kav) using the formula: Kav = (Ve - V0) / (Vt - V0), where V0 is the void volume and Vt is the total column volume.
- Compare the Kav of mutants to the wild-type and known monomeric/dimeric standards.
Protocol 2: In Vivo Validation Using FRET-Based Dimerization Assay
- Objective: Confirm monomeric behavior in living cells.
- Materials: Two plasmids: (1) FP mutant-A fused to FKBP, (2) FP mutant-B fused to FRB; HEK293T cells, transfection reagent, rapamycin.
- Method:
- Co-transfect HEK293T cells with the two fusion constructs.
- After 24-48 hours, acquire acceptor-photobleaching FRET images using a confocal microscope.
- Measure fluorescence intensity of the donor (FP mutant-A) before and after bleaching the acceptor (FP mutant-B) in a region of interest.
- Calculate FRET efficiency: E = 1 - (Donorpre / Donorpost).
- Key Control: Treat parallel samples with 100 nM rapamycin, which induces strong FKBP-FRB dimerization, serving as a positive FRET control. True monomeric FP mutants should show high FRET only upon rapamycin addition.
Data Presentation
Table 1: Efficacy of Key Mutations in Disrupting Dimer Interfaces
| Mutation (in GFP) | Structural Target Interface | Dimer Dissociation Constant (Kd) Change | Common FP Backbones Where Applied | Typical Brightness Relative to WT |
|---|---|---|---|---|
| A206K | Hydrophobic "X-interface" | Increases Kd from µM to >mM range | GFP, YFP, CFP (often combined) | 80-100% |
| F223R | Electrostatic/Salt Bridge | Synergistic with A206K; makes Kd undetectable | CFP, Photoactivatable GFP | 60-90% |
| L221K | Alternative Hydrophobic Patch | Effective in red FPs where A206K fails | mCherry, mRuby, mKate2 | 70-95% |
Table 2: Recommended Mutation Strategies for Common FP Classes
| FP Class | Example | Recommended Monomerizing Strategy | Validated In Vivo? |
|---|---|---|---|
| Green/Yellow | EGFP, YFP | A206K (often sufficient) | Yes (e.g., mGFP) |
| Cyan | ECFP | A206K + F223R (combination critical) | Yes (e.g., mCerulean) |
| Red/Far-Red | mCherry, TagRFP | L221K or equivalent (e.g., R220K in TagRFP) | Yes (e.g., mCherry2) |
| Photoactivatable | PA-GFP | A206K + F223R | Yes |
Visualizations
Troubleshooting Dimerization Issues Workflow
Thesis Context: From Dimer Problem to Monomeric Solutions
The Scientist's Toolkit: Research Reagent Solutions
| Reagent/Material | Function in Monomeric FP Research |
|---|---|
| Superdex 75 Increase 10/300 GL Column | High-resolution size-exclusion chromatography for precise determination of oligomeric state in vitro. |
| FKBP and FRB Dimerization Domains | Inducible dimerization system used as a positive control in cellular FRET assays to validate FP monomericity. |
| Rapamycin | Small molecule that rapidly induces FKBP-FRB dimerization; essential for the in vivo FRET control experiment. |
| Flexible Peptide Linkers (GGGGS)n | Spacer sequences cloned between FP and protein of interest to prevent steric hindrance and fusion-induced aggregation. |
| HEK293T Cell Line | Easily transfectable mammalian cell line standard for in vivo validation of FP localization and dimerization assays. |
| Site-Directed Mutagenesis Kit (e.g., Q5) | For reliable introduction of key point mutations (A206K, F223R, L221K) into FP plasmids. |
| Low-Ionic Strength SEC Buffer (20 mM Tris, pH 7.4) | Prevents non-specific ionic interactions during SEC that can lead to false dimeric elution profiles. |
Historically, fluorescent proteins (FPs) suffered from a tendency to dimerize or aggregate, leading to experimental artifacts such as mislocalization, toxicity, and perturbed function of fusion proteins. This article, framed within a broader thesis on FP dimerization problems, presents monomeric solutions—mGFP, mCherry, mNeonGreen, and mScarlet—as essential tools for precise cellular imaging. This technical support center provides targeted troubleshooting for researchers, scientists, and drug development professionals utilizing this palette.
Troubleshooting Guides & FAQs
Q1: My mNeonGreen fusion protein appears dimmer than expected. What could be the cause?
A: Dim signal can result from several factors. First, verify the health of your cells and expression levels via Western blot. mNeonGreen matures rapidly but is sensitive to prolonged exposure to intense blue light; use lower illumination intensities. Check the pH of your cellular compartment, as mNeonGreen has a pKa ~5.7, making it less bright in acidic environments like lysosomes. Ensure your fusion partner does not cause misfolding. As a control, express unfused mNeonGreen.
Q2: I observe abnormal puncta or aggregation with my mScarlet-I fusion protein. How can I resolve this?
A: While mScarlet-I is engineered to be monomeric, some fusion partners, especially those prone to oligomerization themselves, can drive aggregation. Confirm the monomericity of your target protein. Use a longer, more flexible linker (e.g., (GGGGS)3) between mScarlet and your protein. Reduce expression level, as high concentrations can force aberrant interactions. Compare with an mCherry fusion, which is a validated monomer, to isolate the issue.
Q3: My mGFP (mutation of EGFP) shows poor photostability during time-lapse. Any recommendations?
A: mGFP (e.g., mGFP-avar) is generally photostable, but rapid bleaching indicates excessive illumination. Use a lower light intensity and longer camera exposure times instead. Ensure your imaging medium contains an oxygen-scavenging system (e.g., glucose oxidase/catalase) to reduce phototoxicity. Consider switching to the more photostable mNeonGreen for green emission if the experiment allows.
Q4: mCherry signal is lost after fixation. What protocol adjustments are needed?
A: mCherry is sensitive to certain fixatives. Avoid glutaraldehyde. Use fresh, 4% formaldehyde in PBS for 15-20 minutes at room temperature, followed by thorough washing. Do not over-fix. Post-fixation, store samples in PBS at 4°C and image within a week. For long-term storage, use mounting media with antioxidants.
Q5: For dual-color imaging of mNeonGreen and mScarlet, what filter sets are optimal to avoid bleed-through?
A: mNeonGreen is excited at ~506 nm and emits at ~517 nm. mScarlet is excited at ~569 nm and emits at ~594 nm. Use narrow-band bandpass filters: e.g., 500/520 nm for mNeonGreen and 580/600 nm for mScarlet. Acquire images sequentially, not simultaneously. Perform a control experiment with single-labeled samples to verify no cross-talk exists with your chosen settings.
Quantitative Comparison of Monomeric FPs
The following table summarizes key photophysical and biochemical properties of the featured monomeric FPs, based on current literature. These metrics are critical for experimental design.
Table 1: Properties of Common Monomeric Fluorescent Proteins
| Variant | Ex (nm) | Em (nm) | Brightness* | pKa | Maturation t½ (min) | Photostability | Primary Use Case |
|---|---|---|---|---|---|---|---|
| mGFP (avar) | 484 | 510 | ~50% | 5.7 | ~20 | Moderate | General tagging, fusions |
| mCherry | 587 | 610 | ~25% | <4.5 | ~15 | Moderate | Red marker, tandem tags |
| mNeonGreen | 506 | 517 | ~150% | 5.7 | ~10 | High | Bright green, super-res |
| mScarlet-I | 569 | 594 | ~110% | 4.8 | ~10 | High | Bright red, fusions |
Brightness relative to EGFP (excludes oligomerization effects). *Relative measure under standard imaging conditions.
Experimental Protocols
Protocol 1: Validating Monomeric Behavior via Gel Filtration Chromatography
This protocol tests for dimerization/aggregation of your FP fusion protein in vitro.
- Express and Purify: Express your FP-tagged protein in HEK293T cells and purify using affinity chromatography (e.g., Ni-NTA for His-tag).
- Column Equilibration: Equilibrate a calibrated size-exclusion chromatography (SEC) column (e.g., Superdex 200 Increase) with 1x PBS, pH 7.4.
- Run Sample: Load 50-100 µL of purified protein (≥0.5 mg/mL). Run isocratically at 0.5 mL/min, collecting fractions.
- Analysis: Monitor absorbance at 280 nm (protein) and the FP's excitation wavelength (e.g., 488 nm for mNeonGreen). Compare the elution volume of your fusion to a standard curve of known monomeric and dimeric proteins. A monomeric FP fusion should elute at its predicted monomeric molecular weight.
Protocol 2: Assessing Fusion Protein Localization vs. Artifact
To rule out mislocalization due to FP aggregation.
- Co-transfection: Co-transfect your target protein fused to a red monomeric FP (e.g., mScarlet-I) and a green monomeric FP (e.g., mNeonGreen) fused to a well-established marker for your organelle of interest (e.g., mito-GFP).
- Imaging: Image live cells 24-48h post-transfection using appropriate filters to avoid bleed-through.
- Analysis: Calculate the Pearson's correlation coefficient (PCC) between the red (test) and green (marker) channels. A high PCC supports correct localization. As a negative control, co-express your mScarlet fusion with a marker for a different compartment.
Protocol 3: Photostability Quantification in Live Cells
A comparative assay to choose the right FP for long-term imaging.
- Sample Prep: Express different FPs (e.g., mGFP, mNeonGreen) as unfused cytosolic proteins in separate cell samples.
- Imaging Setup: Use a widefield or confocal microscope. Define a region of interest (ROI) in a cell expressing the FP.
- Bleaching: Continuously illuminate the ROI at standard imaging intensity (e.g., 488 nm laser at 25% power). Acquire an image every second.
- Analysis: Plot fluorescence intensity (F) in the ROI over time normalized to the initial intensity (F0). The time constant (τ) for fluorescence decay (to 1/e of F0) quantifies photostability. A larger τ indicates higher photostability.
Visualizing the Experimental Workflow for Monomeric FP Validation
Diagram 1: FP Fusion Construct Validation Workflow
The Scientist's Toolkit: Key Research Reagent Solutions
Table 2: Essential Reagents for Monomeric FP Experiments
| Reagent / Material | Function | Example / Note |
|---|---|---|
| Monomeric FP Plasmid | Source of optimized FP gene. | Addgene vectors: mNeonGreen-N1, mScarlet-I-C1. |
| Flexible Linker Sequence | Prevents steric hindrance in fusions. | (GGGGS)n, where n=2-4, encoded in primers/vector. |
| Low-Autofluorescence Medium | Reduces background for live imaging. | Phenol-red free Leibovitz's L-15 or FluoroBrite DMEM. |
| Antifade Mounting Medium | Preserves fluorescence in fixed samples. | ProLong Diamond or similar with radical scavengers. |
| Gel Filtration Column | Assesses oligomeric state in vitro. | Superdex 200 Increase 10/300 GL for analytical SEC. |
| Validated Organelle Marker | Control for correct localization. | Commercial or well-cited plasmids (e.g., LAMP1-RFP). |
| Oxygen-Scavenging System | Reduces photobleaching in live cells. | Glucose oxidase/catalase for sealed imaging chambers. |
| Broad-Spectrum Protease Inhibitor | Maintains protein integrity during lysis. | EDTA-free cocktail for purification steps. |
Technical Support Center: Troubleshooting Guides & FAQs
FAQ 1: Why is my monomeric fluorescent protein (FP) fusion construct still exhibiting dimerization or aggregation in cellular assays?
- Answer: This common issue often stems from the linker design or the inherent oligomerization propensity of the FP itself, despite using an "A206K" or similar mutation. First, verify the complete sequence of your FP. Some engineered monomers require additional mutations (e.g., for mCherry, the A206K mutation is not sufficient; mutations like V3A, L7I, N139K, S147E, F167L, R169L, S202H are part of the mCherry2 monomerization strategy). Second, your linker may be too short or too rigid, allowing non-covalent interactions between the FP and your protein of interest (POI). Increase linker length (e.g., to 15-25 amino acids) and use flexible, glycine-serine-rich linkers (e.g., (GGGGS)n). Third, the POI itself may be prone to oligomerization. Consider attaching the FP to the opposite terminus of the POI or using a larger "clamp" like a monomeric tandem dimer (e.g., tdFP) if signal brightness permits.
FAQ 2: What is the optimal cloning strategy for efficiently testing multiple linker variants in fusion constructs?
- Answer: Golden Gate Assembly is the most efficient strategy for modular cloning of linker variants. Design your construct so the FP, linker, and POI are in separate, compatible modular cloning sites (e.g., BsaI or BbsI sites). Prepare a library of linker modules encoding different lengths and sequences (flexible, rigid, cleavable). A single Golden Gate reaction allows for the seamless, scarless assembly of your chosen FP, linker, and POI module without introducing unwanted amino acids at junctions. This high-throughput method eliminates the need for multiple rounds of restriction digestion and ligation.
FAQ 3: My fusion protein shows correct localization but significantly reduced fluorescence intensity. What could be the cause?
- Answer: Reduced brightness can result from several factors related to construct design:
- Linker Polarity/Charges: A linker with high charge density (many acidic or basic residues) might interact with and partially quench the FP chromophore. Use neutral, hydrophilic linkers.
- Proteolytic Cleavage: The linker sequence might contain a cryptic protease cleavage site. Check the sequence with prediction tools and consider mutating it.
- FP Maturation Interference: If the POI folds very rapidly or forms complexes immediately after synthesis, it might sterically hinder the proper maturation of the FP β-barrel. Introducing a longer, more flexible linker can provide the necessary spatial separation.
- pH Sensitivity: If your POI localizes to an acidic compartment (e.g., lysosomes), the fluorescence of many FPs is quenched. Use a pH-resistant FP (e.g., mApple, mNeonGreen).
Experimental Protocol: Golden Gate Assembly for Modular Linker Testing
- Objective: Assemble a monomeric FP-POI fusion construct with a variable linker library.
- Materials: Entry vectors containing: (Module 1) FP with prefix and BsaI site, (Module 2) Linker library with flanking BsaI sites, (Module 3) POI with suffix and BsaI site. Destination vector with compatible BsaI sites and selection marker. BsaI-HFv2 restriction enzyme, T4 DNA Ligase, appropriate buffer.
- Method:
- Set up a 20 µL Golden Gate reaction:
- 50 ng destination vector
- 10-20 fmol of each entry module (FP, linker, POI)
- 1 µL BsaI-HFv2 (10 U/µL)
- 1 µL T4 DNA Ligase (400 U/µL)
- 2 µL 10X T4 Ligase Buffer
- Nuclease-free water to 20 µL.
- Run the following thermocycler program:
- (37°C for 5 min → 16°C for 5 min) x 25-30 cycles
- 50°C for 5 min (optional, for enzyme inactivation)
- 80°C for 5 min.
- Transform 2-5 µL of the reaction into competent E. coli, plate on selective media, and screen colonies by colony PCR or sequencing.
- Set up a 20 µL Golden Gate reaction:
Table 1: Comparison of Common Flexible Linker Sequences for Monomeric Fusions
| Linker Name | Sequence (Amino Acids) | Length (AA) | Characteristics | Best Use Case |
|---|---|---|---|---|
| G4S Simple | GGGGS | 5 | Short, highly flexible. | Minimal separation, stable POIs. |
| G4S Repeat (2x) | (GGGGS)₂ | 10 | Standard flexible linker. | General purpose, balance of flexibility and size. |
| G4S Repeat (4x) | (GGGGS)₄ | 20 | Long, very flexible. | Preventing steric interference, large POIs. |
| (EAAAK)n Rigid | (EAAAK)₃ | 15 | α-helical, rigid, elongating. | Maintain fixed distance, prevent domain interaction. |
| XTEN | Custom (e.g., SGSSGSSGSS) | Variable | Unstructured, proteolytically resistant. | In vivo applications, require high solubility. |
Research Reagent Solutions Toolkit
| Item | Function |
|---|---|
| Monomeric FP Vectors (e.g., pCS2+ mEGFP, pmCherry2-C1) | Provide source of well-validated, truly monomeric FPs for subcloning. |
| Golden Gate MoClo Toolkit | Standardized library of parts and vectors for rapid, modular assembly of genetic constructs. |
| BsaI-HFv2 & BbsI-HF | High-fidelity Type IIS restriction enzymes essential for Golden Gate assembly, minimizing star activity. |
| T4 DNA Ligase | Ligase for seamless fragment joining during Golden Gate reactions. |
| Phusion U Green Multiplex PCR Master Mix | For high-fidelity amplification of modules and screening clones. |
| NEBuilder HiFi DNA Assembly Master Mix | Alternative for Gibson assembly-based construction of fusion genes. |
| Gene Synthesis Service | For optimal codon optimization and de novo synthesis of complex fusion genes with custom linkers. |
Diagram 1: Cloning Strategy for Linker Variant Testing
Diagram 2: Problem Pathway: FP Dimerization Artifact
Diagram 3: Solution Pathway: Monomeric Fusion Design
Troubleshooting Guide & FAQs
Q1: Our monomeric biosensor shows consistently low FRET/fluorescence signals across all experimental conditions, including positive controls. What are the primary causes and solutions? A: Low signal can stem from several issues. First, verify biosensor expression via fluorescence microscopy or western blot. Second, optimize imaging parameters (exposure time, laser power, gain). Third, confirm cell health and transfection efficiency. A critical step is to validate the biosensor's functionality with a known pathway activator in a control experiment. If the issue persists, the biosensor itself may be misfolded; sequence verification and re-purification of the plasmid DNA is recommended.
Q2: We observe high background FRET/fluorescence in negative control cells expressing the monomeric biosensor. How can we reduce this nonspecific signal? A: High background often indicates inadequate washing or nonspecific binding. Implement more stringent wash steps (e.g., 3x with serum-free buffer). Ensure the biosensor's concentration is not saturating; titrate to find the optimal expression level. Check for cellular autofluorescence by imaging untransfected cells. Consider using a different fluorescent protein pair with better spectral separation to reduce bleed-through.
Q3: The biosensor signal is unstable and photobleaches rapidly during live-cell imaging. What protocols can improve stability? A: Rapid photobleaching is typically due to excessive illumination. To mitigate:
- Reduce Illumination: Lower laser power or exposure time.
- Use a Sensitive Camera: Switch to an EMCCD or sCMOS camera.
- Optimize Environment: Use an imaging medium with an oxygen-scavenging system (e.g., Glucose Oxidase/Catalase) and maintain cells at 37°C with 5% CO₂.
- Consider FP Variants: Use more photostable fluorescent protein variants (e.g., mClover3, mRuby3) in your biosensor design.
Q4: Our HCS data shows high well-to-well and cell-to-cell variability in biosensor response. How can we improve assay robustness? A: High variability compromises statistical power. Key solutions include:
- Cell Seeding: Use an automated cell counter and seeder for uniform density.
- Transfection: Employ reverse transfection protocols or stable cell lines to ensure consistent biosensor expression.
- Environmental Control: Use microscopes with full environmental chambers (temperature, CO₂, humidity).
- Normalization: Implement ratiometric imaging (donor/acceptor) and normalize signals to a pre-stimulation baseline for each cell.
- Data Analysis: Apply robust Z'-factor analysis to validate assay quality; a Z' > 0.5 is desirable for screening.
Q5: How do we specifically validate that our observed signal is due to the intended target activation and not artifacts from biosensor oligomerization? A: This is central to the thesis on overcoming FP dimerization artifacts. Implement these control experiments:
- Co-localization: Treat cells with a specific pathway inhibitor and confirm loss of biosensor signal.
- Mutant Control: Express a biosensor with a point mutation that abolishes the target binding site. This should show no activation response.
- Dimerization Check: Perform a Fluorescence Fluctuation Spectroscopy (e.g., Number & Brightness analysis) experiment on the biosensor in live cells to confirm its monomeric state under experimental conditions.
- Cross-Validation: Correlate biosensor readout with an orthogonal assay (e.g., immunofluorescence for phosphorylated target).
Table 1: Comparison of Common Monomeric Fluorescent Proteins for Biosensor Design
| Fluorescent Protein | Excitation Max (nm) | Emission Max (nm) | Brightness (Relative to EGFP) | Photostability (t½, seconds) | Maturation t½ (37°C) | Key Application in Biosensors |
|---|---|---|---|---|---|---|
| mClover3 | 506 | 518 | 1.7 | ~120 | ~15 min | Bright donor for green-red FRET pairs |
| mRuby3 | 558 | 591 | 1.2 | ~85 | ~60 min | Optimal acceptor for mClover3 |
| mTurquoise2 | 434 | 474 | 1.4 | ~90 | ~20 min | Bright, photostable cyan donor |
| mNeonGreen | 506 | 517 | 2.5 | ~45 | ~10 min | Very bright for detection of low-abundance targets |
| mScarlet | 569 | 594 | 1.4 | ~110 | ~7 min | Bright, fast-maturing red acceptor |
Table 2: Typical HCS Assay Performance Metrics with Monomeric Biosensors
| Performance Metric | Target Value for Robust Screen | Common Cause of Failure | Corrective Action |
|---|---|---|---|
| Z'-Factor | > 0.5 | High variability or low signal window | Optimize cell density, transfection, and positive control. |
| Signal-to-Background Ratio | > 3 | High background in controls | Increase wash stringency, titrate biosensor. |
| Coefficient of Variation (CV) per well | < 15% | Inconsistent seeding or expression | Use automated dispensers; generate stable cell lines. |
| Cell Count per Well | > 1000 | Poor cell health or over-confluency | Optimize seeding density and check culture conditions. |
Experimental Protocols
Protocol 1: Validating Monomeric State of a Biosensor Using Number & Brightness (N&B) Analysis This protocol is critical for confirming the biosensor does not oligomerize, a core thesis requirement.
- Sample Preparation: Seed cells in a glass-bottom 35mm dish. Transfect with the biosensor plasmid using a low-efficiency method (e.g., lipofectamine, 1:3 DNA:reagent ratio) to achieve low expression levels ideal for N&B.
- Image Acquisition: Use a confocal microscope with a 40x/1.2NA water objective. Image a single focal plane in a cell with low fluorescence intensity. Acquire a time series of 100 frames with minimal delay between frames (~1ms) using the biosensor's excitation/emission settings. Keep laser power constant and low to avoid photobleaching.
- Data Analysis: Import the image stack into N&B analysis software (e.g., SimFCS). The software calculates the average intensity (⟨I⟩) and variance (σ²) per pixel over time. The brightness (B) is calculated as B = σ²/⟨I⟩. A brightness value (B) close to 1.0 indicates a monomeric state, while values >>1.0 suggest oligomerization.
- Controls: Include cells expressing a known monomeric FP (e.g., mEGFP) and a known dimeric FP (e.g., original EGFP) as negative and positive controls for oligomerization, respectively.
Protocol 2: High-Content Screening Workflow for a GPCR Activation Monomeric Biosensor
- Day 1 - Cell Seeding: Using an automated dispenser, seed HEK293 cells stably expressing the GPCR-targeted monomeric biosensor into a 384-well imaging microplate at 5,000 cells/well in 40µL growth medium. Incubate overnight (37°C, 5% CO₂).
- Day 2 - Compound Treatment:
- Prepare compound library plates with 10mM stocks in DMSO. Using a pin tool or acoustic dispenser, transfer 100nL of compound to corresponding assay wells (final compound concentration ~10µM, 0.1% DMSO).
- Include controls on each plate: Column 1: Negative control (0.1% DMSO only). Column 2: Positive control (known receptor agonist at EC₈₀ concentration).
- Incubate plate for the predetermined optimal time (e.g., 30 minutes) in the incubator.
- Live-Cell Imaging: Transfer the plate to a high-content imaging system with environmental control. Acquire 4 fields per well using a 20x objective, capturing both donor (e.g., CFP) and acceptor (e.g., YFP) channels for ratiometric FRET analysis. Complete imaging within 60 minutes.
- Image Analysis:
- Use HCS software (e.g., CellProfiler, Harmony) to: (a) Identify nuclei and cell cytoplasm. (b) Measure mean donor and acceptor intensity in the cytoplasm. (c) Calculate the FRET ratio (Acceptor Intensity / Donor Intensity) per cell.
- Normalize data: For each well, calculate the median FRET ratio. Then, compute the normalized response as (Well Median - Plate Median Negative Control) / (Plate Median Positive Control - Plate Median Negative Control) * 100%.
- Hit Selection: Compounds eliciting a normalized response > 3 standard deviations from the plate mean (DMSO control) are flagged as primary hits for confirmation.
The Scientist's Toolkit
Table 3: Key Research Reagent Solutions for Monomeric Biosensor HCS
| Item | Function & Importance |
|---|---|
| Monomeric FP-Tagged Biosensor Plasmid | Core reagent. Encodes the genetically encoded sensor with optimized, truly monomeric FPs to prevent artifact-inducing dimerization. |
| Validated Cell Line (Stable or Transient) | Essential for reproducibility. A stable cell line expressing the biosensor at consistent levels is ideal for HCS to minimize well-to-well variability. |
| Live-Cell Imaging Medium (Phenol Red-free) | Maintains cell health and reduces background fluorescence during extended imaging sessions. Often supplemented with HEPES for pH stability outside a CO₂ incubator. |
| Validated Agonist/Inhibitor Controls | Crucial for assay validation and plate-to-plate normalization. Provides defined positive (max signal) and negative (basal signal) controls. |
| Automated Liquid Handler | Ensures precision and consistency in cell seeding, compound addition, and reagent dispensing across hundreds of wells, directly impacting data quality. |
| High-Content Imaging System | Integrated microscope, environmental chamber, and automated stage for rapid, multi-parameter image acquisition from microplates. |
| Data Analysis Pipeline Software | Software (e.g., CellProfiler, IN Carta, Harmony) capable of batch processing thousands of images, performing segmentation, and extracting ratiometric biosensor data per cell. |
Pathway & Workflow Visualizations
Title: GPCR Signaling to Monomeric Biosensor FRET Readout
Title: HCS Workflow with Live-Cell Biosensors
Title: Dimeric vs. Monomeric FP Biosensor Artifacts
Technical Support Center
Troubleshooting Guides & FAQs
Q1: My PALM/STORM reconstruction shows poor localization precision and low resolution. What could be the cause? A: This is often due to FP dimerization or oligomerization, causing multiple molecules to blink as a single emitter. Ensure you are using a truly monomeric FP (e.g., mEOS3.2, mMaple3, monomeric GFP variants like mGFP). Check your labeling density; overexpression can lead to crowding. Verify your imaging buffer (e.g., for STORM, ensure proper concentrations of thiols and oxygen scavengers).
Q2: In my FRET experiment, I observe high FRET efficiency even in my negative control. What should I investigate? A: This is a classic symptom of FP dimerization forcing proximity. First, confirm all FPs (donor and acceptor) are monomeric variants. Check your construct design—the linker between FP and your protein of interest may be too short. Perform an acceptor photobleaching control on the negative control sample to confirm the signal is artifactual.
Q3: My monomeric FP-tagged protein exhibits abnormal cellular localization or function. Is this related to the FP? A: Potentially. Even monomeric FPs can cause steric hindrance or weak, transient interactions. Compare results with different monomeric FPs (e.g., swap mCherry2 for mScarlet-I). Use the smallest FP possible (e.g., sfGFP). Always perform a functional assay for your protein without the FP tag to establish a baseline.
Q4: I get inconsistent blinking kinetics in single-molecule localization microscopy. How can I improve reproducibility? A: Inconsistent blinking is frequently buffer-dependent. For photoswitchable FPs (PALM), prepare imaging buffer fresh and control pH precisely. For dye-based STORM using FP-targeted labels, ensure complete removal of free dye. Environmental factors (temperature, CO₂) can also affect performance; stabilize them during imaging.
Q5: What are the key metrics to validate monomericity of a new FP for my research? A: Perform the following assays:
- Gel Filtration Chromatography: Compare elution volume with known monomeric and dimeric standards.
- In Vivo Co-localization Test: Express two different FPs (e.g., green and red) fused to proteins known to localize to distinct cellular compartments. Co-localization indicates interaction.
- Quantitative Analysis of Complex Formation: Use techniques like fluorescence cross-correlation spectroscopy (FCCS).
Quantitative Comparison of Monomeric Fluorescent Proteins
| FP Name | Class | Excitation (nm) | Emission (nm) | Extinction Coefficient (M⁻¹cm⁻¹) | Quantum Yield | Brightness Relative to EGFP | Primary Application | Dimerization Tendency |
|---|---|---|---|---|---|---|---|---|
| mGFP (mNeonGreen) | Green | 506 | 517 | 116,000 | 0.80 | ~2.0x | FRET, Live-cell SR | Monomeric |
| mEOS3.2 | Photoswitchable | 506 (Green) | 573 (Red) | 63,000 (Green) | 0.55 (Green) | ~0.9x (Green) | PALM | Monomeric |
| mMaple3 | Photoswitchable | 489 (Green) | 573 (Red) | 49,000 (Green) | 0.64 (Green) | ~0.8x (Green) | PALM | Monomeric |
| mCherry2 | Red | 587 | 610 | 72,000 | 0.22 | ~0.4x | FRET, General Labeling | Monomeric |
| mScarlet-I | Red | 569 | 594 | 104,000 | 0.70 | ~1.9x | FRET, General Labeling | Monomeric |
| mTurquoise2 | Cyan | 434 | 474 | 30,000 | 0.93 | ~0.7x | FRET Donor | Monomeric |
Experimental Protocol: Validating FP Monomericity via Gel Filtration
- Objective: To assess the oligomeric state of a purified FP.
- Materials: Purified FP sample, gel filtration column (e.g., Superdex 75), HPLC or FPLC system, gel filtration buffer (e.g., 20 mM Tris-HCl, 150 mM NaCl, pH 7.5), molecular weight standards.
- Procedure:
- Equilibrate the column with at least 2 column volumes (CV) of buffer.
- Prepare FP sample (≥ 50 µg) in the same buffer. Centrifuge at >15,000g for 10 min to remove aggregates.
- Inject sample onto the column. Run isocratic elution at a recommended flow rate (e.g., 0.5 mL/min for a 24 mL column).
- Monitor absorbance at 280 nm (protein) and the FP's excitation wavelength (e.g., 488 nm for GFP).
- Run a set of monomeric/dimeric protein standards under identical conditions.
- Compare the elution volume (Ve) of the FP to the standards. A true monomer will elute later than a dimer of similar molecular weight.
Experimental Protocol: Acceptor Photobleaching FRET Control
- Objective: To confirm FRET signal is genuine and not due to dimerization or spectral bleed-through.
- Materials: Cells expressing donor- and acceptor-tagged constructs, confocal microscope with precise region-of-interest (ROI) bleaching capability.
- Procedure:
- Image the donor channel (e.g., GFP, ex: 488 nm, em: 500-550 nm) and acceptor channel (e.g., mCherry, ex: 561 nm, em: 570-620 nm).
- Select an ROI containing several cells or structures.
- Bleach the acceptor in the ROI using high-intensity 561 nm laser light (100% intensity, 5-20 iterations).
- Re-image both channels using pre-bleach settings.
- Analysis: Calculate FRET efficiency (E) as:
E = 1 - (Donor_pre / Donor_post). A positive efficiency in the experimental sample but not in a negative control (e.g., donor-only or unlinked donor + acceptor) validates the experiment.
The Scientist's Toolkit: Research Reagent Solutions
| Reagent/Material | Function & Importance |
|---|---|
| Monomeric FP Plasmids (e.g., pmEOS3.2-N1, mScarlet-I-C1) | Essential for ensuring non-perturbative, single-molecule labeling. Source from reputable repositories (Addgene). |
| Oxygen Scavenging System (Glucose Oxidase, Catalase, Glucose) | Critical for STORM/PALM to prolong fluorophore blinking and reduce photodamage. |
| Thiol-Based Blinking Buffers (e.g., β-Mercaptoethanol, MEA for STORM) | Enables controlled photoswitching of organic dyes in STORM. |
| Poly-L-Lysine or PEG-Based Passivation Agents | For surface treatment in single-molecule experiments to reduce non-specific FP binding. |
| Gel Filtration Standards (Monomeric & Dimeric Proteins) | Used to calibrate columns for monomericity validation assays. |
| Linker Library Plasmids (e.g., (GGS)n linkers of varying lengths) | To optimize spacing between FP and protein of interest, minimizing steric interference. |
| Fiji/ImageJ with SMLM Plugins (ThunderSTORM, Picasso) | Open-source software for reconstructing and analyzing super-resolution data. |
| Commercial Monomeric FP Validation Kits | Some vendors offer kits for FCCS or biochemical oligomerization assays. |
Experimental Workflows and Pathway Diagrams
Technical Support & Troubleshooting Center
Frequently Asked Questions (FAQs)
Q1: My new monomeric sensor exhibits lower fluorescence intensity compared to the original GCaMP7. Is this expected? A: Yes, this is a common trade-off. Disrupting the dimerization interface of the fluorescent protein (FP) domain (e.g., mNeonGreen or its derivatives) to enforce monomericity can sometimes reduce quantum yield or chromophore maturation efficiency. Verify proper protein expression via western blot. Ensure you are using the correct calibration protocol to establish the dynamic range, as the absolute intensity may be lower but the ΔF/F response could be sufficient.
Q2: The ratiometric signal (emission ratio) shows poor dynamic range in live-cell imaging. What could be wrong? A: Several factors can contribute:
- Ionophore Calibration: Ensure your in-situ calibration using ionomycin and Ca²⁺ buffers (e.g., EGTA) is correctly performed. A shallow ratio change may indicate poor sensor folding or incorrect spectral imaging setup.
- FRET Efficiency: If your design uses Förster Resonance Energy Transfer (FRET), the dynamic range is highly sensitive to linker length and rigidity between the donor and acceptor FP domains. Review your construct's linker design.
- Bleed-Through: Confirm your imaging channels are properly unmixed. Significant bleed-through can compress the apparent ratio change.
Q3: I observe punctate or aggregated fluorescence in cells expressing the "monomeric" sensor. What should I do? A: This indicates residual dimerization or non-specific aggregation. First, perform a co-transfection assay with differently tagged (e.g., CFP/YFP) versions of your sensor and check for FRET or colocalization indicative of interaction. Compare to known monomeric standards like mScarlet-I. Optimize expression levels (use weaker promoters) as high concentrations can drive aberrant interactions even in weak monomers.
Q4: How do I validate true monomeric status in my cellular context? A: Follow this critical experimental protocol derived from dimerization research:
- Co-transfection & FRET Assay: Co-express your sensor tagged with a donor FP (e.g., mTurquoise2) and an acceptor FP (e.g., mNeonGreen) on separate plasmids. As a positive control, use a known obligate dimer (e.g., wild-type GFP). As a negative control, use known monomers (e.g., mScarlet-I, mCerulean3).
- Acceptor Photobleaching FRET: Acquire donor emission before and after photobleaching the acceptor in a region of interest. A significant increase in donor fluorescence indicates proximity/FRET and thus dimerization.
- Quantitative Analysis: Calculate the apparent FRET efficiency. True monomers should show efficiency values indistinguishable from the negative monomeric control and significantly lower than the positive dimer control.
Q5: The sensor response kinetics seem slower than advertised. How can I troubleshoot this? A: Kinetics are dictated by Ca²⁺ binding kinetics of the calmodulin (CaM)/M13 domain and the subsequent conformational change. Ensure you are using fast-performing domains (e.g., from GCaMP6f or jGCaMP7f). Check for cellular health and temperature (image at 37°C). Perform rapid local perfusion of high-K⁺ or ATP to evoke fast Ca²⁺ transients as a test.
Troubleshooting Guide: Common Experimental Issues
| Symptom | Possible Cause | Solution |
|---|---|---|
| No fluorescence | Poor expression, misfolding, chromophore not maturing | Check plasmid sequence/identity; use a strong, constitutive promoter (CMV, CAG) for initial validation; ensure proper incubation temperature (30-32°C can aid FP folding). |
| High background fluorescence in low Ca²⁺ | Low Ca²⁺ affinity variant, sensor saturation, or non-specific binding | Characterize in vitro affinity (Kd). Perform calibration in low-Ca²⁺ (EGTA) buffer. Use a lower affinity sensor for high Ca²⁺ environments. |
| Photostability issues | FP variant prone to bleaching | Consider using more photostable FP backbones (e.g., mNeonGreen, mApple) in your design. Reduce illumination intensity and use optimized filter sets. |
| Cellular toxicity or aberrant morphology | High expression levels, CaM sequestration interfering with native pathways | Use a lower-expression vector (weaker promoter, lower transfection dose), titrate doxycycline if using inducible systems, or switch to a stable, low-copy cell line. |
| Poor signal-to-noise ratio in rationetric mode | Low expression, high camera noise, improper background subtraction | Increase expression modestly, use cameras with higher quantum efficiency, carefully define background ROI from untransfected cells. |
Key Experimental Protocols
Protocol 1: In-situ Calibration for Ratiometric Ca²⁺ Sensors Purpose: Determine the minimum (Rmin) and maximum (Rmax) emission ratio of the sensor in your cellular system. Materials: Imaging solution, 10 μM ionomycin, 0 Ca²⁺ buffer (10 mM EGTA, pH 8.5), 20 mM Ca²⁺ buffer. Steps:
- Image cells expressing the sensor in normal imaging solution to establish baseline ratio (R).
- Perfuse with 0 Ca²⁺ buffer + ionomycin. Measure stabilized ratio (Rmin).
- Perfuse with 20 mM Ca²⁺ buffer + ionomycin. Measure stabilized ratio (Rmax).
- Calculate intracellular [Ca²⁺] using the formula: [Ca²⁺] = Kd * ((R - Rmin)/(Rmax - R))^(1/n), where Kd is the published dissociation constant and n is the Hill coefficient.
Protocol 2: Acceptor Photobleaching FRET Assay for Monomeric Validation Purpose: Quantitatively test for dimerization. Steps:
- Co-transfect cells with donor-tagged and acceptor-tagged sensor constructs.
- Select a region of interest (ROI) within a co-expressing cell.
- Acquire a pre-bleach donor channel image (D_pre).
- Bleach the acceptor fluorophore in the ROI using high-intensity acceptor-excitation light.
- Acquire a post-bleach donor channel image (D_post).
- Calculate FRET efficiency: E = 1 - (Dpre / Dpost).
- Repeat for positive dimer and negative monomer control constructs.
Research Reagent Solutions Toolkit
| Reagent/Category | Example Products | Function/Explanation |
|---|---|---|
| Monomeric FP Base | mNeonGreen, mScarlet-I, mTurquoise2, mCerulean3 | Bright, truly monomeric fluorescent proteins serving as donor/acceptor or the sensor's reporting fluorophore. |
| Ca²⁺ Sensing Domain | Calmodulin (CaM) & M13 peptide (from GCaMP series) | Undergoes conformational change upon Ca²⁺ binding, driving sensor fluorescence change. |
| Linker Libraries | (GGS)n, (GGGGS)n, rigid helical linkers (EAAAR)n | Spacer elements of varying length and flexibility to optimize FRET efficiency and sensor dynamics. |
| Expression Vectors | pcDNA3.1, pCAG, lentiviral vectors (e.g., pLVX) | For transient or stable expression in mammalian cells; weak promoters (e.g., EF1α) help avoid toxicity. |
| Calibration Reagents | Ionomycin, A23187, EGTA, BAPTA-AM | Ionophores and Ca²⁺ chelators for performing in-situ calibration to convert ratio to [Ca²⁺]. |
| Positive/Negative Controls | Dimeric GFP (tdTomato), monomeric mCherry/mScarlet-I | Essential controls for validating monomeric status in dimerization assays. |
Visualizations
Diagram 1: GCaMP Dimerization Problem & Monomeric Ratiometric Solution
Diagram 2: Monomeric Sensor Validation Workflow
Solving FP Artifacts: A Troubleshooting Guide for Reliable Monomeric Experiments
Troubleshooting Guides & FAQs
Q1: My SEC results show a single peak, but at an elution volume corresponding to a higher molecular weight than my monomeric FP construct. Does this confirm dimerization? A: Not definitively. A shifted peak can indicate dimerization, but also non-specific interactions with the column matrix or an elongated protein shape. Always compare against known monomeric and dimeric standards run on the same column. Check your buffer composition; high salt (e.g., 150-300 mM NaCl) can reduce electrostatic interactions with the resin.
Q2: During AUC sedimentation velocity, what frictional ratio (f/f0) value should raise suspicion of oligomerization? A: A f/f0 value significantly above 1.3 for a typical globular FP construct suggests a non-spherical shape, which could be due to dimerization or fusion-induced unfolding. Compare with a verified monomeric control (e.g., mCherry). A measured molecular weight from AUC that is ≥1.8 times the calculated monomer mass is strong evidence for a dimer.
Q3: My FRAP recovery curve is incomplete (plateaus <100%). Does this always indicate immobile oligomers? A: No. Incomplete recovery can indicate a truly immobile fraction due to aggregation or sequestration, but also photobleaching during recovery, or insufficient imaging time for full recovery. Always perform a control FRAP on a known monomeric FP under identical conditions. Ensure laser power is minimized to avoid bleaching during acquisition.
Q4: How do I distinguish between weak dimerization and non-specific aggregation in my assays? A: Concentration dependence is key. True, reversible dimerization will show a shift in SEC elution volume or AUC sedimentation coefficient with increasing protein concentration (e.g., 1 µM vs. 10 µM). Aggregation often appears as a high-molecular-weight shoulder or peak that does not scale linearly and may be irreversible upon dilution.
Key Experimental Protocols
Protocol 1: Size Exclusion Chromatography (SEC) for Dimerization Screening
- Column Equilibration: Equilibrate a high-resolution SEC column (e.g., Superdex 75 Increase 10/300 GL) with ≥1.5 column volumes of running buffer (e.g., 20 mM HEPES, 150 mM NaCl, pH 7.4).
- Standard Calibration: Inject 100 µL of a gel filtration standard mixture. Record elution volumes (Ve) to create a log(MW) vs. Ve/void volume (Vo) calibration curve.
- Sample Preparation: Centrifuge your FP protein sample (50-100 µL at ≥0.5 mg/mL) at 16,000 x g for 10 min to remove aggregates.
- Run Sample: Inject clarified supernatant. Run isocratically at 0.5-0.75 mL/min, monitoring absorbance at 280 nm and the FP's excitation wavelength.
- Analysis: Determine the apparent molecular weight from the calibration curve. Compare to the calculated monomer mass.
Protocol 2: Analytical Ultracentrifugation (AUC) Sedimentation Velocity
- Sample Buffer Matching: Dialyze FP protein into reference buffer exhaustively.
- Loading: Load 400 µL of reference buffer and 380 µL of sample into a double-sector charcoal-filled Epon centerpiece. Use protein concentrations of 0.2, 0.5, and 1.0 OD at the FP's absorbance maximum.
- Centrifugation: Equilibrate at 20°C in an An-50 Ti rotor. Spin at 50,000 rpm, acquiring scans every 5 minutes until complete sedimentation.
- Data Analysis: Fit data using a continuous c(s) distribution model in SEDFIT. The major peak's sedimentation coefficient (s) and derived molecular weight are key outputs.
Protocol 3: Fluorescence Recovery After Photobleaching (FRAP) in Cells
- Transfection & Preparation: Express your FP-tagged construct in live cells (e.g., HEK293). Seed on glass-bottom dishes 24h prior to imaging in phenol-red-free medium.
- Image Acquisition: Use a confocal microscope with a 63x oil objective. Define a circular bleach region (ROI). Acquire 5 pre-bleach images at low laser power (e.g., 2% 488nm).
- Photobleaching: Bleach the ROI with a high-intensity laser pulse (100% power, 1-5 iterations).
- Recovery Monitoring: Acquire post-bleach images every 0.5-1s for 30-60s at low laser power.
- Analysis: Normalize fluorescence in the bleach ROI to the total cell fluorescence. Fit the recovery curve to a single exponential to determine the mobile fraction (Mf) and half-time of recovery (t1/2). A reduced Mf suggests an immobile oligomeric population.
Table 1: Comparative Diagnostic Power of Key Techniques
| Technique | Sample Requirement | Detection Limit for Dimer | Key Output Metric | Advantages | Limitations |
|---|---|---|---|---|---|
| SEC | 10-100 µg purified | ~5% dimer (depending on resolution) | Apparent MW from elution volume | Fast, simple, preparative. | Shape-sensitive, buffer artifacts possible. |
| AUC | 50-200 µg purified | <1% dimer (theoretical) | Sedimentation coefficient (s), direct MW | Solution-state, absolute, detects weak interactions. | Low-throughput, specialized equipment. |
| FRAP | Live cells expressing FP-fusion | Qualitative assessment | Mobile Fraction (Mf), t1/2 | In vivo context, functional readout. | Indirect, influenced by many cellular factors. |
Table 2: Expected Results for Monomeric vs. Dimeric FP Constructs
| Assay | Verified Monomeric FP (e.g., mCherry2) | Dimerizing/Weakly Dimeric FP (e.g., eGFP) |
|---|---|---|
| SEC Apparent MW | Within 10% of calculated monomer MW. | ≥ 1.5x calculated monomer MW. |
| AUC c(s) Peak | Single peak, s20,w ~2.8S, MW matches monomer. | Major peak with s20,w >3.3S, MW indicates dimer. |
| FRAP Mobile Fraction | Mf > 0.9 (near-complete recovery). | Mf often < 0.8, indicating immobile fraction. |
Visualizations
SEC Workflow for FP Oligomer Screening
Interpreting FRAP Mobile Fraction Results
The Scientist's Toolkit: Research Reagent Solutions
| Item | Function & Rationale |
|---|---|
| Superdex 75/200 Increase Columns | High-resolution SEC matrices with minimal non-specific interactions, crucial for separating monomeric and dimeric FP species. |
| Monomeric FP Controls (e.g., mCherry2, mNeonGreen2) | Essential benchmark proteins with validated monomeric behavior for comparison in SEC, AUC, and FRAP assays. |
| Gel Filtration MW Standard Kit | A set of proteins of known molecular weight to calibrate the SEC column for accurate apparent MW determination. |
| Charcoal-Filled Epon Centerpieces (for AUC) | Standard cell assemblies for sedimentation velocity experiments, providing precise optical path length. |
| Phenol-Red Free Cell Culture Medium | Reduces background autofluorescence for sensitive live-cell imaging, including FRAP experiments. |
| Anti-Bleaching Mounting Reagent | For fixed-cell work, reduces photobleaching during prolonged imaging, preserving signal. |
Troubleshooting Guides & FAQs
FAQ 1: Why is my monomeric fluorescent protein (mFP) still forming aggregates in cellular imaging, despite using a published monomeric variant?
- Answer: Persistent aggregation in "monomeric" variants often stems from residual weak hydrophobic interfaces or context-dependent effects. Even mutations like A206K (in GFP derivatives) may not fully prevent self-association at high local concentrations in cells (e.g., when fused to oligomeric targets or overexpressed). Check the propensity of your specific fusion partner to oligomerize. Solution: Consider additional interface-disrupting mutations (e.g., F223R, L221K for some GFP variants) or test next-generation monomers like mNeonGreen2 or mScarlet3, which are engineered for enhanced monomericity.
FAQ 2: My mFP fusion exhibits poor brightness. Is this a maturation problem or poor expression?
- Answer: It could be either. Maturation issues (slow/inefficient chromophore formation) are common pitfalls in monomeric variants, as mutations for monomericity can destabilize the protein barrel. First, quantify expression via western blot. If expression is high but fluorescence is low, it's likely a maturation issue, often exacerbated at 37°C. Solution: Allow more time for maturation post-synthesis (image cells 24-48h post-transfection) or use a variant with faster maturation (e.g., mApple matures faster than mRFP1).
FAQ 3: How do I diagnose photostability issues in my live-cell imaging experiment with mFPs?
- Answer: Rapid photobleaching compromises data quantitation. To diagnose, perform a controlled time-lapse experiment with constant illumination intensity and monitor fluorescence decay. Compare the decay half-time to published values. Note that monomeric mutations can sometimes alter the chromophore environment, reducing photostability. Solution: Optimize imaging conditions (reduce light intensity, use a more sensitive camera). If the problem persists, switch to a variant known for superior photostability in your required channel (e.g., mNeonGreen for green, mCherry2 for red).
Experimental Protocol: Quantifying Oligomeric State via Size-Exclusion Chromatography (SEC)
- Purpose: To empirically verify the monomeric state of your purified mFP variant or fusion protein.
- Materials: Purified protein sample, SEC column (e.g., Superdex 75 Increase), FPLC system, SEC buffer (e.g., PBS, pH 7.4).
- Method:
- Equilibrate the SEC column with at least 2 column volumes of degassed, filtered buffer.
- Concentrate your purified protein to >2 mg/mL in a volume ≤ 0.5% of the column volume.
- Centrifuge the sample at high speed (e.g., 16,000 x g) for 10 minutes to remove aggregates.
- Inject the supernatant onto the column and run isocratically at a recommended flow rate (e.g., 0.5 mL/min).
- Monitor absorbance at 280 nm (protein) and the FP's excitation wavelength (e.g., 488 nm for GFP).
- Compare the elution volume of your sample to a standard curve generated from known molecular weight proteins.
- Expected Outcome: A true monomer will elute at a volume corresponding to its molecular weight. Earlier elution (higher apparent MW) suggests persistent dimerization or aggregation.
Experimental Protocol: In-Cell Maturation Kinetics Assay
- Purpose: To assess the rate of chromophore maturation of an mFP in live cells.
- Materials: Cells expressing the mFP, cycloheximide, live-cell imaging setup.
- Method:
- Transfert cells with your mFP construct and incubate for ~24h.
- Replace medium with one containing cycloheximide (e.g., 100 µg/mL) to halt new protein synthesis.
- Immediately begin time-lapse imaging at 37°C, using low light intensity to minimize bleaching, capturing images every 5-10 minutes.
- Quantify mean cellular fluorescence over time in a region excluding the nucleus.
- Fit the fluorescence increase to a single-exponential equation to derive the maturation half-time.
- Expected Outcome: Fluorescence will increase post-translationaly to a plateau. Slower rise indicates slower maturation.
Research Reagent Solutions
| Item | Function |
|---|---|
| mNeonGreen2 DNA | Bright, truly monomeric green FP with rapid maturation for fusion tagging. |
| mScarlet3 DNA | Bright, monomeric red FP with excellent photostability for long-term imaging. |
| Superdex 75 Increase 10/300 GL Column | High-resolution SEC column for accurate oligomeric state analysis of proteins. |
| Cycloheximide | Protein synthesis inhibitor used in maturation kinetics assays. |
| Halide Salts (e.g., KI) | Used in halide sensitivity assays to test barrel integrity of mFP variants. |
Table 1: Photophysical Properties of Common Monomeric Fluorescent Proteins
| Protein | Ex/Em (nm) | Brightness (% of EGFP) | Maturation t½ (min, 37°C) | Photostability (t½, s) |
|---|---|---|---|---|
| mNeonGreen2 | 506/517 | 188% | ~10 | ~100 (at 3W/cm²) |
| mEGFP (A206K) | 488/507 | 100% | ~30 | ~50 (at 3W/cm²) |
| mCherry2 | 587/610 | 48% | ~15 | ~200 (at 3W/cm²) |
| mScarlet3 | 569/594 | 136% | ~20 | ~150 (at 3W/cm²) |
Note: Brightness relative to EGFP. Photostability half-time under constant illumination can vary significantly with setup.
Table 2: Common Aggregation-Prone Targets & Recommended mFP Solutions
| Fusion Target Concern | Pitfall | Recommended mFP Strategy |
|---|---|---|
| Transmembrane Receptors | High local concentration promotes weak interaction. | Use mFPs with validated monomericity (e.g., mNeonGreen2) and linkers ≥15 aa. |
| Cytoskeletal Proteins | Crowding and potential for cross-linking. | Fuse to N- or C-terminus of well-characterized tags (e.g., ALFA-tag) for indirect labeling. |
| Transcription Factors | Dimerization domains may nucleate FP interaction. | Test both N- and C-terminal fusions; consider introducing a second monomerizing mutation. |
Visualizations
Diagram 1: R&D Path from Dimer Problem to Monomer Pitfalls
Diagram 2: mFP Artifact Troubleshooting Workflow
Technical Support & Troubleshooting Center
FAQ 1: My fluorescent protein (FP) fusion construct shows high background/aggregation. What steps can I take to improve signal-to-noise?
- Answer: High background often stems from FP dimerization/oligomerization, leading to aggregation and mis-localization. First, verify you are using a verified monomeric FP (e.g., mNeonGreen, mScarlet, mCherry2) over older, prone-to-dimerize variants (e.g., eYFP, mRFP). Ensure the linker between your FP and protein of interest is sufficiently long and flexible (e.g., (GGGGS)n, n≥2). Perform a titration of transfection reagent/DNA to find the lowest expression level that gives a detectable signal, as overexpression exacerbates aggregation. Include a non-fused FP control to distinguish aggregation caused by the FP versus the target protein.
FAQ 2: My cells appear unhealthy or die rapidly after FP transfection/induction. How can I minimize cellular toxicity?
- Answer: Toxicity can arise from phototoxicity during imaging, metabolic burden from overexpression, or specific photochemistry of the FP (e.g., production of reactive oxygen species). Mitigate by:
- Optimize Expression: Use weaker promoters (e.g., EF1α over CMV) or inducible systems to tightly control expression levels and duration.
- Reduce Illumination: Use lower light intensity, shorter exposure times, and limit imaging frequency. Employ highly photostable FPs to reduce the total light dose needed.
- Environmental Control: Maintain cells at 37°C with 5% CO2 during live imaging and use phenol-red free media with imaging-compatible buffers.
- FP Selection: Choose FPs with mature, efficient folding at 37°C to reduce metabolic load from misfolded protein.
FAQ 3: How do I experimentally confirm if observed clustering is due to biological interaction or FP artifact?
- Answer: Implement a suite of control experiments as outlined in the protocol below. Critical controls include expressing the FP-tagged protein alongside an excess of untagged protein (to compete for specific binding sites) and performing acceptor photobleaching FRET with a known non-interacting pair. The central thesis of modern FP research emphasizes that monomericity is a prerequisite, but not a guarantee, for artifact-free observation; proper controls are always required.
FAQ 4: What is the best practice for selecting an FP for a new labeling application to balance brightness and monomericity?
- Answer: Refer to the quantitative comparison table below. Prioritize FPs from the "mFruit" or "mCG" series that have been rigorously validated as monomeric via multiple assays (size-exclusion chromatography, fluorescence correlation spectroscopy). For tandem oligomer applications (e.g., transcription factor labeling), ensure the monomeric status of the individual FP subunit to prevent cross-linking.
Key Experimental Protocols
Protocol 1: Assessing FP Monomericity via Size-Exclusion Chromatography (SEC)
- Express & Lysate: Express the FP (with a His-tag) in E. coli or mammalian cells. Lyse cells in a non-denaturing buffer (e.g., 50mM Tris-HCl pH 8.0, 300mM NaCl, 1mM PMSF).
- Purify: Perform a quick nickel-affinity purification to isolate the FP.
- SEC Analysis: Load the purified FP onto a pre-equilibrated analytical SEC column (e.g., Superdex 75 Increase 10/300 GL). Run isocratically with PBS or Tris-buffered saline at 0.5-1.0 mL/min.
- Data Interpretation: Compare the elution volume of your FP to a standard curve of known molecular weight proteins. A true monomer will elute at a volume corresponding to ~1.5x its predicted molecular weight (due to its shape). Dimerization/oligomerization will cause earlier elution.
Protocol 2: Quantifying Signal-to-Noise Ratio (SNR) in Live-Cell Imaging
- Sample Prep: Seed cells expressing your FP construct and untransfected control cells in the same imaging dish.
- Acquisition: Acquire images using identical settings (exposure time, gain, laser power) for both samples. Ensure images are not saturated.
- ROI Analysis: Using ImageJ/Fiji, draw regions of interest (ROIs) on cells expressing the FP (Signal ROIs) and on background areas of untransfected cells (Noise ROIs).
- Calculation: Calculate the mean intensity for each Signal ROI (I_signal) and the mean and standard deviation (SD) of the Noise ROIs (I_background, SD_background). SNR = (I_signal – I_background) / SD_background. Report the average SNR across multiple cells.
Data Presentation: Quantitative FP Comparison
Table 1: Properties of Common Monomeric Fluorescent Proteins
| FP Name | Ex/Em (nm) | Brightness (Relative to EGFP) | Oligomerization Tendency | Photostability | Maturation Time (37°C) | Notes |
|---|---|---|---|---|---|---|
| mNeonGreen | 506/517 | ~2.5x | Monomeric | High | ~15 min | Very bright, derived from Branchiostoma lanceolatum. |
| mScarlet-I | 569/593 | ~1.5x | Monomeric | High | ~45 min | Bright, red FP, excellent for fusions. |
| mCherry2 | 587/610 | ~0.9x | Monomeric | Medium | ~40 min | Improved mCherry, reliable red monomer. |
| mEGFP | 488/507 | 1.0x | Monomeric | Medium | ~20 min | The gold-standard engineered monomeric GFP. |
| TagRFP-T | 555/584 | ~1.0x | Monomeric | Medium | ~1.0 hr | Fast-maturing, pH-stable red monomer. |
| sfGFP | 485/510 | ~1.1x | Monomeric | High | ~10 min | Superfolder GFP, tolerates difficult fusions. |
| tdTomato | 554/581 | ~2.6x | Tandem Dimer | Very High | ~1.0 hr | Not a monomer; two FPs linked, extremely bright. |
Visualizations
The Scientist's Toolkit: Research Reagent Solutions
Table 2: Essential Reagents for FP Expression Optimization
| Reagent/Material | Function & Rationale |
|---|---|
| Validated Monomeric FP Plasmid (e.g., pCMV-mScarlet-I) | Provides the fundamental, artifact-minimized fluorescent tag. Using a verified backbone saves time. |
| Flexible Peptide Linker (e.g., (GGGGS)3 sequence) | Genetically encoded between FP and target protein to reduce steric hindrance and improper folding. |
| Weak/Inducible Promoter System (e.g., pTREC, TRE3G) | Allows precise control over expression levels to avoid saturation and toxicity. |
| Size-Exclusion Chromatography (SEC) Column (e.g., Superdex 75) | The gold-standard biochemical method for assessing FP complex size and monomeric status. |
| Phenol-Red Free Imaging Medium | Reduces background autofluorescence during live-cell microscopy, improving SNR. |
| Anti-FP Nanobody (Chromobody) | Can be used as a live-cell stain or as a competition agent to test for clustering artifacts. |
| Cell Viability Stain (e.g., DRAQ7, Annexin V dye) | To correlate FP expression levels with markers of cytotoxicity in parallel experiments. |
Troubleshooting Guides & FAQs
Q1: My fusion protein is showing significantly lower expression yields than the individual domains. What could be the cause? A: This is a common issue often linked to suboptimal linker design. A linker that is too short or too rigid can cause improper folding, leading to aggregation or degradation. First, analyze your linker's length and flexibility. For fusions requiring independent domain movement, flexible glycine-serine (GS) linkers (e.g., (GGGGS)n) of at least 15-20 amino acids are recommended. If the issue persists, consider testing a panel of linkers with varying lengths (e.g., 5, 10, 15, 20 residues) in a small-scale expression trial to identify the optimal one.
Q2: The biological activity of my fusion construct is lost or diminished. How can I troubleshoot this? A: Loss of activity frequently stems from linker interference with domain function or steric hindrance preventing correct dimerization or binding. This is a core problem in FP dimerization research. First, verify the folding of each domain individually via circular dichroism or limited proteolysis. If domains fold correctly, the linker may be restricting necessary conformational changes. Switch from a flexible to a more rigid, structured linker (e.g., (EAAAK)n) to separate domains and reduce unwanted interdomain interactions. Alternatively, a cleavable linker can be used to confirm that separation restores activity.
Q3: My fusion protein is prone to proteolytic cleavage within the linker region. How do I prevent this? A: Protease sensitivity indicates your linker sequence contains recognition sites for common intracellular or serum proteases. Avoid sequences like arginine-lysine dipeptides. Redesign the linker using protease-resistant, neutral amino acids. Common solutions include substituting with more stable GS repeats or alpha-helical linkers like (AEAAAK)n. Always run an in silico protease cleavage site prediction (e.g., using tools like PeptideCutter) on your final linker sequence.
Q4: How do I choose between a flexible, rigid, or cleavable linker for my specific target? A: The choice is dictated by the structural and functional relationship between your fused domains.
- Flexible Linkers (GS-rich): Use when domains need independent movement and no specific interdomain orientation is required. Ideal for connecting domains that function independently.
- Rigid/Helical Linkers (EAAAK, PAPAP): Use to maintain a fixed distance, prevent unwanted domain interactions, or present domains on opposite sides of the linker. Crucial for creating monomeric solutions from dimerization-prone FPs.
- Cleavable Linkers (enzymatic or self-cleaving 2A peptides): Use when you need the domains to separate in vivo or in vitro, such as in dual-reporter systems or to release a therapeutic payload.
Q5: In the context of solving FP dimerization artifacts, what linker properties are most critical for creating a true monomer? A: Research into monomeric FPs (e.g., mCherry, mNeonGreen) shows that linkers must address both steric repulsion and electrostatic interactions to prevent dimerization. A short, rigid linker can be effective, but often a combined approach is needed: 1) Rigid/Extended Linker: Use an (EAAAK)n linker (n=2-4) to physically separate FP domains. 2) Surface Mutagenesis: Introduce charged mutations (like A206K in GFP variants) on the dimer interface in conjunction with the linker. 3) Empirical Testing: Always validate monomeric status via size-exclusion chromatography or analytical ultracentrifugation.
Experimental Protocols
Protocol 1: Empirical Linker Length Optimization Screen
- Design: Clone your gene of interest (GOI) fused to your reporter (e.g., FP) via a linker library. Use primers encoding linker variants (e.g., (GGGGS)2, (GGGGS)3, (GGGGS)4, (GGGGS)5).
- Expression: Transform constructs into your expression host (e.g., E. coli BL21, HEK293). Perform parallel small-scale expressions (5-10 mL cultures).
- Lysis & Clarification: Harvest cells, lyse via sonication or detergent, and clarify by centrifugation.
- Analysis: Assess yield via SDS-PAGE and Coomassie staining. Measure activity/fluorescence via plate reader or functional assay.
- Selection: Choose the construct with the highest yield and correct activity for scale-up.
Protocol 2: Validating Monomeric State of Fusion Protein
- Sample Preparation: Purify the fusion protein using standard affinity chromatography.
- Size-Exclusion Chromatography (SEC): Load 50-100 µg of purified protein onto a calibrated SEC column (e.g., Superdex 200 Increase).
- Run & Monitor: Elute with your standard buffer at 0.5 mL/min, monitoring absorbance at 280 nm and the FP's excitation wavelength.
- Data Analysis: Compare the elution volume of your fusion to a standard curve of proteins with known molecular weight and oligomeric state. A true monomer will elute later than a dimer of similar molecular weight.
- Cross-Validation: For critical applications, confirm SEC results with analytical ultracentrifugation (sedimentation equilibrium).
Data Presentation
Table 1: Common Linker Types and Their Properties
| Linker Type | Example Sequence | Key Properties | Ideal Use Case |
|---|---|---|---|
| Flexible | (GGGGS)n, (GGGS)n | High conformational entropy, protease resistant | Connecting independently functioning domains |
| Rigid/Helical | (EAAAK)n, (AEAAAK)n | Alpha-helical structure, minimizes domain interaction | Enforcing domain separation, preventing dimerization |
| Cleavable | LVPR↓GS (TEV site), 2A peptides | Specific protease cleavage or ribosomal skipping | Releasing one domain post-translationally |
| Solubility-Enhancing | (XP)n where X = polar residue | Improves solubility, reduces aggregation | Fusions with hydrophobic domains |
Table 2: Linker Length Impact on Fusion Protein Characteristics
| Linker Length (AA) | Relative Expression Yield* | Specific Activity* | Predominant Oligomeric State (FP Fusions) |
|---|---|---|---|
| 5 | Low (40-60%) | Low (30-50%) | Dimer/Aggregate |
| 15 | High (85-100%) | High (80-100%) | Mixed Monomer/Dimer |
| 25 | High (90-100%) | Moderate (70-90%) | Predominantly Monomer |
| 35 | Moderate (70-85%) | Moderate (60-80%) | Monomer |
*Normalized to a well-expressed, active control construct.
Diagrams
The Scientist's Toolkit: Research Reagent Solutions
| Item | Function in Fusion Protein Design |
|---|---|
| Golden Gate or Gibson Assembly Master Mix | Enables seamless, scarless cloning of genes with precise linker sequences. |
| Modular Cloning Vector (e.g., MoClo, GoldenBraid) | Allows rapid, combinatorial assembly of domains and linker libraries. |
| Size-Exclusion Chromatography (SEC) Column (e.g., Superdex 200 Increase) | Critical for analyzing the oligomeric state and homogeneity of the final fusion protein. |
| TEV or HRV 3C Protease | Used to cleave and remove affinity tags, or to test functionality of cleavable linkers. |
| Circular Dichroism (CD) Spectrophotometer | Assesses secondary structure and monitors folding stability of fusion constructs. |
| Differential Scanning Fluorimetry (DSF) Dyes (e.g., SYPRO Orange) | Measures protein thermal stability (Tm) to evaluate the impact of linker design on overall fold. |
| Monomeric FP Control Plasmid (e.g., mCherry-N1, mNeonGreen) | Essential positive control when troubleshooting dimerization artifacts in imaging experiments. |
| Linker Prediction Software (e.g., LINKS, PEP-FOLD) | In silico tools to model and predict linker flexibility and conformation. |
Troubleshooting Guides & FAQs
Q1: My "monomeric" FP-tagged construct shows unexpected co-localization or FRET in my cells. What are the first controls to run? A: First, validate expression levels. High local concentration can cause apparent dimerization even with engineered FPs. Perform a titration experiment (see Table 1) and compare to a known oligomeric positive control. Second, run a positive control for dimerization (e.g., a known obligate dimer fused to your FP) in the same cellular context to confirm your assay's sensitivity.
Q2: How do I distinguish between true functional monomeric behavior and weak, context-dependent dimerization? A: Implement a two-pronged control strategy. 1) Biochemical Control: Perform crosslinking or co-immunoprecipitation in your specific cell lysate alongside a known monomeric standard (e.g., mCherry). 2) Functional Rescue Control: If applicable, test if your FP-tagged construct can rescue a phenotype in a knockout background as effectively as the untagged wild-type protein. Reduced rescue suggests the tag perturbs function, potentially via dimerization.
Q3: The monomeric FP works in vitro but appears to dimerize in my primary neuronal culture. What context-specific factors should I investigate? A: Cellular context introduces variables like pH, redox state, and specific interacting partners. Essential controls include:
- pH Mapping: Use a ratiometric pH sensor to ensure your cellular compartment's pH isn't driving protonation-dependent dimerization (common in older FPs like eYFP).
- Redox State: Treat cells with antioxidants (e.g., DTT) or pro-oxidants and monitor FP interaction via FLIM-FRET.
- Crowding Agent Test: Perform in vitro FRET assays with cell lysates or added crowding agents (Ficoll) to mimic intracellular environment.
Q4: What are the critical controls for a fluorescence anisotropy/polarization assay to prove monomeric status? A: Key controls are summarized in Table 2. The core principle is to rule out anisotropy changes due to factors other than oligomeric state, such as binding to cellular components or viscosity changes.
Q5: For a drug screening assay relying on monomeric FP-fused receptors, what long-term validation controls are needed? A: Beyond initial validation, implement:
- Stability Control: Regularly passage cells and re-check FP monomeric status via crosslinking every 10-15 passages. Genetic drift or selective pressure can lead to overexpression.
- Assay Window Control: Include a known dimerizing inhibitor and a neutral compound in each screening plate to continuously monitor the assay's dynamic range and sensitivity to dimerization artifacts.
Table 1: Titration Control for Apparent Dimerization from Overexpression
| Expression Level (Molecule/µm³) | FRET Efficiency (Test FP) | FRET Efficiency (Obligate Dimer +ve Control) | Interpretation |
|---|---|---|---|
| < 50 | < 5% | > 30% | True Monomeric Behavior |
| 50 - 200 | 5% - 15% | > 30% | Weak, Concentration-Dependent Interaction |
| > 200 | > 15% | > 30% | Assay Invalid; Reduce Expression |
Table 2: Controls for Fluorescence Anisotropy Assays
| Control Experiment | Purpose | Expected Result for True Monomer |
|---|---|---|
| Free FP in Buffer | Baseline anisotropy (r0) | Low, stable value |
| FP-Fusion in Cell Lysate | Test for binding-induced anisotropy | r ~ r0 |
| Lysate + Unlabeled Competitor | Specificity of binding | r returns to r0 |
| Lysate + Viscogen (Glycerol) | Measure viscosity dependence | r increases linearly |
| Known Monomeric Standard | Instrument/condition calibration | Matches published values |
Experimental Protocols
Protocol 1: Crosslinking Control for Low-Affinity Dimerization in situ
- Seed cells expressing your FP-tagged construct of interest on a 6-well plate.
- Treat with 1 mM membrane-permeable crosslinker BS³ (in DMSO) for 30 min at room temperature. Include a DMSO-only control.
- Quench the reaction with 100 mM Tris-HCl, pH 7.5, for 15 min.
- Lyse cells in RIPA buffer without reducing agents (omit DTT/β-mercaptoethanol).
- Analyze by SDS-PAGE (use a 4-12% Bis-Tris gel) under non-reducing conditions.
- Image the gel using the FP fluorescence channel. A monomeric protein will show a single band at the expected molecular weight, even with crosslinker. Dimers will show a higher molecular weight band only in the crosslinked sample.
Protocol 2: FLIM-FRET Positive & Negative Control Sample Preparation
- Negative Control (Donor Only): Transfect cells with the donor FP (e.g., mEGFP) fused to your protein of interest.
- Positive Control (Obligate Dimer): Create a fusion where the donor FP and acceptor FP (e.g., mScarlet) are linked by a short, flexible peptide (e.g., 5x GGS repeats) that ensures intramolecular FRET. Co-express this with your untagged protein.
- Test Sample: Co-express the donor FP- and acceptor FP- tagged versions of your protein.
- Acquire FLIM images using a confocal microscope with a 470-490 nm pulsed laser and a 500-550 nm emission filter. Fit the lifetime decay. The positive control should show a significantly reduced donor lifetime compared to the negative control.
Visualizations
Diagram 1: Control Experiment Workflow for Monomeric Validation
Diagram 2: Key Factors Influencing FP Dimerization in Cellular Context
The Scientist's Toolkit: Research Reagent Solutions
| Reagent/Material | Function in Monomeric Validation |
|---|---|
| Engineered Monomeric FPs (e.g., mEGFP, mScarlet-I) | Next-generation FPs with published point mutations (A206K, L221K, etc.) that minimize hydrophobic interfaces, serving as optimal monomeric standards. |
| Membrane-Permeable Crosslinkers (e.g., BS³, DTSSP) | Chemically "freeze" transient protein-protein interactions in live cells for downstream SDS-PAGE analysis to detect low-affinity oligomers. |
| Fluorescent Protein Antibodies (GFP/RFP Nanobodies) | Used in co-IP or pull-down experiments to specifically isolate FP-fusion proteins and their potential interacting partners from complex lysates. |
| FLIM-FRET Calibration Standards | Slides or samples with known FRET efficiency or donor lifetime for calibrating microscope systems, ensuring quantitative comparison across experiments. |
| Crowding Agents (Ficoll PM-70, Dextran) | Mimic the high macromolecular concentration inside cells for in vitro experiments, testing if crowding induces "artifactual" dimerization. |
| Ratiometric pH Sensors (pHluorin, pHRed) | Co-transfected or encoded in a tandem construct to simultaneously map local pH, controlling for pH-sensitive dimerization of some FPs. |
This guide provides targeted troubleshooting for researchers working within the context of FP dimerization artifacts and monomeric solutions research. The FAQs and protocols address specific pitfalls encountered when generating and validating monomeric fluorescent protein (FP) constructs for accurate protein interaction studies in drug development.
Troubleshooting FAQs
Q1: My cloned mFP (monomeric FP) construct shows unexpected high molecular weight bands on a Western blot. What could be the cause? A: This is a classic symptom of persistent dimerization/aggregation. First, verify the monomeric mutation integrity (e.g., A206K for mEGFP) via sequencing. Perform a cross-linking gel assay: treat purified protein with 0-1% glutaraldehyde, run on SDS-PAGE, and stain. Monomeric FPs should show a single band even at high cross-linker concentrations. Persistent high MW bands suggest issues with protein folding or the need for additional stabilizing mutations.
Q2: During live-cell imaging, my mFP-tagged protein forms puncta instead of displaying the expected diffuse localization. How do I troubleshoot this? A: Punctate formation often indicates protein aggregation or inclusion bodies. Key troubleshooting steps:
- Reduce Expression: Lower transfection DNA amount or use a weaker promoter. High local concentration can force aggregation even with mFPs.
- Check Construct Design: Ensure the mFP is linked via a long, flexible linker (e.g., 15-25aa, (GGGGS)n). Short, rigid linkers can sterically induce clustering.
- Temperature Test: Culture cells at 30°C post-transfection. Slower folding at lower temperatures can improve solubility.
- Co-transfect with Chaperones: Co-express with folding chaperones like Hsp70 to test if misfolding is the cause.
Q3: My FRET efficiency between mFP pairs is anomalously high or low. What are the primary calibration controls? A: Improper FRET signals commonly arise from non-monomeric FP behavior or spectral crosstalk. Implement these control constructs and measure their apparent FRET efficiency (Eapp).
| Control Construct | Purpose | Expected Eapp (Typical Range) |
|---|---|---|
| mFP1-mFP2 Tandem | Positive control for maximal FRET | 0.25 - 0.45 (Linker-dependent) |
| mFP1 only | Measure donor bleed-through | < 0.05 |
| mFP2 only | Measure acceptor direct excitation | < 0.05 |
| mFP1-Unrelated Protein | Negative control for interaction | < 0.10 |
Protocol: Three-Cube FRET Measurement (Microscopy)
- Image Acquisition: Capture images using three filter sets:
- Donor (D) channel: Ex Donor / Em Donor.
- FRET (F) channel: Ex Donor / Em Acceptor.
- Acceptor (A) channel: Ex Acceptor / Em Acceptor.
- Calculate Corrected FRET (Fc): Use the formula:
Fc = F - (a * D) - (b * A), whereaandbare bleed-through coefficients derived from donor-only and acceptor-only samples. - Determine Eapp: Calculate
Eapp = Fc / (Fc + G * D). The G-factor is an instrument-specific calibration constant determined using the tandem construct.
Q4: After successful cloning and protein expression, my mFP exhibits dim fluorescence. How can I restore brightness? A: Dimness can stem from folding or chromophore maturation issues. Follow this protocol to diagnose:
- Cycloheximide Chase: Treat expressing cells with 100 µg/mL cycloheximide. Monitor fluorescence intensity over 4-8 hours. If intensity increases, slower maturation is likely. If it decays, the protein is unstable.
- Spectrum Scan: Perform excitation/emission scans on a spectrofluorometer. A shifted peak indicates a misfolded chromophore.
- Test Maturation Conditions: For problem FPs (e.g., some red mFPs), reduce temperature to 28-30°C or add 1-10 µM biliverdin (for infrared FPs) to culture media.
Key Experimental Protocols
Protocol 1: Validating Monomeric State via Analytical Size-Exclusion Chromatography (SEC)
- Purpose: To confirm the oligomeric state of a purified mFP fusion protein.
- Method:
- Equilibrate an analytical SEC column (e.g., Superdex 200 Increase 5/150) with running buffer (e.g., PBS, pH 7.4).
- Calibrate the column using a standard protein mix (e.g., Thyroglobulin 670kDa, IgG 158kDa, Ovalbumin 44kDa, Myoglobin 17kDa).
- Inject 50 µL of purified, concentrated (≥ 1 mg/mL) mFP-tagged protein.
- Run isocratically at 0.2-0.5 mL/min, monitoring absorbance at 280 nm and the FP's excitation wavelength.
- Compare the elution volume (Ve) of your sample to the calibration curve. A true monomer will elute at a volume corresponding to ~1.5-2x its predicted molecular weight due to its hydrodynamic radius.
Protocol 2: Quantifying Dimerization Propensity via Two-Color Fluorescence Cross-Correlation Spectroscopy (FCCS)
- Purpose: To measure weak, transient dimerization of mFPs in live cells with high sensitivity.
- Method:
- Co-transfect cells with two plasmids: one expressing your protein of interest tagged with mGFP, another expressing the same protein tagged with mRFP.
- On a confocal microscope with FCCS capability, position the laser focus in the cell cytoplasm.
- Record simultaneous fluorescence fluctuations in the green and red channels for 60 seconds.
- Auto- and cross-correlate the signals. The amplitude of the cross-correlation function (Gcc(0)) relative to the autocorrelation amplitudes indicates the fraction of doubly-labeled complexes.
- A perfect monomeric pair will yield Gcc(0) ~ 0. Any positive cross-correlation indicates residual co-diffusion/dimerization.
Research Reagent Solutions
| Reagent / Material | Function & Application in FP Dimerization Research |
|---|---|
| Monomeric FP Vectors (e.g., pmEGFP-N1, pmScarlet-I-C) | Backbone plasmids with validated point mutations (A206K, etc.) to prevent dimerization. Essential for starting new fusions. |
| Flexible Peptide Linkers (e.g., (GGGGS)n, XTEN linkers) | Spacer sequences to separate the FP from the protein of interest, reducing steric interference and aggregation. |
| Gel Filtration Markers (e.g., Bio-Rad #1511901) | Protein standards for calibrating SEC columns to determine precise hydrodynamic radius and oligomeric state. |
| Cross-linkers (e.g., Glutaraldehyde, BS³) | Chemical tools to covalently stabilize weak protein-protein interactions for analysis on SDS-PAGE gels. |
| Chaperone Co-expression Plasmids (e.g., pGro7, pKJE7) | Systems to express bacterial or eukaryotic chaperones, aiding in the folding of difficult mFP fusions. |
| FRET Standard Constructs (Tandem mCer3-mVenus, non-interacting pair) | Validated positive and negative control plasmids required for calibrating and correcting FRET microscopy measurements. |
Troubleshooting Flowcharts
Diagram Title: Troubleshooting FP Constructs: Cloning to Imaging
Diagram Title: FRET Assay Calibration & Validation Pathway
Benchmarking Monomeric FPs: Performance Metrics and Head-to-Head Comparisons
Frequently Asked Questions (FAQs) & Troubleshooting
Q1: My fluorescent protein (FP) appears dim in my cellular system. Which criteria should I check first? A: First, assess Brightness (the product of extinction coefficient and quantum yield) and Maturation kinetics. Dimness can result from slow maturation at 37°C or a suboptimal quantum yield. Check the pKa if your cellular compartment has a lower pH (e.g., lysosomes). Also, confirm the oligomerization state, as unintended dimerization can cause mislocalization and reduced effective fluorescence.
Q2: How can I determine if my FP is truly monomeric in my experimental context? A: Validating monomericity requires multiple approaches. Perform a bimolecular fluorescence complementation (BiFC) assay with your FP split into two non-functional fragments. True monomers should not reconstitute fluorescence. Additionally, use size-exclusion chromatography (SEC) or analytical ultracentrifugation (AUC) on the purified protein. In cells, check for aberrant localization patterns (e.g., aggregation, nuclear exclusion) indicative of oligomerization.
Q3: Why does my FP signal vary between different cellular compartments? A: This is often due to differences in the local environment affecting pKa (for pH-sensitive FPs) or maturation efficiency. The maturation rate of many FPs is slower in oxidizing environments like the endoplasmic reticulum (ER). Always select an FP with a pKa well below the pH of your target compartment and verify maturation kinetics in that compartment.
Q4: I see unexpected aggregation. Is this an oligomerization problem? A: Yes, unintended oligomerization is a common cause. Even weakly dimerizing FPs can drive higher-order aggregates at high concentrations. Switch to a validated monomeric FP (e.g., mNeonGreen, mScarlet). Ensure your fusion construct uses a sufficiently long and flexible linker (>15 amino acids) to prevent steric-induced aggregation.
Experimental Protocols
Protocol 1: Determining Quantum Yield (QY)
- Principle: Compare the integrated fluorescence intensity of the FP to a standard dye with a known QY, using matching optical densities at the excitation wavelength.
- Steps: a. Purify the FP in a suitable, non-fluorescent buffer (e.g., PBS, pH 7.4). b. Measure the absorbance (A) at the excitation peak. Use samples with A < 0.1 to avoid inner filter effects. c. Record the fluorescence emission spectrum (excited at the absorbance peak). d. Repeat steps b-c for the reference standard (e.g., Fluorescein in 0.1 M NaOH, QY=0.92). e. Plot integrated fluorescence intensity vs. absorbance for both. QY is calculated as: QYsample = QYref × (Gradsample/Gradref) × (ηsample²/ηref²), where Grad is the slope and η is the refractive index of the solvent.
Protocol 2: Assessing Oligomerization via Size-Exclusion Chromatography (SEC)
- Principle: Separate proteins based on hydrodynamic radius. Monomers will elute later than dimers or tetramers.
- Steps: a. Equilibrate an appropriate SEC column (e.g., Superdex 75 Increase for ~30 kDa FPs) with running buffer (e.g., 50 mM Tris, 150 mM NaCl, pH 7.4). b. Concentrate purified FP to >2 mg/mL. Centrifuge at 20,000 x g for 10 minutes to remove aggregates. c. Load 50-100 µL of sample onto the column at a constant flow rate (e.g., 0.5 mL/min). d. Monitor elution at 280 nm (protein) and the FP's excitation wavelength (fluorescence). e. Compare the elution volume (Ve) to a calibration curve of standard proteins to estimate the apparent molecular weight.
Data Tables
Table 1: Key Validation Parameters for Common FPs
| Fluorescent Protein | Brightness* (% of EGFP) | Quantum Yield (QY) | Maturation t½ (37°C) | pKa | Oligomeric State |
|---|---|---|---|---|---|
| EGFP | 100% | 0.60 | ~30 min | 5.7 | Weak Dimer |
| mNeonGreen | 180% | 0.80 | ~10 min | 5.7 | Monomer |
| mCherry | 47% | 0.22 | ~40 min | <4.5 | Monomer |
| mScarlet-I | 144% | 0.70 | ~10 min | <4.5 | Monomer |
| TagBFP | 63% | 0.64 | ~25 min | 2.7 | Dimer |
| mTurquoise2 | 93% | 0.93 | ~15 min | 3.1 | Monomer |
*Brightness relative to EGFP, expressed as (ε × QY) / (εEGFP × QYEGFP). Data compiled from recent literature.
Table 2: Troubleshooting Guide for FP Artifacts
| Problem | Possible Cause | Diagnostic Experiment | Solution |
|---|---|---|---|
| Dim/Variable Signal | Slow maturation, low pKa | Measure fluorescence over time at 37°C; titrate pH | Use faster-maturing FP; choose FP with lower pKa |
| Aggregation/Mislocalization | Oligomerization | Perform SEC or BiFC assay | Switch to validated monomeric FP variant |
| Photobleaching | Low photostability | Perform time-lapse illumination assay | Use more photostable FP (e.g., mScarlet vs. mCherry) |
| Excitation Crosstalk | Broad excitation spectrum | Acquire full excitation-emission matrix | Use FPs with non-overlapping spectra (e.g., mTurquoise2 & mNeonGreen) |
Diagrams
Title: FP Problem Diagnostic Workflow
Title: Solving Dimerization Problems in FPs
The Scientist's Toolkit: Research Reagent Solutions
| Item | Function & Relevance to FP Validation |
|---|---|
| Size-Exclusion Chromatography (SEC) Column (e.g., Superdex 75/200 Increase) | Separates proteins by size to determine oligomeric state (monomer vs. dimer/tetramer) of purified FP. |
| Fluorescence Spectrophotometer (Cuvette-based & plate reader) | Measures excitation/emission spectra, quantum yield, brightness, and pH sensitivity (pKa) in vitro. |
| Reference Dyes for QY (Fluorescein, Rhodamine 6G) | Standards with known quantum yield required for accurate relative QY measurement of new FPs. |
| pH Calibration Buffers (pH 4.0 - 9.0) | Used to titrate FP sample for empirical determination of its pKa value from fluorescence intensity. |
| BiFC Vectors | Plasmids encoding split, non-fluorescent FP fragments to test for self-assembly/oligomerization in live cells. |
| Validated Monomeric FP Controls (e.g., mNeonGreen, mScarlet-I plasmids) | Positive controls for monomeric behavior in localization and oligomerization assays. |
| Flexible Peptide Linkers (e.g., (GGGGS)n sequences) | Used in fusion constructs to minimize steric hindrance and prevent false positive aggregation. |
Technical Support & Troubleshooting Center
FAQ & Troubleshooting Guides
Q1: My red fluorescent protein (RFP) signal is dimmer than expected in live-cell imaging. Could this be due to dimerization/aggregation artifacts, and how do I choose the best monomeric protein to mitigate this? A: Yes, classical RFPs like mCherry can form weak dimers, leading to aggregation and altered localization, which quenches fluorescence. For monomeric performance, select mScarlet3 or mRuby3. First, confirm your construct uses a validated monomeric variant. Ensure your imaging setup uses the correct filters (ex/em for mScarlet3: 569/593 nm; mRuby3: 558/592 nm). Check expression level; high concentrations can force aggregation even in engineered monomers.
Q2: During long-term time-lapse imaging, my red fluorescence bleaches rapidly, obscuring biological dynamics. Which protein is most photostable, and what imaging settings should I use? A: mRuby3 demonstrates superior photostability. To maximize performance:
- Use the lowest laser power that provides a sufficient signal-to-noise ratio.
- Increase the camera dwell time instead of increasing laser power.
- Reduce the frequency of time-lapse acquisition if possible.
- Ensure your imaging medium includes oxygen-scavenging systems or antioxidants to reduce phototoxicity.
- Verify that bleaching is not specific to your cellular compartment due to local environment (e.g., acidity).
Q3: I am performing two-color imaging with GFP. My red protein's brightness seems low relative to GFP. Which red FP offers the best brightness balance, and how can I optimize detection? A: mScarlet3 is the brightest red monomeric protein and pairs well with GFP. To optimize:
- Use sequential, not simultaneous, acquisition to minimize bleed-through.
- Set your GFP channel acquisition first, as it is typically less photostable.
- Adjust your detection bandwidths: for mScarlet3, use a 600-620 nm emission filter to cut off GFP tail emission.
- Balance expression levels by using similar promoters or titrating DNA amounts.
Q4: When I create fusion constructs, my protein of interest mislocalizes. Is this a dimerization problem with my FP tag? A: Very likely. Older mCherry fusions are prone to this. Clone your gene with a monomeric FP like mScarlet3 or mRuby3, using a long, flexible linker (e.g., 15-20 aa, GS-rich). Always include a control with the FP tag alone to check for proper localization. Consider testing your construct in a complementation assay or via gel filtration to check for oligomerization.
Q5: How do I quantitatively compare the performance of these FPs in my specific cellular system? A: Follow this protocol:
- Cloning: Create identical expression constructs (same promoter, vector backbone) coding for the three FPs (mScarlet3, mCherry, mRuby3) with no fusion partner.
- Transfection: Transfect the same amount of plasmid into your cells in parallel, using a standardized protocol.
- Imaging: 24-48h post-transfection, image using identical settings (laser power, gain, exposure) specific to each FP's optimal wavelengths.
- Analysis: Measure mean fluorescence intensity per cell and plot the distribution. For photostability, perform a time-series with constant illumination and plot fluorescence decay over time.
Quantitative Comparison Data
Table 1: Photophysical Properties of Monomeric Red Fluorescent Proteins
| Property | mCherry | mScarlet3 | mRuby3 | Measurement Notes |
|---|---|---|---|---|
| Excitation Max (nm) | 587 | 569 | 558 | In vitro, purified protein. |
| Emission Max (nm) | 610 | 593 | 592 | In vitro, purified protein. |
| Molecular Brightness | 100% (Ref) | ~150-180% of mCherry | ~130-150% of mCherry | Relative to mCherry in cells. |
| Extinction Coefficient (M⁻¹cm⁻¹) | 72,000 | 104,000 | 112,000 | Measured in vitro. |
| Quantum Yield | 0.22 | 0.41 | 0.45 | Measured in vitro. |
| Photostability (t₁/₂) | Low | High | Very High | Time to halve intensity under constant illumination. |
| pKa | ~4.5 | ~4.5 | ~5.3 | Indicates acidity sensitivity. |
| Maturation t₁/₂ (min, 37°C) | ~15 | ~10 | ~50 | Time to reach 50% fluorescence. |
| Monomeric Status | Tendency to dimerize | Engineered monomer | Engineered monomer | Validated by structural studies. |
Experimental Protocols
Protocol 1: Quantitative Live-Cell Photostability Assay Purpose: To measure the fluorescence decay rate of FPs under constant illumination. Materials: Cells expressing the FP of interest, live-cell imaging medium, confocal or widefield microscope with environmental control (37°C, 5% CO₂). Steps:
- Plate cells expressing the FP in a glass-bottom dish.
- Locate a field of view with ~10-20 moderately expressing cells.
- Set acquisition to rapid continuous imaging (e.g., 1 frame per second) at the FP's optimal excitation/emission.
- Set laser power to a standard, high level (e.g., 50% of max) to induce bleaching.
- Acquire 200-500 frames without interruption.
- Analysis: Define a region of interest (ROI) in the cytoplasm for each cell. Plot mean intensity in the ROI vs. frame number. Normalize intensity to the starting value (Frame 1 = 100%). Calculate the frame number or time at which fluorescence decays to 50% (t₁/₂).
Protocol 2: Brightness Comparison via Flow Cytometry Purpose: To objectively compare cellular brightness levels across FP variants. Materials: Cells transfected with FP plasmids, flow cytometer with 561 nm laser and appropriate filters (e.g., 610/20 nm for mCherry/Scarlet, 582/15 for mRuby3). Steps:
- Transfect cells in triplicate with equimolar amounts of each FP plasmid using the same method.
- 24 hours post-transfection, harvest cells, resuspend in PBS.
- Run samples on the flow cytometer. Record fluorescence from at least 10,000 live, single-cell events.
- Analysis: Gate on transfected cells using untransfected controls as a baseline. Compare the median fluorescence intensity (MFI) of the positive populations for each FP. Statistical significance can be determined via a t-test.
Visualization
Title: Evolutionary Path from Dimeric DsRed to Modern Monomeric RFPs
Title: Experimental Workflow for Direct FP Performance Comparison
The Scientist's Toolkit: Research Reagent Solutions
| Item | Function & Rationale |
|---|---|
| Monomeric FP Plasmid Set | Ready-to-use vectors (e.g., pCMV backbone) encoding mScarlet3, mRuby3, and mCherry as C-terminal fusions or standalone. Essential for controlled, parallel comparison. |
| Live-Cell Imaging Medium | Phenol-red free medium supplemented with HEPES buffer and serum. Minimizes background fluorescence and maintains pH during microscopy without CO₂. |
| Oxygen-Scavenging System (e.g., Oxyrase) | Reduces photobleaching and phototoxicity by removing dissolved oxygen, extending the time viable for time-lapse imaging. |
| Validated Flexible Linker Peptide (e.g., (GGS)n) | A 15-30 amino acid linker to separate the FP from the protein of interest, minimizing steric interference and preserving monomeric behavior. |
| Neutral Density (ND) Filters | Physical filters for the microscope to uniformly attenuate laser light, enabling precise control of illumination dose for photostability assays. |
| Cell Line with Low Autofluorescence (e.g., HEK293T) | A standard mammalian cell line with minimal intrinsic fluorescence in the red channel, ensuring a high signal-to-noise ratio for FP detection. |
| Gel Filtration Standards | Size-exclusion chromatography standards for in vitro validation of FP monomeric state in solution post-purification. |
Technical Support Center
Troubleshooting Guides & FAQs
Q1: My FRET efficiency is high even in the negative control without the target interaction. What could be the cause? A: This is a classic sign of non-specific FRET due to fluorescent protein (FP) dimerization. The donor and acceptor FPs may be interacting directly, independent of the fused proteins of interest. Solution: Replace your current FPs with validated monomeric mutants (e.g., mTurquoise2, mNeonGreen, mScarlet-I). Ensure you are using a pair from incompatible dimerization lineages (e.g., avoid combining FPs derived from the same progenitor like GFP and YFP variants without proper monomeric engineering).
Q2: How can I experimentally prove that my observed FRET signal is specific to my biological interaction and not an artifact? A: Perform a critical positive and negative control experiment.
- Protocol: Acceptor Photobleaching FRET Control.
- Transfect cells with your donor-acceptor construct.
- Image a region of interest (ROI) and measure donor (D) and acceptor (A) intensity.
- Photobleach the acceptor in the ROI using a high-intensity laser at the acceptor's excitation wavelength.
- Re-image the same ROI and measure donor intensity again.
- Calculate FRET efficiency:
E = 1 - (D_pre / D_post). - Interpretation: A significant increase in donor fluorescence post-bleach indicates true energy transfer. Repeat this with a negative control construct where the interacting proteins are separated or truncated. No FRET efficiency should be detected in this control if the FPs are truly monomeric and non-interacting.
Q3: What are the key photophysical properties to check when selecting a monomeric FRET pair? A: Refer to the quantitative comparison table below.
Table 1: Properties of Common Monomeric FRET Pairs
| Donor | Acceptor | Ex (nm) | Em (nm) | Extinction Coefficient (M⁻¹cm⁻¹) | Quantum Yield | Brightness Relative to EGFP | Förster Radius (R₀ in nm) | Reference |
|---|---|---|---|---|---|---|---|---|
| mTurquoise2 | mNeonGreen | 434 | 474 / 505 | 30,000 | 0.93 | 1.4 | ~5.1 | [1] |
| mTurquoise2 | mScarlet-I | 434 | 474 / 610 | 30,000 / 70,000 | 0.93 / 0.70 | 1.4 / 1.5 | ~5.9 | [1,2] |
| mNeonGreen | mScarlet-I | 506 | 517 / 610 | 116,000 / 70,000 | 0.80 / 0.70 | 3.0 / 1.5 | ~6.0 | [2,3] |
| mCerulean3 | mVenus | 433 | 475 / 528 | 40,000 / 92,000 | 0.87 / 0.57 | 1.4 / 1.7 | ~5.4 | [4] |
References: [1] Goedhart et al., Nat Comm 2012; [2] Bindels et al., Nat Comm 2017; [3] Shaner et al., Nat Methods 2013; [4] Kremers et al., Nat Methods 2006.
Q4: Can I use tandem dimer constructs to test for monomeric behavior? A: Yes, this is a definitive validation experiment.
- Protocol: Tandem Dimerization Assay.
- Create a construct where the donor and acceptor FPs are linked directly by a short, flexible peptide linker (e.g., 5-10 AA).
- Express this tandem construct in your cells.
- Measure the FRET efficiency via sensitized emission or acceptor photobleaching.
- Interpretation: For a perfectly monomeric pair, the FRET efficiency in this tandem construct should be very high (>30%), as the FPs are forced into proximity. However, when expressed as separate, untagged proteins in the same cell, they should show no FRET signal. If untagged FPs exhibit FRET, it indicates residual dimerization.
Q5: My monomeric FP construct shows correct localization but low brightness. What should I do? A: Low brightness can stem from poor folding at 37°C. Solution: Consult the FP literature for thermostability data. Consider using more robust monomers like mNeonGreen (thermostable) or mScarlet-I. Ensure your expression vector uses optimal codons for your expression system (e.g., mammalian codon optimization for HEK cells). Lower incubation temperature (e.g., 30-32°C) can sometimes improve folding.
The Scientist's Toolkit: Research Reagent Solutions
Table 2: Essential Reagents for Monomeric FRET Validation
| Item | Function | Example / Notes |
|---|---|---|
| Validated Monomeric FPs | Core donor/acceptor fluorophores with minimal interaction. | mTurquoise2 (donor), mNeonGreen (acceptor/donor), mScarlet-I (acceptor). |
| Positive Control Plasmid | Construct with known high FRET for system calibration. | Tandem dimer of your chosen FRET pair linked by a short (5AA) linker. |
| Negative Control Plasmid | Construct to establish baseline, non-specific FRET. | Donor and acceptor fused to non-interacting proteins or separated domains. |
| Acceptor Photobleaching Module | Microscope software/hardware for controlled acceptor bleaching. | Standard on most confocal systems (e.g., Zeiss, Nikon, Olympus). |
| Spectral Unmixing Software | For clean separation of donor/acceptor signals in sensitized emission. | Essential for filtersets with bleed-through (e.g., ImageJ plugins, commercial software). |
| Transfection Reagent | For plasmid delivery into live cells. | Lipofectamine 3000, Polyethylenimine (PEI), or electroporation systems. |
| Immobilization Reagent | For fixing cells or proteins for certain measurements. | Poly-L-Lysine, Cell-Tak, or low-melt agarose for live-cell imaging. |
Experimental Protocols
Protocol: Sensitized Emission FRET Measurement with Spectral Unmixing. This protocol quantifies FRET by measuring the increase in acceptor emission upon donor excitation.
- Sample Prep: Plate cells on imaging dishes and transfect with your FRET construct and controls (positive tandem, negative non-interacting).
- Microscope Setup: Use a widefield or confocal microscope with controlled laser lines and a spectral detector or appropriate filter sets.
- Channel 1 (Donor): Ex: Donor laser line (e.g., 458nm for mTurquoise2). Em: Donor emission band (e.g., 470-500nm).
- Channel 2 (FRET): Ex: Donor laser line. Em: Acceptor emission band (e.g., 580-620nm for mScarlet-I).
- Channel 3 (Acceptor): Ex: Acceptor laser line (e.g., 561nm). Em: Acceptor emission band.
- Image Acquisition: Capture images of the same field in all three channels with identical settings. Keep exposure times low to minimize photobleaching.
- Calculate Corrected FRET (Fc):
- Acquire images from cells expressing donor-only and acceptor-only constructs to determine spectral bleed-through coefficients (α and β).
- Use the formula:
Fc = FRET_channel - α * Donor_channel - β * Acceptor_channel.
- Normalize: Express FRET as a ratio:
Fc / Acceptor_channelor calculate the apparent FRET efficiency.
Protocol: Determining Dimerization Propensity via Size-Exclusion Chromatography (SEC). A biochemical assay to assess FP monomeric state.
- Protein Purification: Express and purify your FP of interest (as a tagged protein) from E. coli or mammalian cells.
- Column Equilibration: Equilibrate an SEC column (e.g., Superdex 75) with your running buffer (e.g., PBS, pH 7.4).
- Sample Run: Inject purified FP and run isocratic elution. Monitor absorbance at 280nm and the FP's excitation wavelength.
- Analysis: Compare the elution volume of your FP to a standard curve of proteins with known molecular weights. A true monomer will elute at its predicted molecular weight. A dimer or oligomer will elute earlier (higher apparent molecular weight).
Visualizations
Title: The Dimerization Problem and Monomeric Solution Path
Title: FRET Specificity Validation Workflow
Technical Support Center
Frequently Asked Questions (FAQs) & Troubleshooting Guides
Q1: Our high-content imaging assay shows abnormal punctate or clustered fluorescence, not the expected diffuse cytoplasmic localization, even with "monomeric" FPs. What is the cause and solution?
A: This is a classic sign of residual weak dimerization or aggregation. Many early-generation "monomeric" variants (e.g., mGFP, mRFP) still possess weak interfacial attractions under the high concentrations typical of overexpression.
- Troubleshooting Steps:
- Confirm Construct: Verify your FP sequence. True state-of-the-art monomers are A206K (for GFP-based FPs) or the "m" series with multiple interface-disrupting mutations (e.g., mNeonGreen2, mScarlet3).
- Perform a Dimerization Check: Co-transfect your FP-tagged construct of interest with an untagged version of the same protein. If dimerization occurs, the untagged protein will co-cluster with the tagged one, altering the fluorescence pattern. A true monomer will not.
- Switch FP: Adopt next-generation, rigorously engineered monomers. See Table 1 for recommendations.
- Supporting Protocol: Dimerization Check via Co-Transfection
- Plate HEK293T cells in a 24-well imaging plate.
- Co-transfect with two plasmids:
- Group A: FP-X (0.5 µg) + untagged-X (1.5 µg).
- Group B (Control): FP-X (0.5 µg) + empty vector (1.5 µg).
- Image live cells at 24-48h post-transfection. Compare fluorescence distribution patterns between groups. Clustering in Group A indicates interaction via residual FP dimerization.
Q2: We observe significant assay variability and high background in our FP-based biosensor (e.g., FRET, translocation) used for HTS. Could FP issues be the source?
A: Absolutely. Traditional dimeric FPs (e.g., eCFP/eYFP FRET pairs) cause biosensor concatenation, leading to: * High Baseline FRET: False-positive signals. * Reduced Dynamic Range: Dampened response to biological stimuli. * Variable Expression Levels: Altered effective biosensor concentration due to aggregation. * Solution: Standardize on validated monomeric FRET pairs. See Table 1 for optimized pairs. Ensure biosensor linkers are sufficiently long and flexible (>15 aa) to prevent steric clashes that can force artifactual FP interactions.
Q3: In our protein-protein interaction (PPI) studies using Bimolecular Fluorescence Complementation (BiFC), we get strong fluorescence even in negative controls. How can we trust the results?
A: BiFC is notoriously prone to false positives from FP fragment self-assembly or forced proximity. While complete monomerization of fragments isn't feasible (they must complement), the industry is moving towards monomeric full-length FP-based assays for primary screening.
- Recommendation:
- For PPI validation, use a monomeric FP-tagged co-immunoprecipitation (Co-IP) workflow as a gold-standard corroboration.
- If BiFC is necessary, use the most optimized, low-affinity fragments (e.g., from Venus YFP) and always include rigorous controls: fragments co-expressed with non-interacting partners.
- Supporting Protocol: Monomeric FP-Based Co-IP
- Transfect cells with your protein of interest tagged with a monomeric FP (e.g., mNeonGreen2) and the putative interactor tagged with a different monomeric FP (e.g., mScarlet3).
- At 48h post-transfection, lyse cells in a mild, non-denaturing lysis buffer.
- Incubate lysate with GFP-Trap or RFP-Trap magnetic beads (chromotek) for 1h at 4°C.
- Wash beads 3x with lysis buffer.
- Elute and analyze by SDS-PAGE and Western blot, probing for both tags. Clear, specific pulldown without non-specific banding indicates a clean interaction, free from FP-mediated artifacts.
Data Presentation
Table 1: Performance Comparison of Common Fluorescent Proteins
| FP Name | Class/Color | Oligomeric State | Brightness (Relative to EGFP) | Photostability (t½, seconds) | Primary Adoption Rationale & Best Use Case |
|---|---|---|---|---|---|
| EGFP | Green | Weak Dimer | 1.0 | ~174 | Historical standard; avoid for quantitative work. |
| mNeonGreen2 | Green | Monomer | 1.8 | ~266 | Industry standard. High brightness & stability for tagging & reporters. |
| TagRFP-T | Red | Dimer | 0.81 | ~330 | Bright but dimeric; use only when monomeric options fail. |
| mScarlet3 | Red | Monomer | 1.5 | ~106 | Preferred red monomer. Ideal for multiplexing & biosensors. |
| mCherry2 | Red | Monomer | 1.1 | ~360 | Very photostable monomer for long-term imaging. |
| SYFP2 | Yellow | Weak Dimer | 1.2 | ~60 | Common in FRET but prone to dimerization. |
| mCitrine | Yellow | Monomer | 0.8 | ~49 | Monomeric FRET acceptor. Use with mCerulean3. |
| mCerulean3 | Cyan | Monomer | 0.86 | ~34 | Optimized monomeric FRET donor. Pair with mCitrine/mVenus. |
Visualizations
Diagram 1: Dimeric vs. Monomeric FP Assay Artefacts
Diagram 2: FP Evolution & Standardization Workflow
The Scientist's Toolkit: Research Reagent Solutions
| Reagent/Material | Function & Rationale |
|---|---|
| mNeonGreen2 GeneTwin (N-terminal) | Premade, sequence-verified cloning vector for creating N-terminal fusions with this bright, stable green monomer. Accelerates construct generation. |
| mScarlet3-C Vector | Cloning vector for creating C-terminal fusions with the preferred red monomer. Contains a flexible linker to minimize steric interference. |
| GFP-Trap Magnetic Agarose | Immunoprecipitation resin with a single-domain anti-GFP nanobody. Captures all GFP-derivatives (including mNeonGreen) with high affinity and specificity for Co-IP. |
| Monomeric FRET Pair Kit (mCerulean3/mCitrine) | Validated pair of expression vectors with optimized linkers for building FRET biosensors with minimal concatemerization. |
| CellLight BacMam 3.0 (Monomeric TagRFP-Tubulin) | Baculovirus-based delivery for consistent, low-copy number expression of a tagged cytoskeletal marker in hard-to-transfect primary cells, using a monomeric tag. |
| Anti-Dimerization Control Plasmid | Expresses an untagged version of a common protein (e.g., Actin). Used in co-transfection experiments to test for FP-mediated clustering (see FAQ1 Protocol). |
Technical Support Center
Troubleshooting Guides & FAQs
Q1: In my co-localization experiment, my old dimeric FP (e.g., EYFP) shows apparent co-localization with my protein of interest that disappears when I switch to a monomeric variant (e.g., mVenus). What is happening? A: This is a classic artifact of FP dimerization. Dimeric FPs can induce artificial aggregation or mislocalization of fusion proteins by cross-linking. The monomeric variant reveals the true, unperturbed localization. To confirm, perform a Förster Resonance Energy Transfer (FRET) negative control experiment with two proteins known not to interact, fused to your old dimeric FPs. Spurious FRET signals will indicate forced proximity due to dimerization.
Q2: I am observing significantly reduced expression or increased cellular toxicity with my new monomeric FP construct compared to the older dimeric one. Why? A: While monomeric FPs themselves are less toxic, this often points to issues with the linker sequence between your protein and the FP. A suboptimal linker can expose hydrophobic patches on the FP or subject it to improper folding. Redesign the linker. Use a flexible, glycine/serine-rich linker (e.g., (GGGGS)₂-₃). Additionally, verify the codon optimization of the entire fusion construct for your expression system; monomeric FPs may have different codon usage.
Q3: After migrating to a monomeric FP, my fluorescence intensity is lower, compromising my detection sensitivity. How can I recover signal without reverting to dimeric FPs? A: This is a common concern. First, quantify the brightness difference (see Table 1). Next-generation monomers (e.g., mNeonGreen, mScarlet) rival or exceed older dimers in brightness. If you are using an older monomer (e.g., mCherry), upgrade to a next-gen variant. Alternatively, consider using a tandem dimer construct (e.g., tdTomato) which is intrinsically monomeric but contains two FP domains for brighter signal, though it is larger in size.
Q4: My FRET-based biosensor, optimized with dimeric FPs (CFP/YFP), shows poor dynamic range when directly swapped with monomeric pairs (e.g., mTurquoise2/mNeonGreen). What steps are required for optimization? A: A direct swap is insufficient. Dimeric FPs can artificially enhance FRET efficiency through non-specific proximity, masking suboptimal sensor design. You must re-optimize the biosensor. This includes: 1) Testing multiple linker lengths between the sensor domain and the FPs to find the optimal conformation for signal change. 2) Re-validating the sensor's specificity and kinetics, as you are now measuring true, interaction-driven FRET. 3) Potentially selecting a FRET pair with a different Förster distance (R₀) better suited to the new conformation.
Q5: In my protein-protein interaction assay (e.g., BiFC), I rely on FP fragment complementation. Doesn't this require dimeric FPs to work? A: Traditional BiFC often used fragments from dimeric or tetrameric FPs (e.g., YFP), which could lead to false positives from forced association. The field has evolved. Newer systems use monomeric split FPs (e.g., split mVenus, split mNeonGreen2) that have been engineered to minimize self-association of the fragments themselves. You must migrate to these validated, next-generation split monomeric systems to maintain interaction specificity.
Table 1: Comparison of Historical Dimeric and Next-Gen Monomeric Fluorescent Proteins
| FP Name | Class | Oligomerization | Brightness (Relative to EGFP) | Extinction Coefficient (M⁻¹cm⁻¹) | Quantum Yield | pKa |
|---|---|---|---|---|---|---|
| EGFP | Green | Weak Dimer | 1.0 | 55,900 | 0.60 | 5.8 |
| EYFP | Yellow | Dimer | 1.5 | 83,400 | 0.61 | 5.5 |
| mVenus | Yellow | Monomer | 1.4 | 92,200 | 0.57 | 5.5 |
| mNeonGreen | Green | Monomer | 2.7 | 116,000 | 0.80 | 5.7 |
| tdTomato | Red | Tandem Dimer | 2.7 | 138,000 | 0.69 | 4.7 |
| mCherry | Red | Monomer | 0.5 | 72,000 | 0.22 | 4.5 |
| mScarlet | Red | Monomer | 2.4 | 100,000 | 0.70 | 5.5 |
Table 2: Common Artifacts Caused by FP Dimerization and Monomeric Solutions
| Assay Type | Dimeric FP Artifact | Recommended Monomeric Solution | Key Consideration |
|---|---|---|---|
| Co-localization | Artificial aggregation/co-localization | mNeonGreen, mApple | Verify with orthogonal labeling methods. |
| FRET | False positive from forced proximity | Pair: mTurquoise2/mNeonGreen | Re-optimize biosensor linkers. |
| Protein Trafficking | Mistargeting due to cross-linking | mVenus, mCherry | Check expression levels are physiological. |
| Transcriptional Reporting | Altered kinetics from protein clustering | mkate2, mCitrine | Use shorter half-life (degron-tagged) FPs. |
| Super-Resolution | Overcounting due to cross-linking | PA-mCherry1, mEos4b | Use genetically encoded tags like HaloTag. |
Experimental Protocols
Protocol 1: Validating Monomeric Status via Gel Filtration Chromatography Purpose: To empirically confirm the monomeric state of an FP fusion protein. Method:
- Express and purify your FP-tagged protein of interest.
- Equilibrate a size-exclusion chromatography column (e.g., Superdex 200 Increase) with running buffer (e.g., PBS, pH 7.4).
- Load 100-500 µL of purified sample at a concentration of 1-5 µM.
- Run chromatography at 0.5 mL/min, monitoring absorbance at 280 nm (protein) and the FP's excitation maximum (e.g., 488 nm for GFP).
- Compare the elution volume of your fusion protein to a standard curve of known molecular weight proteins. A monomeric FP fusion will elute at a volume corresponding to its predicted molecular weight. A dimeric FP will cause earlier elution, indicating a larger hydrodynamic radius.
Protocol 2: Linker Optimization for Monomeric FP Fusions Purpose: To identify a linker that prevents steric interference and maintains protein/FP function. Method:
- Design: Clone your gene of interest to the N- or C-terminus of your monomeric FP using 3-5 different linker sequences. Examples: L1: (GGGGS)₂, L2: (GGGGS)₃, L3: (EAAAK)₂, L4: No linker (direct fusion).
- Test Expression: Transfect each construct into your model cell line. Use western blotting (anti-FP or anti-target protein antibody) 24-48h post-transfection to confirm full-length fusion protein expression.
- Function Assay: Perform the primary assay for your protein's function (e.g., enzyme activity, localization, interaction assay).
- Brightness Quantification: Measure fluorescence intensity per cell via flow cytometry. Normalize to expression levels (by western blot band density).
- Select the construct that yields the highest functional output and brightness with proper localization.
Visualizations
Title: Dimeric vs. Monomeric FP Impact on Experimental Data
Title: Stepwise Migration Path from Dimeric to Monomeric FPs
The Scientist's Toolkit: Research Reagent Solutions
| Reagent/Material | Function & Rationale |
|---|---|
| mNeonGreen | A very bright, truly monomeric green FP. Ideal for replacing EGFP/EYFP for tagging, with superior photostability for live-cell imaging. |
| mScarlet or mCherry | Monomeric red FPs. mScarlet is bright and mature; mCherry is well-established but dimmer. Choose based on required brightness vs. tradition. |
| mTurquoise2 & mNeonGreen FRET Pair | A spectrally ideal, bright, and monomeric FRET pair. Essential for rebuilding biosensors to eliminate dimerization artifacts. |
| Flexible Glycine-Serine Linker Oligos | DNA sequences encoding (GGGGS)n linkers. Critical for creating flexible junctions between your protein and the FP to ensure both fold independently. |
| Codon-Optimized Cloning Vector | An expression vector with your monomeric FP sequence already codon-optimized for your system (mammalian, bacterial, etc.). Saves time and boosts expression. |
| HaloTag or SNAP-tag System | A protein tag system using a dye-binding enzyme. Provides a truly monomeric, small label alternative to FPs, especially for super-resolution. |
| Gel Filtration Standards Kit | A set of proteins of known molecular weight. Required for Protocol 1 to empirically confirm the monomeric state of your FP fusion protein. |
Conclusion
The transition from dimeric and tetrameric FPs to engineered monomeric variants represents a fundamental shift toward greater experimental rigor in live-cell imaging and molecular biosensing. This review has synthesized the foundational understanding of dimerization artifacts, the methodological toolkit for implementing monomeric solutions, troubleshooting strategies to avoid common pitfalls, and comparative validation data critical for informed FP selection. The collective evidence underscores that monomeric FPs are no longer a specialized option but a necessity for generating quantitative, reliable data in protein localization, interaction studies, and dynamic biosensing—areas directly impacting target validation and mechanistic studies in drug development. Future directions point toward the continued engineering of ultra-bright, photoswitchable, and environmentally insensitive monomers, as well as their integration into multiplexed imaging and organelle-specific probes. For the research community, adopting these validated monomeric standards is imperative to reduce artifact-driven conclusions and accelerate translational discoveries with enhanced confidence.