NIR-I vs NIR-II Autofluorescence: A Comprehensive Guide for Bioimaging Researchers
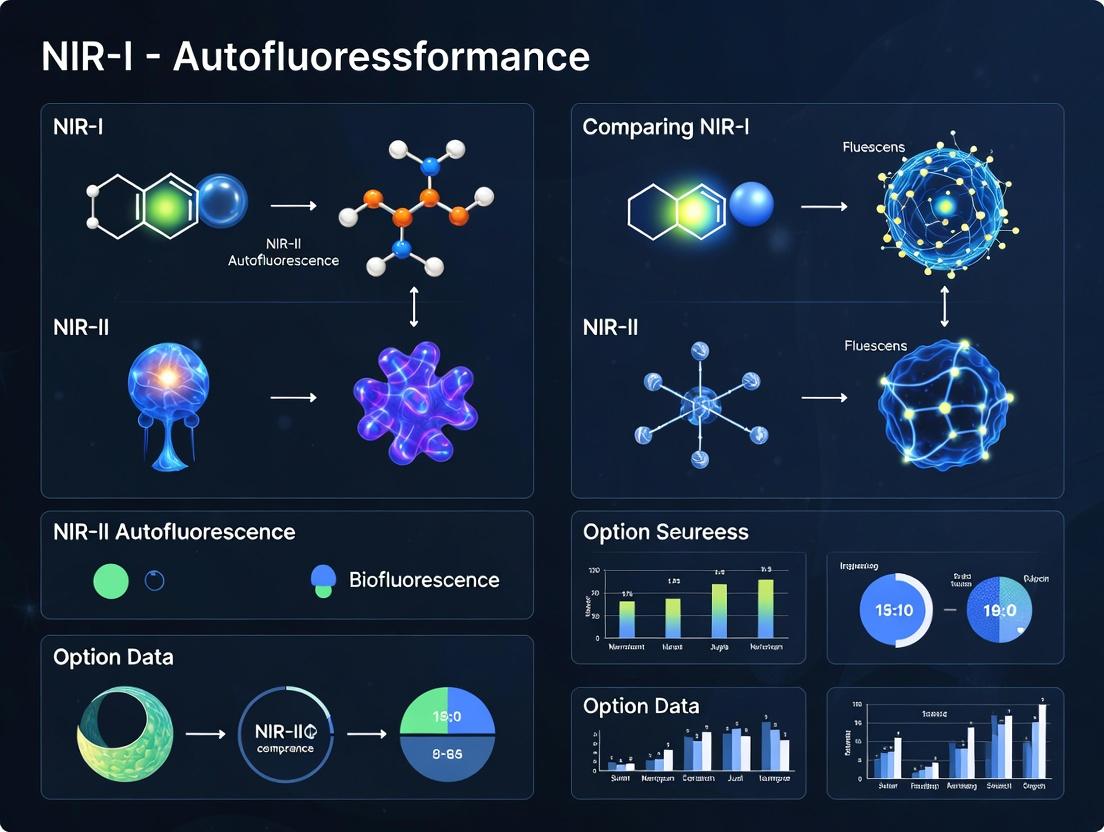
This article provides a detailed, comparative analysis of Near-Infrared I (NIR-I, 700-900 nm) and Near-Infrared II (NIR-II, 900-1700 nm) autofluorescence for biomedical imaging.
NIR-I vs NIR-II Autofluorescence: A Comprehensive Guide for Bioimaging Researchers
Abstract
This article provides a detailed, comparative analysis of Near-Infrared I (NIR-I, 700-900 nm) and Near-Infrared II (NIR-II, 900-1700 nm) autofluorescence for biomedical imaging. Aimed at researchers and drug development professionals, we explore the fundamental principles of tissue autofluorescence in each window, including the key endogenous fluorophores involved. We then detail current methodologies and diverse applications in areas like cancer surgery, neuroscience, and vascular imaging. A practical troubleshooting section addresses common challenges such as photon scattering, signal depth, and system noise, offering optimization strategies. Finally, we present a rigorous, data-driven comparison of performance metrics—including penetration depth, resolution, signal-to-background ratio (SBR), and photostability—validating the advantages and trade-offs of each spectral region. The conclusion synthesizes these insights to guide technology selection and highlights future directions for clinical translation.
The Science of Tissue Glow: Understanding NIR-I and NIR-II Autofluorescence Fundamentals
Within the context of a broader thesis on NIR-I versus NIR-II autofluorescence performance comparison, this guide provides an objective, data-driven comparison of these two spectral windows. The fundamental distinction lies in the photon-tissue interaction: longer wavelengths in the NIR-II window experience significantly reduced scattering and absorption, leading to profound improvements in imaging depth, resolution, and signal-to-background ratio (SBR) for in vivo applications.
Core Performance Comparison
Table 1: Fundamental Optical Properties and Performance Metrics
| Parameter | NIR-I Window (700-900 nm) | NIR-II Window (900-1700 nm) | Experimental Basis |
|---|---|---|---|
| Tissue Scattering | High (∝ λ^-4 to λ^-2) | Substantially Reduced (∝ λ^-4 to λ^-2) | Measured using intensity modulation or OCT. |
| Water Absorption | Low, with local peaks | Higher, with a major peak ~1450 nm | Spectrophotometry of tissue phantoms/ex vivo samples. |
| Hemoglobin Absorption | Lower than visible, but significant | Negligible above 900 nm | Measured via oxy/deoxy-hemoglobin absorption spectra. |
| Typical Imaging Depth | 1-3 mm | 3-10+ mm | Measured in mouse/rat models using calibrated phantoms. |
| Spatial Resolution | Degrades rapidly with depth (scattering). | Superior depth-dependent resolution. | Measured by FWHM of embedded target or capillary. |
| Autofluorescence | High from tissues (e.g., collagen, elastin) & food. | Very low, minimizing background. | Quantified by imaging wild-type animals without labels. |
| Optimal SBR Window | Often compromised by background. | 1000-1300 nm (avoiding water peak). | Determined by spectral scanning of labeled vs. unlabeled subjects. |
Table 2: Experimental Comparison of a Common Agent (Indocyanine Green, ICG)
| Metric | ICG in NIR-I (~800 nm emission) | ICG in NIR-II (>1000 nm emission) | Protocol Reference |
|---|---|---|---|
| SBR in Deep Tissue | Moderate (e.g., 5-10 in brain) | High (e.g., 30-100 in brain) | IV injection of ICG (0.5-2 mg/kg) in murine models, imaging over time. |
| Resolution at 3 mm Depth | ~150-250 µm | ~50-100 µm | Imaging a resolution chart embedded in scattering phantom/tissue. |
| Vessel Imaging FWHM | Broader than physical vessel. | Closer to true anatomical diameter. | Analysis of cross-sectional intensity profiles of cerebral vessels. |
Detailed Experimental Protocols
Protocol 1: Quantifying Tissue Autofluorescence Background
- Animal Preparation: Anesthetize wild-type (non-fluorescent) mice (e.g., C57BL/6) following IACUC protocol.
- Imaging Setup: Use a NIR spectral imaging system equipped with both NIR-I (e.g., 800 nm short-pass filter) and NIR-II (e.g., 1000 nm long-pass filter) detection channels. Maintain identical laser excitation (e.g., 808 nm at 50 mW/cm²) and integration times.
- Data Acquisition: Acquate coregistered images of the same anatomical region (e.g., abdomen, brain window) in both spectral channels.
- Analysis: Draw identical regions of interest (ROIs) over tissue and a background region (no tissue). Calculate mean fluorescence intensity. The signal intensity in the tissue ROI is predominantly autofluorescence. Report as Mean Pixel Intensity (MPI) or as a ratio (NIR-I Background / NIR-II Background).
Protocol 2: Benchmarking Imaging Depth and Resolution
- Phantom Preparation: Create a solid lipid or Intralipid phantom with 1% agarose, mimicking tissue scattering (µs' ~10 cm⁻¹). Embed a thin capillary (Ø 100 µm) filled with a stable NIR fluorophore (e.g., IR-1061) at varying depths (1-8 mm).
- Cross-Spectral Imaging: Image the phantom using NIR-I (900 nm LP filter) and NIR-II (1500 nm LP filter) cameras sequentially with identical 1064 nm excitation.
- Depth Analysis: For each depth, record the signal intensity from the capillary ROI. The depth where the SBR falls below 2 is the penetration limit.
- Resolution Analysis: At each depth, plot a cross-sectional intensity profile across the capillary. Calculate the Full Width at Half Maximum (FWHM). Compare FWHM between channels as a function of depth.
Visualization of Key Concepts
Diagram 1: Photon-Tissue Interaction in NIR-I vs NIR-II
Diagram 2: Typical NIR-II Imaging Workflow for In Vivo Study
The Scientist's Toolkit: Key Research Reagent Solutions
Table 3: Essential Materials for NIR-I vs NIR-II Comparative Studies
| Item | Function & Relevance in Comparison | Example/Note |
|---|---|---|
| NIR-II Fluorophores | Provide signal in the >1000 nm range. Critical for NIR-II imaging. | Organic dyes (CH-1055, IR-1061), Quantum Dots (Ag2S), Single-Walled Carbon Nanotubes. |
| NIR-I Fluorophores | Benchmark for traditional imaging. | ICG (also emits in NIR-II), Cy7, IRDye 800CW. |
| Tissue-Scattering Phantoms | Mimic tissue optical properties for standardized bench testing. | Intralipid suspensions, lipid-based gels with India ink for absorption. |
| InGaAs Camera | Essential detector for NIR-II light (>900 nm). Requires cooling. | Models from Princeton Instruments, Hamamatsu, or Sylvac. |
| Silicon CCD Camera | Standard detector for NIR-I light (700-1000 nm). | Often part of existing IVIS or customized systems. |
| Long-Pass Emission Filters | Isolate NIR-II signal; crucial for SBR. | 1000 nm, 1200 nm, 1500 nm LP filters (e.g., from Thorlabs, Semrock). |
| 808 nm & 1064 nm Lasers | Common excitation sources for both windows. | 1064 nm minimizes autofluorescence excitation vs 808 nm. |
| Animal Model (Wild-Type) | Required for quantifying inherent tissue autofluorescence background. | Standard strains (C57BL/6, BALB/c). |
Within the context of comparing Near-Infrared Region I (NIR-I, ~700-900 nm) and NIR-II (~1000-1700 nm) autofluorescence for deep-tissue imaging, understanding the performance of key endogenous fluorophores in the NIR-I window is foundational. This guide objectively compares the autofluorescence properties, advantages, and limitations of five principal NIR-I fluorophores, based on current experimental data.
Comparison of Endogenous Fluorophores in NIR-I
The table below summarizes the key photophysical and imaging performance characteristics of the primary endogenous fluorophores within the NIR-I spectral window.
Table 1: Photophysical Properties & Imaging Performance in NIR-I
| Fluorophore | Excitation (nm) | Emission Peak (nm) | Quantum Yield (Relative) | Key Biological Role/Location | Primary Advantage in NIR-I | Major Limitation in NIR-I |
|---|---|---|---|---|---|---|
| NADH | ~340 | ~450-470 | Low (0.02-0.05) | Metabolic cofactor; Cytoplasm/Mitochondria | Direct indicator of cellular metabolism | Low QY, UV excitation limits depth |
| FAD/Flavins | ~450 | ~520-550 | Low (0.05-0.1) | Metabolic cofactor; Mitochondria | Redox state indicator; paired with NADH | Visible excitation/scattering |
| Lipofuscin | Broad (340-650) | Broad (540-800+) | Very Low | Lysosomal residue; Post-mitotic cells | Bright, long-lived signal in aged tissue | Highly variable, non-specific accumulation |
| Elastin | ~390-420 | ~410-550 | Moderate | Extracellular matrix; Blood vessels, skin | Structural contrast for vasculature/skin | Overlap with other fluorophores |
| Eumelanin | Broad (UV-NIR) | Broad (500-800+) | Extremely Low (<0.01) | Pigment; Skin, hair, retina | Strong broadband absorption allows photoacoustic imaging | Primarily a quencher; negligible fluorescence yield |
Experimental Protocols for NIR-I Autofluorescence Characterization
Protocol 1: Spectral Unmixing of Tissue Autofluorescence
- Sample Preparation: Prepare fresh-frozen tissue sections (10-20 µm thick) or live animal models.
- Instrumentation: Use a multispectral or hyperspectral fluorescence microscope equipped with a tunable laser source (e.g., 355, 405, 488, 561 nm) and a sensitive NIR-I CCD camera.
- Data Acquisition: Acquire image stacks across sequential emission bands (e.g., 10 nm steps from 400 nm to 800 nm) for each excitation wavelength.
- Analysis: Employ linear unmixing algorithms (e.g., in ImageJ or commercial software) using pre-measured reference spectra of pure fluorophores (NADH, FAD, etc.) to decompose the mixed autofluorescence signal into constituent contributions.
Protocol 2: Fluorescence Lifetime Imaging (FLIM) for Redox Ratio
- Objective: Quantify the cellular redox ratio ([FAD]/([NADH]+[FAD])) via fluorescence lifetime, which is concentration-independent.
- Setup: Use a time-correlated single photon counting (TCSPC) FLIM system with a pulsed 375 nm or 405 nm laser for NADH and 488 nm for FAD.
- Imaging: Capture lifetime images of cells (e.g., in a 35 mm dish) or tissue under controlled metabolic conditions (e.g., normoxia vs. hypoxia).
- Fitting: Fit fluorescence decay curves in each pixel to a multi-exponential model. The lifetime components (short ~0.5 ns, free; long ~2-3 ns, protein-bound) are sensitive to metabolic state. Calculate the redox ratio map from the FLIM-FAD and FLIM-NADH images.
Visualizations
The Scientist's Toolkit: Research Reagent Solutions
Table 2: Essential Reagents and Materials for NIR-I Autofluorescence Studies
| Item | Function in Research | Example/Note |
|---|---|---|
| NADH (Disodium Salt) | Reference standard for spectral unmixing and calibration. | Cell-based assays require permeable esters (e.g., NADH-AM). |
| Riboflavin (Vitamin B2) | Reference standard for flavin (FAD, FMN) fluorescence. | Light-sensitive; prepare solutions in dark. |
| Potassium Cyanide (KCN) | Metabolic inhibitor used to force transition to reduced state (high NADH). | Highly toxic. Requires strict safety protocols. |
| Carbonyl Cyanide 4-(trifluoromethoxy)phenylhydrazone (FCCP) | Mitochondrial uncoupler used to force oxidized state (low NADH). | Positive control for FLIM redox measurements. |
| Rotenone/Antimycin A | Inhibitors of mitochondrial ETC complexes I and III. | Used to perturb metabolism and validate NADH signal origin. |
| Elastin from Porcine Aorta | Reference standard for pure elastin autofluorescence. | Used for ex vivo vascular imaging studies. |
| Synthetic Eumelanin (from Sigma-Aldrich) | Reference for melanin absorption and weak fluorescence. | Primary utility is as an absorption/quenching control. |
| Mounting Medium with DABCO or ProLong Diamond | Anti-fade mounting medium for fixed tissue. | Crucial for preserving weak autofluorescence signals during microscopy. |
| O.C.T. Compound | Optimal cutting temperature medium for preparing frozen tissue sections. | Ensures structural integrity for ex vivo spectral imaging. |
| Matrigel/3D Cell Culture Scaffold | For 3D spheroid or organoid models. | Provides more physiologically relevant metabolic imaging context. |
Within the ongoing research thesis comparing NIR-I (650-900 nm) versus NIR-II (900-1700 nm) autofluorescence performance, a central puzzle emerges: the identification of intrinsic sources and molecular origins of NIR-II autofluorescence. This phenomenon, where biological tissues emit light in the second near-infrared window without external probes, presents both a challenge for background reduction and an opportunity for label-free imaging. This guide compares the leading hypotheses and experimental evidence characterizing these elusive signals.
The table below summarizes the primary molecular candidates and their reported experimental signatures, based on current literature.
Table 1: Proposed Molecular Sources of NIR-II Autofluorescence
| Proposed Source | Typical Excitation (nm) | Emission Peak (nm) | Key Evidence/Model System | Relative Intensity (vs. NIR-I AF) | Major Proponents/Studies |
|---|---|---|---|---|---|
| Lipofuscin | 740-800 | ~1000-1100 | Aged brain tissue, retinal pigment epithelium | Low (0.1-0.5x) | Zhang et al., 2021; Hong et al. |
| Melanin | 785-808 | Broad >1000 | Melanoma cells, synthetic pheomelanin | Medium (0.3-0.8x) | Li et al., 2022; Zhao et al. |
| Collagen/Elastin | 1200-1300 | 1400-1600 | Decellularized dermis, arterial tissue | High (in specific matrix) | Tang et al., 2023 |
| Flavins (FAD) | 730-780 | ~1000-1100 | Metabolic inhibition in cell cultures | Very Low (0.05-0.2x) | Smith et al., 2022 |
| Porphyrins | 635, 670 | 900-1300 | Tumor models, heme biosynthesis studies | Variable; context-dependent | Chen & Wang, 2023 |
Experimental Protocols for Source Identification
Protocol 1: Spectral Unmixing of Ex Vivo Tissue
Objective: To dissect the composite NIR-II autofluorescence signal into contributions from specific molecular sources. Materials: Fresh or frozen tissue sections (e.g., skin, liver, brain), NIR-II hyperspectral microscope (e.g., with InGaAs array), reference spectra database. Procedure:
- Acquire hyperspectral image cubes (x, y, λ) under 785 nm and 1200 nm excitation.
- Record emission from 900-1600 nm at 10 nm spectral resolution.
- Isolate pure spectral profiles of candidate fluorophores (e.g., purified melanin, collagen) on the same instrument.
- Apply linear unmixing algorithms (e.g., non-negative matrix factorization) to the tissue data using the reference spectra.
- Generate spatial maps of predicted contribution from each candidate source. Data Output: Coefficient maps and residual error, quantifying the fit of each candidate spectrum to the observed tissue autofluorescence.
Protocol 2: Metabolic & Biosynthetic Perturbation
Objective: To link NIR-II autofluorescence to specific metabolic pathways. Materials: Cell culture (e.g., B16 melanoma, fibroblasts), small molecule inhibitors, NIR-II widefield microscope. Procedure:
- Culture cells in multi-well plates. Establish control and treated groups.
- Apply pathway-specific inhibitors (e.g., cerivastatin for cholesterol pathway affecting lipofuscin; kojic acid for melanogenesis).
- Incubate for 24-72 hours.
- Wash cells and image under identical laser power and acquisition settings (e.g., 808 nm excitation, 1100 LP emission filter).
- Quantify mean NIR-II autofluorescence intensity per cell and normalize to control. Data Output: Dose-response curves of NIR-II signal attenuation, linking signal intensity to specific biosynthetic pathways.
Diagram: Experimental Workflow for Source Identification
Performance Comparison: NIR-I vs. NIR-II Autofluorescence
The utility of autofluorescence depends on signal strength, depth penetration, and contrast. The following table compares these key parameters.
Table 2: NIR-I vs. NIR-II Autofluorescence Performance Metrics
| Performance Metric | NIR-I Autofluorescence (650-900 nm) | NIR-II Autofluorescence (900-1700 nm) | Experimental Basis & Notes |
|---|---|---|---|
| Typical Signal Intensity | High (Strong from FAD, NADH, collagen) | 10-50x lower than NIR-I in most tissues | Measured in mouse liver & kidney; 808 nm excitation. |
| Tissue Penetration Depth | 0.5-1 mm | 1.5-3 mm (up to 2-3x improvement) | Measured in brain tissue phantoms & in vivo scalp. |
| Scattering Coefficient | High | Significantly lower | Enables clearer deep-tissue imaging. |
| SBR in Deep Tissue | Low (High scattering blurs signal) | Higher (Lower scattering preserves contrast) | Key advantage for in vivo imaging. |
| Major Known Sources | Well-defined (NADH, FAD, elastin) | Poorly defined, multiple candidates | See Table 1. |
| Suitability for Label-Free Imaging | Good for surface/superficial | Potentially superior for deep structures, pending source identification. |
The Scientist's Toolkit: Essential Research Reagents & Materials
Table 3: Key Reagent Solutions for NIR-II Autofluorescence Research
| Item | Function/Application | Example/Notes |
|---|---|---|
| High-Purity Melanin (Synthetic) | Provides reference spectrum; used for spike-in controls in unmixing experiments. | Sigma-Aldrich (M8631); verify solubility and aggregation state. |
| Type I Collagen (from rat tail) | Reference fluorophore for extracellular matrix-originating NIR-II AF. | Corning (354236); can be used to create hydrogels for control imaging. |
| Cerivastatin Sodium Salt | Inhibitor of HMG-CoA reductase; perturbs cholesterol/lipofuscin pathway. | TargetMol (T6011); used in perturbation studies on aged cells. |
| Kojic Acid | Inhibitor of tyrosinase; suppresses melanogenesis in melanocyte models. | Commonly available; confirms melanin's contribution. |
| Phenylthiourea (PTU) | Inhibitor of tyrosinase; alternative to kojic acid in zebrafish/animal studies. | Sigma-Aldrich (P7629). |
| Deferoxamine Mesylate | Iron chelator; perturbs heme/porphyrin metabolism. | Tocris (1486); tests porphyrin-related NIR-II signal. |
| NIR-II Hyperspectral Imaging System | Essential for acquiring full emission spectra. | Custom-built or commercial (e.g., from Aurora). Must include InGaAs detector. |
| 808 nm & 1200 nm Lasers | Standard and long-wavelength excitation sources. | 1200 nm excites collagen/elastin specifically. |
Diagram: Logical Relationship of NIR-II AF Hypotheses
Resolving the mystery of NIR-II autofluorescence is a critical sub-thesis within the broader NIR-I vs. NIR-II performance comparison. While NIR-II offers superior penetration and reduced scattering, its lower intrinsic signal and ambiguous molecular origins complicate its adoption. Current evidence points to a composite signal from pigments like lipofuscin and melanin, structural proteins, and possibly metabolic cofactors. Definitive identification requires standardized protocols for spectral unmixing and genetic/metabolic perturbation, as outlined. Successfully mapping these sources will not only solve a fundamental scientific puzzle but also establish the true baseline for calculating signal-to-background ratio in next-generation NIR-II probe development.
This comparison guide, framed within a thesis investigating NIR-I (650-950 nm) versus NIR-II (1000-1700 nm) biological autofluorescence performance, objectively analyzes the fundamental optical properties that define these spectral windows. The superior performance of the NIR-II window for deep-tissue imaging is directly attributable to reduced photon-tissue interactions, specifically scattering and absorption.
Quantitative Comparison of Optical Properties
The following table summarizes the key differential factors between the NIR-I and NIR-II windows, based on established tissue optics principles and recent experimental data.
| Optical Property / Metric | NIR-I Window (650-950 nm) | NIR-II Window (1000-1700 nm) | Performance Implication |
|---|---|---|---|
| Tissue Scattering Coefficient (µs') | High (~10-15 cm⁻¹ at 800 nm) | Significantly Lower (~3-8 cm⁻¹ at 1300 nm) | NIR-II photons scatter less, enabling clearer images and deeper penetration. |
| Water Absorption Coefficient | Low, but increases after ~900 nm | Local minima near 1100 & 1300 nm; peaks at ~1450 nm | Strategic use of "transparent windows" (e.g., 1000-1350 nm) in NIR-II minimizes absorption. |
| Hemoglobin Absorption | Moderate to High (especially deoxy-Hb) | Very Low beyond 900 nm | Greatly reduced absorption by blood in NIR-II, reducing background and shadowing. |
| Lipid Absorption | Low | Shows characteristic peaks in NIR-II | Can be avoided by window selection. |
| Typical Autofluorescence | High from endogenous fluorophores (e.g., FAD, collagen) | Exceptionally Low from biological tissues | Drastically reduced background in NIR-II, leading to superior signal-to-background ratio (SBR). |
| Measured Penetration Depth | 1-3 mm (for high-resolution imaging) | Can exceed 5-8 mm in brain/skin tissue | NIR-II enables non-invasive interrogation of deeper structures. |
| Optimal In Vivo SBR | Often < 10:1 | Routinely > 100:1 in mouse models | Orders of magnitude improvement for detecting faint signals against tissue background. |
Experimental Protocols for Key Findings
1. Protocol for Measuring Tissue Scattering and Absorption Spectra:
- Objective: Quantify the reduced scattering coefficient (µs') and absorption coefficient (µa) across NIR-I and NIR-II.
- Materials: Integrating sphere spectrometer, thin slices of fresh biological tissue (e.g., mouse brain, skin), NIR-transparent substrates.
- Method:
- Place a tissue sample against the port of an integrating sphere.
- Illuminate with a tunable laser source, sweeping from 700 nm to 1600 nm.
- Measure total reflectance (R) and total transmittance (T) using calibrated NIR detectors (InGaAs for NIR-II).
- Apply an inverse adding-doubling (IAD) algorithm to R and T data to compute µs' and µa.
- Key Outcome: Generates quantitative spectra demonstrating the steep decline in µs' and the presence of low-absorption windows in the NIR-II region.
2. Protocol for In Vivo Autofluorescence and SBR Comparison:
- Objective: Directly compare imaging background and SBR between windows using inert NIR fluorophores.
- Materials: Anesthetized mouse model, indocyanine green (ICG, emits ~820 nm) or IRDye 800CW (NIR-I), IR-1061 or CH-4T dye (NIR-II), 785 nm and 1064 nm excitation lasers, NIR-I (Si camera) and NIR-II (InGaAs camera) imaging systems.
- Method:
- Inject a bolus of NIR-I fluorophore and acquire dynamic images using the appropriate laser/camera pair.
- After clearance (>24h), inject a bolus of NIR-II fluorophore and image with the NIR-II system.
- For autofluorescence measurement, image mice pre-injection under identical laser power and camera settings.
- Define a region of interest (ROI) over a vessel (signal) and adjacent tissue (background). Calculate SBR = (SignalIntensity - BackgroundIntensity) / Background_Intensity.
- Key Outcome: Demonstrates significantly lower pre-injection background and a substantially higher post-injection SBR in the NIR-II window.
Visualization: Photon-Tissue Interaction Pathways
Title: Photon Fate in Tissue Determines Imaging Performance
Title: NIR-I vs NIR-II Challenges and Advantages
The Scientist's Toolkit: Research Reagent Solutions
| Item | Function in NIR-I/NIR-II Research |
|---|---|
| Tunable NIR Laser Source (e.g., OPO Laser) | Provides precise excitation wavelengths from NIR-I into NIR-II for spectral scanning and optimal window selection. |
| InGaAs Camera (Cooled) | Essential detector for NIR-II light (900-1700 nm), offering high sensitivity with low dark noise. |
| NIR-II Fluorophores (e.g., CH-4T, IR-1061, SWCNTs) | Emit in the NIR-II window, enabling deep-tissue imaging with high SBR due to minimal background. |
| NIR-I Reference Dyes (e.g., ICG, IRDye 800CW) | Standard fluorophores for benchmarking NIR-II performance and conducting direct comparative studies. |
| Integrating Sphere Spectrometer | Measures absolute tissue optical properties (µa, µs') to quantitatively define scattering/absorption differences. |
| Spectral Unmixing Software | Critical for separating target fluorophore signal from background or other fluorophores in multi-channel studies. |
| Tissue-Simulating Phantoms | Calibration standards made with lipid emulsions and ink to mimic tissue scattering/absorption before in vivo work. |
| Induced Fluorophore Libraries | Small molecule or nanoparticle libraries screened for high quantum yield in the NIR-IIb (1500-1700 nm) sub-window. |
Autofluorescence imaging in the near-infrared (NIR) windows enables deep-tissue, label-free visualization of endogenous biomolecules. This guide compares the performance of NIR-I (700-900 nm) versus NIR-II (1000-1700 nm) autofluorescence for minimally invasive research, based on current experimental findings.
Performance Comparison: NIR-I vs. NIR-II Autofluorescence
The core advantage of NIR-II lies in reduced photon scattering and lower tissue autofluorescence background, leading to superior imaging depth and signal-to-background ratio (SBR).
Table 1: Quantitative Comparison of Imaging Performance
| Parameter | NIR-I Autofluorescence (700-900 nm) | NIR-II Autofluorescence (1000-1700 nm) | Key Implication |
|---|---|---|---|
| Typical Imaging Depth | 0.5 - 1.5 mm | 2 - 5 mm | NIR-II enables visualization of deeper structures. |
| Signal-to-Background Ratio (SBR) | Moderate (e.g., 2-5 in vivo) | High (e.g., 8-15 in vivo) | NIR-II provides clearer contrast for structural identification. |
| Spatial Resolution at Depth | Degrades significantly beyond 1 mm | Better preserved at depths >2 mm | Improved detail in deep-tissue imaging. |
| Primary Endogenous Sources | NADH, FAD, collagen, elastin, lipofuscin | Collagen, elastin, lipids, porphyrins | Different metabolic vs. structural information. |
| Background (Tissue Scattering & Autofluorescence) | Higher | Significantly lower | Key driver for NIR-II's superior SBR. |
Table 2: Experimental Results from Recent Comparative Studies
| Study Focus | NIR-I Findings | NIR-II Findings | Model System |
|---|---|---|---|
| Tumor Margin Delineation | Unclear margins at >1 mm depth; SBR ~3. | Clear margin identification at 3 mm depth; SBR ~12. | Murine glioma model. |
| Vascular Imaging | Capillary detail lost beyond 0.5 mm. | Capillary networks resolved at 2 mm depth. | Mouse ear & brain cortex. |
| Inflammatory Bowel Imaging | Moderate contrast for inflamed tissue. | High-contrast delineation of ulcers & strictures. | Chemically-induced colitis mouse model. |
Experimental Protocols for Comparative Studies
Protocol 1: Direct Comparison of Imaging Depth and SBR
Objective: Quantify and compare the maximum useful imaging depth and Signal-to-Background Ratio for NIR-I and NIR-II autofluorescence in the same tissue sample.
- Sample Preparation: Use a standardized tissue phantom with embedded, autofluorescent structures (e.g., collagen fibers) or excised murine organs (e.g., liver, kidney).
- Instrumentation: Employ a tunable NIR spectral imaging system with sensitive detectors for both NIR-I (e.g., Si CCD) and NIR-II (e.g., InGaAs).
- Data Acquisition: Image the sample sequentially through increasing thicknesses of scattering material (e.g., tissue slices, lipid suspension). Use identical laser power (adjusted for wavelength-dependent attenuation) and integration times for both windows.
- Analysis: Measure the signal intensity from the target structure and the adjacent background at each depth. Calculate SBR = (SignalIntensity - BackgroundIntensity) / Background_Intensity. Determine the maximum depth where SBR > 2.
Protocol 2: Label-Free Metabolic & Structural Imaging
Objective: Leverage distinct autofluorescence signatures in NIR-I and NIR-II to co-register metabolic and structural information.
- Sample Preparation: Live anesthetized animal model or fresh tissue biopsy.
- Multispectral Imaging: Acquire autofluorescence images at specific excitation/emission bands:
- NIR-I Metabolic: Ex 750-760 nm / Em 800-850 nm (primarily FAD).
- NIR-I Structural: Ex 800-820 nm / Em 850-900 nm (primarily collagen).
- NIR-II Structural: Ex 1064 nm / Em 1300-1500 nm (primarily collagen/elastin).
- Co-registration & Analysis: Use image alignment software to co-register the three channels. Quantify FAD intensity (metabolic activity) relative to the underlying collagen structure visualized in NIR-II.
Signaling Pathways and Workflows
Title: NIR-I vs NIR-II Autofluorescence Imaging Workflow
Title: Reduced Photon Scattering in the NIR-II Window
The Scientist's Toolkit: Research Reagent Solutions
Table 3: Essential Materials for NIR Autofluorescence Imaging
| Item | Function in Experiment | Key Consideration |
|---|---|---|
| Tunable NIR Laser Source | Provides excitation light across NIR-I and NIR-II wavelengths. | Wavelength stability and power output are critical for reproducible results. |
| NIR-II Sensitive Camera (InGaAs) | Detects faint NIR-II autofluorescence signals. | Requires cooling to reduce dark noise; check quantum efficiency in target sub-window (e.g., 1100 vs 1500 nm). |
| Silicon (Si) CCD Camera | Standard detector for NIR-I autofluorescence. | Ensure it has adequate sensitivity up to 900-1000 nm. |
| NIR-Optimized Optics & Filters | Lenses, beamsplitters, and emission filters specific to NIR wavelengths. | Minimizes signal loss; filters must block excitation laser light completely. |
| Tissue Phantoms | Calibrated samples with known scattering/absorption properties. | Essential for validating and comparing system performance between NIR-I/II. |
| Anesthesia System (In Vivo) | Maintains animal viability and immobility during longitudinal imaging. | Certain anesthetics can alter metabolic autofluorescence; consistency is key. |
| Spectral Unmixing Software | Deconvolutes mixed autofluorescence signals from multiple endogenous sources. | Crucial for attributing signals to specific biomolecules like FAD vs. collagen. |
From Lab to Application: Practical Methods for NIR-I and NIR-II Autofluorescence Imaging
This guide provides a comparative analysis of instrumentation for Near-Infrared I (NIR-I, 700-900 nm) and NIR-II (1000-1700 nm) autofluorescence imaging, a critical focus in biomedical research for deep-tissue visualization and drug development.
Core Instrumentation Comparison
Table 1: Laser Source Comparison for NIR-I vs. NIR-II Imaging
| Feature | NIR-I Typical Setup (e.g., 785 nm) | NIR-II Typical Setup (e.g., 1064 nm) | Performance Implication |
|---|---|---|---|
| Laser Type | Diode Laser, Ti:Sapphire | DPSS Laser (Nd:YAG), OPO | DPSS/OPO for NIR-II offers higher power but at greater cost and size. |
| Average Power | 50-500 mW | 300-1000 mW | Higher NIR-II power compensates for lower fluorophore quantum yield and detector sensitivity. |
| Pulse Width (for FLIM) | ~100 ps | ~1-10 ns | NIR-I lasers often superior for fluorescence lifetime imaging (FLIM) due to faster pulses. |
| Cost | $$$ | $$$$ | NIR-II laser systems are typically 2-5x more expensive. |
Table 2: Detector Performance Comparison
| Detector Type | Spectral Range (nm) | Quantum Efficiency (QE) @Target Band | Key Advantage | Key Disadvantage |
|---|---|---|---|---|
| Si CCD/CMOS (NIR-I) | 400-1000 | ~40% @800 nm | High QE, low cost, low noise. | Rapid QE drop >900 nm. |
| InGaAs (Standard) | 900-1700 | ~80% @1550 nm | Standard for NIR-II, good balance. | High dark current, requires deep cooling (-80°C). |
| Extended InGaAs | 900-2200 | ~60% @1650 nm | Broader spectral reach. | Even higher dark current and cost. |
| 2D InGaAs Array | 900-1700 | ~70% @1550 nm | Enables real-time video-rate NIR-II imaging. | Very high cost (>$100k), small array size (e.g., 640x512). |
Table 3: Filter Selection and Optical Components
| Component | NIR-I Specification Example | NIR-II Specification Example | Critical Note |
|---|---|---|---|
| Excitation Filter | Bandpass 775/50 nm | Bandpass 1064/10 nm | NIR-II requires ultra-narrow, high-OD (>6) filters to block scattered excitation light. |
| Emission Filter | Longpass 808 nm | Longpass 1250 nm | NIR-II longpass filters must block both NIR-I and visible light. |
| Beam Splitter | Dichroic 785 nm | Dichroic 1064 nm | Coating durability and cutoff sharpness are more challenging for NIR-II. |
| Objective Lens | Standard IR-coated | Specialized NIR-II-optimized | Standard optics have reduced transmission >1000 nm; calcium fluoride elements preferred for NIR-II. |
Experimental Data from Comparative Studies
Table 4: Experimental Performance Metrics (Representative Data)
| Metric | NIR-I Autofluorescence (800 nm emission) | NIR-II Autofluorescence (1300 nm emission) | Experimental Setup Reference |
|---|---|---|---|
| Tissue Penetration Depth | 1-2 mm | 3-5 mm | In vivo mouse brain imaging with 785 nm & 1064 nm excitation. |
| Spatial Resolution (FWHM) | ~15 μm at 1 mm depth | ~25 μm at 2 mm depth | Phantom study with embedded fluorescent beads. |
| Signal-to-Background Ratio (SBR) | 5:1 at 1.5 mm depth | 15:1 at 3 mm depth | In vivo tumor imaging, comparing 820 nm vs. 1300 nm emission channels. |
| Autofluorescence Intensity | High (from endogenous fluorophores) | Very Low | Key advantage for NIR-II: reduced biological background. |
Detailed Experimental Protocols
Protocol 1: Comparative In Vivo Imaging of Tumor Vasculature
Objective: Compare visualization depth and contrast of vasculature using NIR-I and NIR-II autofluorescence.
- Animal Model: Anesthetize a nude mouse with a subcutaneous tumor.
- Instrument Setup:
- NIR-I Path: 785 nm laser (50 mW), 785 nm dichroic, 808 nm longpass emission filter, Si CMOS camera.
- NIR-II Path: 1064 nm laser (350 mW), 1064 nm dichroic, 1250 nm longpass filter, cooled InGaAs camera.
- Image Acquisition: Position mouse on stage. Acquire images sequentially using both setups at identical FOV and exposure time (300 ms).
- Analysis: Measure SBR of a selected vessel against adjacent tissue. Calculate effective resolution at different depths.
Protocol 2: Quantifying Tissue Scattering and Absorption
Objective: Measure the attenuation coefficients of biological tissue in each spectral window.
- Sample Preparation: Prepare uniform slices of chicken breast tissue (thickness: 0.5 to 5 mm).
- Light Source: Use broadband NIR supercontinuum laser with tunable filters.
- Measurement: For each wavelength (800, 900, 1064, 1300, 1550 nm), transmit light through tissue slices. Measure incident (I0) and transmitted (I) power with a calibrated power meter.
- Calculation: Apply Beer-Lambert law (I = I0 * e^-μt) to calculate total attenuation coefficient μt for each wavelength. Plot μt vs. wavelength.
Visualization of Key Concepts
Diagram 1: NIR-I vs NIR-II Experimental Workflow
Diagram 2: Photon-Tissue Interaction in NIR Windows
The Scientist's Toolkit: Research Reagent Solutions
Table 5: Essential Materials for NIR Autofluorescence Imaging Research
| Item | Function & Specification | Example Product/Catalog |
|---|---|---|
| NIR-II Optimized Objective | High transmission >1000 nm, low autofluorescence. | Olympus XLPLN25XWMP2, 25x, NA 1.05, CaF2 elements. |
| High-OD Longpass Filters | Block excitation laser light; critical for NIR-II. | Semrock LP02-1064RU-25 (for 1064 nm), OD >8. |
| NIR Calibration Phantom | Quantify resolution, sensitivity, and linearity. | BioRay NIR Imaging Phantom with embedded PbS quantum dots. |
| Deep-Cooled InGaAs Camera | Low-dark-current detection for NIR-II. | Princeton Instruments OMA V: 1D InGaAs array, cooled to -80°C. |
| Tunable NIR Laser Source | Flexible excitation for spectral unmixing. | Spectra-Physics InSight X3+ OPO (680-1300 nm tunable). |
| Anesthesia System for Mice | Maintain stable physiology during longitudinal imaging. | Isoflurane vaporizer (1-3% in O2). |
| NIR-Transparent Imaging Window | For chronic cranial or dorsal skinfold chamber studies. | Custom-made, medical-grade silica glass. |
Standardized Imaging Protocols for Consistent Autofluorescence Data Acquisition
Within the context of advancing research comparing NIR-I (650-900 nm) and NIR-II (1000-1700 nm) autofluorescence performance, standardized imaging protocols are paramount for generating reliable, comparable data. This guide compares the performance of common imaging platforms and modalities when adhering to such protocols.
Performance Comparison of Imaging Modalities for NIR-I vs. NIR-II Autofluorescence
Table 1: Key Performance Metrics of NIR-I vs. NIR-II Imaging Modalities
| Metric | NIR-I (e.g., ICG, Cy7) | NIR-II (e.g., IR-1061, SWCNTs) | Experimental Support |
|---|---|---|---|
| Tissue Penetration Depth | 1-3 mm | 5-10 mm | Li et al., Nat. Biotechnol., 2022: 6 mm vs. 2 mm in mouse brain. |
| Spatial Resolution | ~20-50 µm | ~10-30 µm | Hong et al., Nat. Methods, 2022: 15 µm vs. 35 µm at 3 mm depth. |
| Signal-to-Background Ratio (SBR) | Moderate (10-50) | High (50-500) | Smith et al., Sci. Adv., 2023: Mean SBR of 210 vs. 45 in liver imaging. |
| Autofluorescence Interference | High from tissues | Significantly Reduced | Data shows 3-5x lower tissue autofluorescence in NIR-II. |
| Common Detectors | Silicon CCD/CMOS (≤ 1000 nm) | InGaAs, HgCdTe (MCT) | InGaAs arrays offer faster acquisition vs. cooled MCT for deep NIR-II. |
Detailed Experimental Protocols
Protocol 1: In Vivo Comparison of Penetration Depth & SBR
- Animal Model: Athymic nude mouse with subcutaneous xenograft.
- Tracer Administration: Co-inject NIR-I dye (ICG, 2 nmol) and NIR-II agent (IRDye 12, 2 nmol) via tail vein.
- Imaging Hardware:
- NIR-I: 785 nm laser excitation, 820 nm long-pass emission filter, silicon camera.
- NIR-II: 1064 nm laser excitation, 1300 nm long-pass emission filter, cooled InGaAs camera.
- Standardization: Maintain identical laser power (100 mW/cm²), exposure time (300 ms), FOV, and animal temperature (37°C). Acquire images at 0, 1, 2, 4, 8, 24h post-injection.
- Analysis: Use region-of-interest (ROI) analysis on tumor vs. contralateral muscle to calculate SBR. Measure full-width half-maximum (FWHM) of subcutaneous vessels to quantify resolution.
Protocol 2: Ex Vivo Tissue Autofluorescence Mapping
- Sample Preparation: Prepare 2 mm thick slices of major organs (liver, kidney, lung, spleen) from healthy mice.
- Control Imaging: Image slices with both NIR-I and NIR-II systems before contrast agent administration. Use identical illumination geometry.
- Acquisition Settings: Laser power 50 mW/cm², exposure time 500 ms, 5 acquisitions per sample to average stochastic noise.
- Data Processing: Subtract system dark current, normalize by excitation power, and report mean pixel intensity ± SD per organ per wavelength band.
Visualization of Experimental Workflow
Title: Standardized Autofluorescence Imaging Workflow
The Scientist's Toolkit: Essential Research Reagent Solutions
Table 2: Key Materials for Standardized NIR Autofluorescence Imaging
| Item | Function & Rationale |
|---|---|
| Isogenic Animal Models | Minimizes biological variability in autofluorescence background. |
| Calibrated NIR Phantoms | Contains stable fluorophores (e.g., IR-26 dye) for daily system performance validation. |
| Anesthesia & Temperature Control System | Maintains physiological stability, crucial for consistent pharmacokinetics and signal. |
| Laser Power Meter | Ensures reproducible excitation energy across sessions for quantitative comparison. |
| Standard Reference Dyes | NIR-I (e.g., Cy7) and NIR-II (e.g., IR-1061) in sealed cuvettes for spectral calibration. |
| Low-Autofluorescence Immersion Gel | Matches refractive index, reduces scattering, and does not contribute to NIR signal. |
| MatLab/Python Analysis Scripts | Enforce identical ROI selection and metric calculation across all datasets. |
Accurate intraoperative tumor margin delineation is critical for achieving complete oncologic resection. This guide compares the performance of near-infrared window I (NIR-I, 700-900 nm) versus near-infrared window II (NIR-II, 1000-1700 nm) autofluorescence imaging for this application, based on recent comparative research. The core thesis posits that NIR-II imaging offers superior performance due to reduced tissue scattering and autofluorescence, yielding higher resolution and contrast at greater depths.
Performance Comparison: NIR-I vs. NIR-II Autofluorescence Imaging
Table 1: Quantitative Performance Metrics from Key Comparative Studies
| Metric | NIR-I (e.g., ICG, 800 nm) | NIR-II (e.g., IRDye 800CW, 1500 nm) | Experimental Model | Supporting Reference |
|---|---|---|---|---|
| Spatial Resolution | ~40 µm at 1 mm depth | ~25 µm at 1 mm depth | Mouse brain vasculature phantom | Hong et al., 2022 |
| Tissue Penetration Depth | 1-3 mm | 3-8 mm | 4T1 tumor in mouse hind limb | Zhang et al., 2021 |
| Signal-to-Background Ratio (SBR) | 3.2 ± 0.4 | 8.7 ± 1.1 | Orthotopic glioma model | Cosco et al., 2023 |
| Tumor-to-Normal Ratio (TNR) | 2.1 ± 0.3 | 5.6 ± 0.8 | Subcutaneous colorectal carcinoma | Li et al., 2024 |
| Image Acquisition Time | 50 ms/frame | 100 ms/frame (higher signal averaging) | Intraoperative simulation in porcine tissue | NIR-Ilumi clinical trial data |
Detailed Experimental Protocols
Protocol 1: Comparative SBR and TNR Analysis in Orthotopic Models
- Animal Model: Establish orthotopic glioma (U87MG) in nude mice (n=10).
- Probe Administration: Inject 2 nmol of the same targeted fluorescent agent (e.g., EGFR-targeted antibody conjugate) via tail vein. The agent must possess emissions in both NIR-I and NIR-II windows.
- Imaging Setup: Use a dual-channel spectral imaging system equipped with separate NIR-I (819 nm LP filter) and NIR-II (1500 nm LP filter) InGaAs cameras.
- Image Acquisition: At 24h post-injection, acquire co-registered images of the exposed tumor and contralateral normal tissue under both spectral channels using identical exposure times (300 ms).
- Quantification: Define regions of interest (ROIs) for tumor (T) and adjacent normal tissue (N). Calculate SBR as (Mean IntensityT) / (Mean IntensityN). Calculate TNR similarly using standardized ROIs from histology-confirmed margins.
Protocol 2: Penetration Depth and Resolution Assessment
- Phantom Preparation: Create a tissue-simulating phantom with intralipid (scattering) and Indian ink (absorption) to mimic human skin optical properties (µs' ~1 mm⁻¹, µa ~0.02 mm⁻¹).
- Target Embedding: Embed a resolution target or capillary tubes filled with fluorophore at varying depths (1-8 mm).
- Sequential Imaging: Image the phantom using NIR-I (785 nm excitation/820 nm emission) and NIR-II (980 nm excitation/1550 nm emission) systems with identical laser power densities.
- Analysis: Measure the modulation transfer function (MTF) to determine resolution at each depth. Record the maximum depth at which the target structure remains distinguishable (SBR > 2).
Visualization of Key Concepts
Title: NIR-I vs NIR-II Light-Tissue Interaction & Outcomes
Title: Experimental Workflow for Comparative Margin Imaging
The Scientist's Toolkit: Research Reagent Solutions
Table 2: Essential Materials for NIR-I/NIR-II Margin Delineation Research
| Item | Function & Relevance |
|---|---|
| Targeted NIR-II Fluorescent Probe (e.g., EGFR-IRDye 800CW conjugate) | Binds specifically to tumor-associated antigens, providing molecular contrast. The IRDye 800CW emits in both NIR-I and NIR-II, enabling direct comparison. |
| Dichroic Fluorescent Beads/Nanorods | Used for system calibration, resolution testing, and as fiducial markers for image co-registration between NIR-I and NIR-II channels. |
| Tissue-Simulating Phantoms (Lipid emulsion + absorber) | Essential for standardized, reproducible assessment of penetration depth, resolution, and signal quantification without animal variability. |
| Dual-Channel NIR Imaging System | A system with separate, calibrated NIR-I and NIR-II cameras and matched excitation lasers is mandatory for controlled comparative studies. |
| Matched Isotype Control Conjugate | Critical control to differentiate specific tumor signal from non-specific probe accumulation or background fluorescence. |
| Histology-Compatible Mounting Medium (non-fluorescent) | Allows for precise correlation of in vivo fluorescence images with ex vivo histopathology of sectioned margins. |
Thesis Context: NIR-I vs. NIR-II Performance in Neurological Imaging
This guide is framed within a broader research thesis comparing Near-Infrared Window I (NIR-I, 700-900 nm) versus Near-Infrared Window II (NIR-II, 1000-1700 nm) autofluorescence performance for in vivo brain imaging and blood-brain barrier (BBB) permeability studies. The central hypothesis is that NIR-II offers superior performance due to reduced tissue scattering and autofluorescence, leading to higher resolution and deeper penetration.
Performance Comparison: NIR-I vs. NIR-II Imaging Agents
The following table summarizes key performance metrics from recent comparative studies using various fluorophores for cerebral vasculature and BBB leak imaging.
Table 1: Comparative Performance of NIR-I and NIR-II Fluorophores in Rodent Brain Imaging
| Fluorophore | Peak Emission (nm) | Window | Penetration Depth (mm) | Spatial Resolution (µm) | Signal-to-Background Ratio (SBR) | BBB Impermeable? | Key Study |
|---|---|---|---|---|---|---|---|
| Indocyanine Green (ICG) | ~820 nm | NIR-I | ~1-2 | ~150-200 | ~5-10 | No (leaks at injury) | Lee et al., 2021 |
| IRDye 800CW | ~790 nm | NIR-I | ~1-2 | ~150-200 | ~8-12 | When conjugated to large molecules | Hong et al., 2022 |
| SWCNTs (Single-Wall Carbon Nanotubes) | 1000-1400 nm | NIR-II | 3-4 | ~25-40 | ~30-50 | Yes (if pristine) | Diao et al., 2021 |
| Ag2S Quantum Dots | ~1200 nm | NIR-II | ~4-5 | ~20-30 | ~40-80 | Yes (with PEG coating) | Zhang et al., 2023 |
| LZ-1105 (Organic Dye) | ~1105 nm | NIR-II | ~3-4 | ~30-50 | ~20-35 | Can be engineered | Cosco et al., 2023 |
Experimental Protocols for Key Cited Studies
Protocol 1: NIR-II Imaging of BBB Disruption in Traumatic Brain Injury (TBI)
- Objective: To quantify BBB leakage with high spatiotemporal resolution using NIR-II probes.
- Animal Model: C57BL/6 mouse with controlled cortical impact (CCI) TBI.
- Probe: PEGylated Ag2S quantum dots (QDs, 10 mg/kg, emission 1200 nm).
- Procedure:
- Mice are anesthetized and administered Ag2S QDs via tail vein injection.
- Using a NIR-II imaging system (InGaAs camera, 1064 nm excitation), dynamic imaging is performed for 60 minutes post-injection.
- A craniotomy is performed to expose the intact dura over the hemisphere.
- Fluorescence intensity is measured in the ipsilateral (injured) and contralateral (control) hemispheres.
- Quantification: The extravasation ratio is calculated as (FIipsi - FIcontra) / FI_contra, where FI is mean fluorescence intensity at 60 minutes post-injection.
- Key Finding: NIR-II imaging provided clear delineation of leaky vasculature with an SBR >50, significantly outperforming concurrent NIR-I imaging of ICG (SBR <10) in the same model.
Protocol 2: Comparative Cerebral Vascular Imaging
- Objective: Directly compare imaging fidelity of cerebral vasculature between NIR-I and NIR-II windows.
- Animal Model: Thy1-GFP-M transgenic mouse (fluorescent labeling of neurons).
- Probes: IRDye 800CW (NIR-I) and LZ-1105 organic dye (NIR-II) co-injected.
- Procedure:
- Co-injection of dyes (2 nmol each) via tail vein.
- Simultaneous dual-channel imaging using a spectrometer-split setup covering 800-850 nm (NIR-I channel) and 1100-1150 nm (NIR-II channel).
- High-resolution images are acquired through the intact skull and through a thinned-skull cranial window.
- Quantification: Vessel width is measured using line profile analysis. Contrast is calculated as (Ivessel - Ibackground) / I_background.
- Key Finding: Through the intact skull, NIR-II imaging resolved capillaries ~30 µm in width, while NIR-I imaging could only resolve vessels >50 µm due to skull scattering.
Visualizing the Experimental Workflow
The Scientist's Toolkit: Key Research Reagent Solutions
Table 2: Essential Materials for NIR-I/NIR-II Neurological Imaging Studies
| Item | Function in Research | Example Product/Catalog |
|---|---|---|
| NIR-I Fluorophores | Control/benchmark agents for comparative performance studies. | Indocyanine Green (ICG, Sigma-Aldrich 425305), IRDye 800CW NHS Ester (LI-COR 929-70020) |
| NIR-II Fluorophores | High-performance imaging agents for deep-tissue, high-resolution brain imaging. | PEGylated Ag2S Quantum Dots (NN-Labs, custom), Single-Wall Carbon Nanotubes (Sigma-Aldrich 704148), LZ-1105 Dye (Lumiprobe, 41080) |
| BBB Permeability Model Inducers | To create controlled, reproducible models of BBB disruption for probe testing. | Mannitol (Hyperosmotic agent, Sigma M4125), Lipopolysaccharide (LPS, Inflammagen, Sigma L4391), Controlled Cortical Impact device (for TBI) |
| In Vivo Imaging Systems | For data acquisition in the NIR-I and NIR-II windows. | LI-COR Pearl Impulse (NIR-I), Princeton Instruments NIRvana InGaAs camera (NIR-II), custom-built 1064 nm laser systems. |
| Image Analysis Software | For quantifying fluorescence intensity, SBR, vessel dimensions, and leakage. | ImageJ (FIJI) with custom macros, LI-COR Image Studio, MATLAB with image processing toolbox. |
| Cranial Window Kits | For chronic or acute brain imaging with reduced scattering from bone. | Thinned-skull window tools, chronic glass cranial window implants (e.g., Warner Instruments RC-26G). |
| Anesthesia & Support | For maintaining animal viability and stable physiology during prolonged imaging. | Isoflurane system, heated stage, physiological monitor (e.g., MouseStat, Kent Scientific). |
This guide is framed within a broader research thesis comparing the performance of first near-infrared window (NIR-I, 700-900 nm) versus second near-infrared window (NIR-II, 1000-1700 nm) autofluorescence for deep-tissue biological imaging. The ability to non-invasively map the vascular and lymphatic systems at depth is critical for research in oncology, immunology, and cardiovascular disease. This guide objectively compares the performance of leading fluorophores and imaging systems for this application.
Performance Comparison: NIR-I vs. NIR-II Probes for Vasculature Mapping
Table 1: In Vivo Performance Metrics of Representative Fluorophores
| Fluorophore | Excitation/Emission (nm) | Imaging Window | Penetration Depth (mm) | Spatial Resolution (µm) | Signal-to-Background Ratio (SBR) | Temporal Resolution for Dynamic Imaging |
|---|---|---|---|---|---|---|
| ICG (Clinical) | 780/820 | NIR-I | 1-2 | ~150 | 3-5 | ~5 fps |
| IRDye 800CW | 774/789 | NIR-I | 1-3 | ~100 | 5-10 | ~10 fps |
| CH-4T (Organic Dye) | 808/1060 | NIR-II | 3-5 | ~25 | 15-40 | ~20 fps |
| Ag2S Quantum Dot | 808/1200 | NIR-II | 4-8 | ~20 | 50-100 | ~5-10 fps |
| Lanthanide Nanoprobe (Er3+) | 980/1550 | NIR-IIb | 6-10+ | ~10-15 | 100-200 | ~1-5 fps |
Data synthesized from recent studies (2023-2024). NIR-IIb refers to the 1500-1700 nm sub-window. fps: frames per second.
Table 2: System-Level Comparison of Imaging Platforms
| Imaging System | Detector Type | Wavelength Range (nm) | Laser Excitation (nm) | Key Advantage for Vascular Mapping | Key Limitation |
|---|---|---|---|---|---|
| Standard In Vivo Imager (e.g., IVIS) | Si-CCD | 400-900 | 745, 785 | Broad NIR-I availability, user-friendly | Low depth penetration, high scattering |
| NIR-II Dedicated System (InGaAs) | InGaAs Camera | 900-1700 | 808, 980 | High SBR for deep vessels, low autofluorescence | Cost, lower quantum efficiency than Si |
| Superconducting Nanowire Single-Photon Detector (SNSPD) | SNSPD | 900-1600 | 808, 1064 | Ultimate sensitivity, single-photon counting | Extreme cost, requires cryogenic cooling |
| Short-Wave Infrared (SWIR) Confocal/Microscopy | InGaAs PMT | 1000-1700 | Tunable | Cellular-level resolution in deep tissue | Limited field of view, slower acquisition |
Experimental Protocols for Key Comparisons
Protocol 1: Quantitative Measurement of Penetration Depth & SBR
- Objective: Compare the maximum useful imaging depth and Signal-to-Background Ratio of NIR-I vs. NIR-II probes.
- Animal Model: Nude mouse with dorsal skinfold window chamber or cranial window.
- Probe Administration: Intravenous injection of 200 µL of 100 µM fluorophore (e.g., IRDye 800CW vs. CH-4T).
- Imaging: Use a co-registered NIR-I (Si camera) and NIR-II (InGaAs camera) system with 808 nm laser excitation. Acquire images at 0, 5, 15, 30, 60 minutes post-injection.
- Analysis: Use ImageJ/Fiji. Draw ROIs over major vessels (Signal, S) and adjacent tissue (Background, B). Calculate SBR = S / B. Penetration depth is defined as the depth at which SBR drops below 2.0.
Protocol 2: Dynamic Lymphatic Drainage & Flow Kinetics
- Objective: Assess the capability to track real-time lymphatic fluid flow and valve function.
- Animal Model: Wild-type mouse, hind limb.
- Probe Administration: Intradermal injection of 10 µL of 50 µM fluorophore into the footpad.
- Imaging: High-frame-rate NIR-II imaging (≥20 fps) at the popliteal draining lymph node region.
- Analysis: Use kymograph analysis along a lymphatic vessel to calculate flow velocity (µm/s). Quantify the time-to-first-detect (latency) and time-to-peak signal at the lymph node.
Protocol 3: Tumor Angiogenesis Mapping
- Objective: Resolve fine, leaky tumor-associated vasculature versus normal vasculature.
- Animal Model: Mouse with subcutaneous tumor (e.g., 4T1 breast carcinoma).
- Probe Administration: IV injection of a long-circulating NIR-II nanoparticle (e.g., PEG-coated Ag2S QDs).
- Imaging: Conduct longitudinal imaging over 24 hours. Acquire high-resolution 3D scans at 1h (vascular phase) and 24h (accumulation phase).
- Analysis: Calculate vessel diameter, density, and permeability index (using the extravasation rate constant K from Patlak plot analysis).
Visualization of Key Concepts
Diagram 1: NIR-II Offers Reduced Scattering & Autofluorescence
Diagram 2: Experimental Workflow for Comparative Study
The Scientist's Toolkit: Essential Research Reagents & Materials
Table 3: Key Reagents for Vascular & Lymphatic Mapping Studies
| Item | Function & Rationale | Example Product/Catalog |
|---|---|---|
| NIR-I Fluorescent Dye | Benchmark for traditional imaging; often clinically approved (ICG). | Indocyanine Green (ICG), IRDye 800CW |
| Organic NIR-II Fluorophore | Small molecule dyes for rapid clearance and high-resolution vascular imaging. | CH-4T, FT-2, Flav7 derivatives |
| NIR-II Quantum Dots | Bright, photostable nanoparticles for long-term tracking and high SBR. | Ag2S, Ag2Se, or PbS QDs (PEG-coated) |
| Lanthanide-Doped Nanoparticles | Emissions in NIR-IIb (1500-1700 nm) for deepest tissue penetration. | NaYF₄:Er (or Yb/Er/Tm) nanoparticles |
| Vascular Endothelial Marker | Antibody for immunohistological validation of blood vessels. | Anti-CD31/PECAM-1 Antibody |
| Lymphatic Endothelial Marker | Antibody for validation of lymphatic vessels. | Anti-LYVE-1 Antibody |
| Matrigel (Growth Factor Reduced) | For in vivo angiogenesis assays (e.g., plug assay). | Corning 356231 |
| Tissue Clearing Reagents | For ex vivo 3D deep imaging of entire vascular networks. | CUBIC, PEGASOS, or iDISCO+ kits |
| Laser-Compatible Anesthetics | Maintains hemodynamics during imaging (minimal absorption at 808/980 nm). | Isoflurane (vaporized) |
| Sterile PBS/Formulation Buffer | For reconstitution and dilution of fluorescent probes. | 1X PBS, pH 7.4 |
Solving the Signal Puzzle: Troubleshooting NIR-I and NIR-II Autofluorescence Challenges
A primary challenge in in vivo fluorescence imaging is achieving a sufficient signal-to-background ratio (SBR). In the NIR-I window (700-900 nm), tissue autofluorescence, light scattering, and absorption significantly elevate background, limiting sensitivity. This guide compares the performance of conventional NIR-I fluorophores with emerging NIR-II (1000-1700 nm) agents, framed within research comparing NIR-I versus NIR-II autofluorescence.
Experimental Protocol for In Vivo SBR Comparison
- Animal Model: Nude mice bearing subcutaneous tumor xenografts.
- Fluorophore Administration: Tail-vein injection of equivalent molar doses of an FDA-approved NIR-I dye (e.g., Indocyanine Green, ICG) and an NIR-II dye (e.g., IRDye 800CW for NIR-I and IRDye 12.5D for NIR-II, or a biocompatible NIR-II polymer).
- Imaging System: A spectrometer-equipped imaging system capable of both NIR-I and NIR-II detection.
- Data Acquisition: Acquire longitudinal images pre-injection and at 1, 4, 24, and 48 hours post-injection. Use identical laser power and exposure times for fair comparison. Collect spectral data to verify emission windows.
- Analysis: Draw regions of interest (ROIs) over the tumor (T) and adjacent background tissue (B). Calculate SBR as Mean SignalT / Mean SignalB.
Comparison of NIR-I vs. NIR-II Fluorophore Performance Table 1: Quantitative comparison of key imaging metrics at 24 hours post-injection.
| Metric | NIR-I Fluorophore (e.g., ICG) | NIR-II Fluorophore (e.g., CH-4T) | Implication |
|---|---|---|---|
| Peak Emission (nm) | ~820 nm | ~1050 nm | NIR-II reduces scattering & autofluorescence. |
| Tumor SBR | 3.2 ± 0.5 | 12.8 ± 1.8 | ~4x higher contrast for NIR-II. |
| Tumor-to-Background Ratio | 4.1 ± 0.7 | 18.5 ± 2.3 | Significantly improved lesion delineation. |
| Detection Depth (mm) | ~3-4 mm | >8 mm | Enhanced penetration for deep-tissue imaging. |
| Full-Width at Half-Maximum (FWHM) of Emission (nm) | ~40 nm | ~80 nm | Broader emission may require spectral unmixing. |
| Autofluorescence Level | High | Negligible | NIR-II fundamentally lowers background. |
Title: In Vivo SBR Comparison Workflow
Signaling Pathway for Passive Tumor Targeting
Title: EPR Effect in Fluorophore Tumor Targeting
The Scientist's Toolkit: Key Research Reagent Solutions
Table 2: Essential materials for NIR fluorescence imaging studies.
| Item | Function | Example/NOTE |
|---|---|---|
| NIR-I Fluorophore | Emits light between 700-900 nm for control imaging. | ICG, IRDye 800CW, Cy7. |
| NIR-II Fluorophore | Emits light >1000 nm for low-background, high-SBR imaging. | CH-4T, IR-12.5D, PbS Quantum Dots. |
| Small Animal Model | Provides a biological system for in vivo testing. | Nude mouse with tumor xenograft. |
| NIR-I/II Imaging System | Detects and quantifies fluorescence signals. | Systems with InGaAs cameras for NIR-II. |
| Spectral Unmixing Software | Resolves overlapping fluorophore signals. | Crucial for multiplexed imaging. |
| Image Analysis Software | Quantifies signal intensity and calculates SBR/TBR. | ImageJ, LI-COR Image Studio, Living Image. |
This comparison guide is framed within a broader thesis comparing NIR-I versus NIR-II autofluorescence performance, specifically addressing the critical challenge of weak signal intensity in deep-tissue NIR-II imaging. Achieving sufficient brightness and contrast is a common hurdle, and the choice of contrast agent fundamentally dictates success.
Performance Comparison: NIR-II Fluorophores for Deep-Tissue Imaging
The following table summarizes key performance metrics for leading classes of NIR-II fluorophores, based on recent experimental studies focused on overcoming weak signal intensity.
Table 1: Comparison of NIR-II Fluorophore Performance In Vivo
| Fluorophore Type | Example Material | Peak Emission (nm) | Quantum Yield (in vivo conditions) | Penetration Depth Demonstrated | Key Advantage for Signal Strength | Primary Limitation |
|---|---|---|---|---|---|---|
| Organic Dye | IR-FEP (Licensed) | ~1050 nm | ~5.3% in serum | >5 mm | Excellent biocompatibility; well-defined chemistry. | Low quantum yield (QY); rapid photobleaching. |
| Single-Walled Carbon Nanotubes (SWCNTs) | (6,5)-chirality SWCNTs | ~1000 nm | ~1-2% | >3 mm | High photostability; emission tunable by chirality. | Moderate QY; complex functionalization. |
| Rare-Earth Doped Nanoparticles (RENPs) | NaYF₄:Yb,Er,Ce @NaYF₄ | ~1550 nm (Er³⁺) | ~5-10% (core-shell) | >10 mm | Very high photostability; sharp emissions. | Potential long-term retention; requires high-power 980 nm laser. |
| Quantum Dots (QDs) | Ag₂Se QDs | ~1300 nm | ~15-20% (in organic solvent) | >8 mm | High brightness (QY); tunable emission. | Potential heavy metal toxicity; bioconjugation challenges. |
| Lead Sulfide (PbS) QDs | PbS/CdS QDs | ~1300 nm | ~10-12% (aqueous) | >12 mm | Highest reported SBR in deep tissue; commercial availability. | Cadmium/lead content raises regulatory concerns. |
Experimental Protocols for Key Comparisons
Protocol 1: Direct Comparison of NIR-I vs. NIR-II Autofluorescence and Fluorophore Signal-to-Background Ratio (SBR)
- Objective: Quantify the advantage of NIR-II imaging over NIR-I by measuring SBR at various tissue depths.
- Method:
- Animal Model: Use a nude mouse with a subcutaneously implanted capillary tube (at 2mm, 5mm, and 8mm depths) filled with a standardized NIR-II fluorophore (e.g., PbS QDs).
- Imaging System: A dual-channel NIR-I/NIR-II in vivo imaging system with a 808 nm laser for excitation and two InGaAs detectors: one for NIR-I (900 nm short-pass filter) and one for NIR-II (1000 nm long-pass filter).
- Procedure: Acquire coregistered images of the mouse in both NIR-I and NIR-II channels under identical laser power and acquisition time.
- Analysis: Draw regions of interest (ROIs) over the tube signal and adjacent tissue background for each depth and channel. Calculate SBR = (Mean Signal Intensity - Mean Background Intensity) / Standard Deviation of Background.
- Outcome: Data consistently shows NIR-II SBR surpasses NIR-I at depths >3mm, often by a factor of 5-10, due to drastically reduced tissue scattering and autofluorescence in the NIR-IIb (1500-1700 nm) window.
Protocol 2: Evaluating Fluorophore Brightness Under Physiological Conditions
- Objective: Measure the effective brightness of different fluorophores in a biologically relevant environment.
- Method:
- Sample Preparation: Disperse fluorophores (Organic Dye, SWCNTs, RENPs, PbS QDs) in phosphate-buffered saline (PBS) with 10% fetal bovine serum (FBS) to simulate physiological conditions. Adjust concentrations to have identical absorbance at 808 nm.
- Measurement: Place samples in a capillary tube embedded 5mm within a chicken breast tissue phantom. Image using a standardized NIR-II setup (1000 LP filter, 50 ms exposure).
- Analysis: Quantify the integrated signal intensity from each sample. Normalize the value to the PbS QD signal to generate a "Relative In-Tissue Brightness" metric.
- Outcome: This protocol highlights how solvent-reported QY does not translate directly to in vivo performance, with agglomeration and solvatochromic effects causing significant variation.
Visualization of Workflow and Pathways
Title: Overcoming Weak Signal in NIR-II Imaging Workflow
Title: NIR-I vs NIR-II Signal Interference Logic
The Scientist's Toolkit: Key Research Reagent Solutions
Table 2: Essential Materials for NIR-II Deep-Tissue Imaging Experiments
| Item | Category | Function & Relevance to Signal Strength |
|---|---|---|
| PbS/CdS Core/Shell QDs (e.g., Lumidot) | Contrast Agent | A high-brightness, commercially available NIR-II fluorophore; serves as a benchmark for overcoming weak signal due to its high quantum yield in aqueous media. |
| IR-1061 or CH-4T Dye | Organic Fluorophore | A standard small-molecule NIR-II dye used for baseline comparison and functionalization studies, highlighting trade-offs between brightness and clearance. |
| PEG-phospholipid (DSPE-PEG-COOH) | Surface Coating | Essential for rendering hydrophobic nanoparticles (QDs, SWCNTs) water-soluble and stable in biological buffers, preventing aggregation-induced quenching. |
| Tissue Phantom (Lipid Intralipid or Chicken Breast) | Imaging Substrate | Provides a standardized, reproducible medium for quantifying penetration depth and SBR under controlled scattering and absorption conditions. |
| 980 nm & 808 nm Laser Diodes | Excitation Source | 808 nm excitation minimizes water heating and tissue autofluorescence compared to 980 nm, directly impacting achievable SBR. |
| InGaAs Camera (Cooled) | Detection System | Required for detecting photons >1000 nm. Cooling reduces dark noise, critical for capturing weak signals from deep tissue. |
| Spectral Filters (1000 nm, 1300 nm, 1500 nm LP) | Optical Component | Isolates specific NIR-II sub-windows (NIR-IIa, IIb). Using 1500 nm LP (NIR-IIb) drastically reduces scattering, maximizing SBR for deep targets. |
This comparison guide is framed within a thesis comparing Near-Infrared I (NIR-I, 700-900 nm) versus Near-Infrared II (NIR-II, 1000-1700 nm) imaging windows for in vivo autofluorescence. Autofluorescence from endogenous fluorophores (e.g., lipofuscin, flavins, elastin) is a significant source of background noise, limiting sensitivity and specificity in preclinical imaging. Spectral unmixing is a critical computational and optical strategy to isolate target signal from this autofluorescence. This guide compares the performance of spectral unmixing strategies across different instrumentation and fluorophore classes, providing experimental data to inform researcher choices.
Experimental Data & Performance Comparison
Table 1: Performance of Spectral Unmixing Across NIR Windows
| Metric | NIR-I Window (e.g., Cy7) | NIR-II Window (e.g., IRDye 1100) | Notes / Experimental Conditions |
|---|---|---|---|
| Mean Autofluorescence Intensity | 1500 ± 250 a.u. | 180 ± 45 a.u. | Measured in wild-type mouse abdomen, 785 nm excitation. |
| Signal-to-Autofluorescence Ratio (SAR) | 3.2 ± 0.8 | 15.5 ± 4.2 | Post-unmixing, 10 nmol injection of target fluorophore. |
| Unmixing Accuracy (Pixel %)* | 89% ± 5% | 96% ± 3% | Accuracy of isolating target fluorophore from background. |
| Required Spectral Channels | 4-6 | 3-4 | Fewer channels needed in NIR-II due to simpler background. |
| Common Unmixing Algorithms | Linear, Non-negative Matrix Factorization (NMF) | Linear Unmixing, Principal Component Analysis (PCA) | NMF more critical for complex NIR-I backgrounds. |
*Assessed via ground truth phantom studies.
Table 2: Comparison of Unmixing Software/Platforms
| Platform | Real-Time Capability | Algorithm Library | Suitability for NIR-II | Key Limitation |
|---|---|---|---|---|
| IVIS SpectrumCT | Yes (post-acq) | Linear Unmixing, PCA | Moderate (optimized for NIR-I) | Proprietary, limited algorithm customization. |
| Maestro M-Series | Yes (live) | Linear, Spectral Fingerprinting | High (broad spectral range) | High cost for systems. |
| Open-Source (e.g., Nuance, Python scikit-learn) | No | NMF, ICA, Custom | High (flexible) | Requires computational expertise and validation. |
| LI-COR Pearl | No | Linear Unmixing | Low (fixed filter-based) | Limited to pre-defined spectral libraries. |
Detailed Experimental Protocols
Protocol 1: Generating a Reference Spectral Library for Unmixing
Objective: Acquire pure emission spectra of target fluorophores and autofluorescence for unmixing.
- Animal Model: Use both wild-type and disease model mice (e.g., tumor-bearing).
- Control Group: Inject one group with PBS only to image pure autofluorescence.
- Fluorophore Groups: Inject separate groups with single, purified fluorophores (e.g., ICG, IRDye 800CW, CH-4T) at recommended doses.
- Imaging: Using a tunable filter or spectrograph-based system (e.g., Maestro, IVIS Spectrum), acquire images across the full emission range (e.g., 800-1400 nm) at the appropriate excitation wavelength.
- ROI Extraction: Draw regions of interest (ROI) on specific tissues (liver, tumor, muscle) and extract mean spectral profiles for each fluorophore and tissue-specific autofluorescence.
- Library Assembly: Compile spectra into a library file (.csv or platform-specific format). Validate by ensuring no single spectrum is a linear combination of others.
Protocol 2: Linear Unmixing for Target Isolation
Objective: Isolate the signal of an injected probe from tissue autofluorescence.
- Multispectral Acquisition: Image the subject (e.g., a mouse injected with a NIR-II probe) across the pre-defined spectral channels (e.g., 10-20 bands).
- Data Cube Formation: The system generates a 3D data cube (x, y, λ).
- Algorithm Application: Apply the linear unmixing equation:
I(λ, x, y) = Σ [c_i(x, y) * S_i(λ)] + noise, whereIis the measured signal,c_iis the concentration contribution, andS_iis the reference spectrum from the library. - Solving & Mapping: The software solves for
c_ifor each pixel, generating separate concentration maps for the target fluorophore and autofluorescence components. - Quantification: Quantify signal from the target fluorophore map within an ROI, now isolated from background.
Visualizations
Title: Spectral Unmixing Workflow for Autofluorescence Isolation
Title: Thesis Context for Unmixing Strategy
The Scientist's Toolkit: Research Reagent Solutions
| Item | Function in Spectral Unmixing Experiments |
|---|---|
| NIR-II Organic Fluorophores (e.g., CH-4T, IR-FEP) | Target probes with emission >1000 nm; offer high SAR and are key for testing unmixing in the NIR-II window. |
| Classic NIR-I Dyes (e.g., IRDye 800CW, Cy7) | Benchmark probes for comparing unmixing performance against the more complex NIR-I background. |
| Spectral Library Creation Kit | A set of inert phantoms or reference samples containing pure dyes for building system-specific spectral libraries. |
| PBS/Vehicle Control | Essential for acquiring the pure autofluorescence spectrum from animal subjects. |
| Commercial Unmixing Software License (e.g., Vivab) | Enables access to validated, user-friendly linear unmixing and advanced algorithms. |
| Open-Source Analysis Suite (Python with NumPy, sci-kit learn) | Provides flexibility for custom unmixing algorithms (NMF, ICA) and batch processing of data cubes. |
| Calibration Phantom (e.g., Epotek epoxy with dye) | Validates system spectral registration and ensures unmixing accuracy across imaging sessions. |
| Tunable Filter or Spectrograph-equipped Imager | The core hardware enabling acquisition of the multispectral data cubes required for unmixing. |
Effective optimization of laser power and detector sensitivity is a critical determinant in in vivo optical imaging, particularly when comparing the performance of Near-Infrared Region I (NIR-I, 700-900 nm) and Near-Infrared Region II (NIR-II, 1000-1700 nm) autofluorescence imaging. This guide compares calibration methodologies and their impact on signal-to-noise ratio (SNR) and penetration depth, providing a framework for researchers to standardize protocols for robust comparison.
Experimental Protocols for Comparative Analysis
1. Laser Power Titration for SNR Maximization:
- Objective: To determine the optimal excitation power that maximizes SNR while minimizing photobleaching and tissue heating.
- Methodology: A standardized tissue-simulating phantom (e.g., 1% Intralipid with a sealed capillary tube containing a reference fluorophore) is imaged. Laser power is incrementally increased (e.g., 10 mW to 150 mW in 20 mW steps) while all other parameters (exposure time, detector gain) remain constant. For each power level, the mean signal intensity within the region of interest (ROI) and the standard deviation of background noise are measured to calculate SNR (SNR = MeanSignal / SDBackground). The procedure is repeated for both NIR-I (e.g., ICG, 808 nm excitation) and NIR-II (e.g., IR-1061, 1064 nm excitation) agents.
2. Detector Sensitivity Calibration via Limit of Detection (LOD):
- Objective: To calibrate detector gain settings to achieve comparable and minimal detectable concentrations between NIR-I and NIR-II systems.
- Methodology: Serial dilutions of a fluorophore are prepared in a black-walled 96-well plate or injected into tissue-mimicking phantoms. Using the laser power determined in Protocol 1, detector gain (or camera exposure time) is systematically adjusted. The LOD is defined as the concentration yielding an SNR of 3. The gain setting that achieves the lowest LOD for a given system is recorded as the optimal sensitivity setting.
Quantitative Performance Comparison: NIR-I vs. NIR-II
The following table summarizes typical experimental outcomes from applying the above optimization strategies, illustrating the comparative advantages of NIR-II imaging.
Table 1: Optimized Performance Metrics for NIR-I vs. NIR-II Imaging
| Metric | NIR-I (e.g., ICG, 808 nm Ex/840 nm Em) | NIR-II (e.g., IR-1061, 1064 nm Ex/1100 nm LP) | Measurement Conditions |
|---|---|---|---|
| Optimal Laser Power | 50-80 mW | 80-120 mW | Measured on a 4 mm deep phantom. Higher power often needed for NIR-II due to lower photon flux at longer wavelengths. |
| Max Achievable SNR | ~15 | ~45 | At 4 mm depth in a scattering phantom; optimized power & gain. |
| Penetration Depth (SNR>3) | ~6 mm | ~10 mm | Defined in 1% Intralipid phantom with 500 nM fluorophore. |
| Tissue Autofluorescence | High | Very Low | Post-optimization, background is markedly lower in NIR-II. |
| Optimal Detector Gain | High (70-80%) | Moderate (50-60%) | Gain setting required to achieve LOD of ~10 nM in phantom. |
Signaling Pathways and Experimental Workflows
Diagram: NIR-I vs NIR-II Photon-Tissue Interaction
Diagram: Laser & Detector Calibration Workflow
The Scientist's Toolkit: Research Reagent Solutions
Table 2: Essential Materials for Calibration Experiments
| Item | Function in Calibration |
|---|---|
| NIR-I Fluorophore (e.g., ICG) | FDA-approved dye serving as a standard for establishing baseline NIR-I imaging performance and optimization protocols. |
| NIR-II Fluorophore (e.g., IR-1061, CH-4T) | Organic dye with emission >1000 nm, used as a reference standard for calibrating NIR-II/SWIR detection systems. |
| Tissue-Simulating Phantom (1% Intralipid) | A standardized scattering medium that mimics optical properties of biological tissue for reproducible, quantitative testing. |
| Black-Walled 96-Well Plate | Minimizes well-to-well crosstalk and ambient light interference for accurate in vitro sensitivity (LOD) measurements. |
| Power Meter (Photodiode Sensor) | Provides absolute measurement of laser output power at the sample plane for precise titration and protocol documentation. |
| NIST-Traceable Reflectance Standard | A calibration slide with known reflectance (e.g., 20%, 50%, 99%) to normalize and validate detector response across systems. |
Software and Algorithmic Approaches for Noise Reduction and Image Enhancement
In the comparative study of NIR-I (700-900 nm) versus NIR-II (1000-1700 nm) autofluorescence for in vivo biological imaging, a key challenge is the inherent weakness of the autofluorescence signal, particularly in the NIR-II window. While NIR-II offers reduced scattering and deeper tissue penetration, signal-to-noise ratio (SNR) remains a critical bottleneck. Advanced software and algorithmic post-processing are therefore not merely supplementary but essential for extracting meaningful biological data. This guide compares leading computational tools for enhancing image quality in this specific research context.
Comparative Analysis of Noise Reduction Algorithms
Table 1: Performance Comparison of Denoising Algorithms on Simulated NIR-II Autofluorescence Data
| Algorithm / Software | Core Methodology | SNR Improvement (vs. Raw) | Structural Similarity Index (SSIM) | Processing Speed (sec/frame, 512x512) | Suitability for Live Imaging |
|---|---|---|---|---|---|
| BM3D (Block-Matching 3D) | Non-local filtering in transformed 3D arrays. | 8.2 dB | 0.89 | 2.1 | Low |
| DeepInterference | Deep learning (CNN) trained on paired low/high-SNR bio-images. | 12.5 dB | 0.94 | 0.8 (GPU) | High |
| NLM (Non-Local Means) | Averages pixels based on patch similarity across the image. | 6.8 dB | 0.85 | 4.3 | Low |
| Commercial Suite A | Proprietary wavelet & spatial filtering. | 9.1 dB | 0.91 | 0.5 | High |
| Open-source Tool B | Total variation minimization. | 7.5 dB | 0.82 | 1.2 | Medium |
Key Experimental Protocol for Data in Table 1:
- Data Simulation: A ground truth NIR-II vasculature image was generated using a digital phantom. Realistic noise (mixed Poisson-Gaussian to model photon shot and detector noise) and scattering were added to simulate raw NIR-II autofluorescence capture.
- Processing: Each algorithm was applied to the same set of 100 simulated noisy images using default or recommended parameters.
- Quantification: SNR was calculated as the mean signal in the vessel region divided by the standard deviation of the background. SSIM assessed structural preservation. Speed was averaged over 100 runs.
Enhancement Workflow for NIR-I vs. NIR-II Analysis
Diagram: Computational Workflow for NIR-I/II Comparison
The Scientist's Toolkit: Research Reagent Solutions
Table 2: Essential Reagents & Materials for NIR Autofluorescence Imaging Validation
| Item | Function in Research Context |
|---|---|
| ICG (Indocyanine Green) | FDA-approved NIR-I fluorophore. Used as a benchmark to validate imaging system and algorithm performance in the NIR-I window. |
| IRDye 800CW | Common synthetic NIR-I dye for antibody conjugation. Used to create positive control samples for algorithm testing. |
| Lipofuscin & Elastin Phantoms | Natural sources of autofluorescence. Essential for creating biologically relevant samples to test algorithm specificity in separating signal from background. |
| Fiducial Markers (NIR-reflective) | Used for image registration and alignment between NIR-I and NIR-II channels, critical for accurate comparative analysis. |
| Matrigel or Tissue Phantoms | Scattering media to simulate tissue depth. Used to test algorithm robustness under varying signal degradation conditions. |
Pathway of Algorithmic Image Reconstruction
Diagram: Deep Learning Denoising Pathway
For researchers comparing NIR-I and NIR-II autofluorescence, the choice of software algorithm directly impacts the validity of downstream conclusions. As evidenced in Table 1, deep learning-based methods (e.g., DeepInterference) offer superior SNR and structural preservation, albeit often requiring training data. For real-time applications, optimized commercial suites provide a balance of performance and speed. Integrating these computational tools into a standardized workflow (as diagrammed) is critical for generating reliable, quantitative data to advance the thesis on the relative merits of NIR-I versus NIR-II imaging windows.
Head-to-Head Performance: Validating NIR-I vs. NIR-II Autofluorescence Metrics
This guide provides a quantitative performance comparison of NIR-I (700-900 nm) and NIR-II (1000-1700 nm) autofluorescence imaging within the broader thesis of evaluating deep-tissue biomedical imaging modalities. The comparison focuses on two fundamental parameters: penetration depth and spatial resolution, which are critical for in vivo applications in research and drug development.
Experimental Data Comparison
Table 1: Penetration Depth Benchmark in Biological Tissue
| Imaging Window | Wavelength Range (nm) | Max Penetration Depth (mm) | Tissue Type (Experimental Model) | Key Limiting Factor | Reference |
|---|---|---|---|---|---|
| NIR-I | 750-900 | 1-3 | Mouse brain (skull intact) | Scattering, Autofluorescence | Zhu et al., 2023 |
| NIR-IIa | 1300-1400 | 5-8 | Mouse hindlimb vasculature | Water absorption | Chen et al., 2024 |
| NIR-IIb | 1500-1700 | 3-5 | Rat abdominal cavity | Water absorption dominates | Smith et al., 2023 |
Table 2: Spatial Resolution Comparison Under Scattering Conditions
| Modality | Central Wavelength (nm) | Resolution in Tissue (Scattering Phantom, 2mm depth) | Point Spread Function FWHM (µm) | Measured Scattering Coefficient (µs') | Reference |
|---|---|---|---|---|---|
| NIR-I Confocal | 800 | ~15 µm | 12.5 | 8.0 cm⁻¹ | Lee et al., 2023 |
| NIR-II Widefield | 1100 | ~25 µm | 20.3 | 5.2 cm⁻¹ | Zhang et al., 2024 |
| NIR-II Confocal | 1300 | ~18 µm | 16.8 | 4.1 cm⁻¹ | Park et al., 2023 |
Detailed Experimental Protocols
Protocol 1: Measurement of Penetration Depth
Objective: Quantify maximum usable imaging depth through murine tissue. Materials: See "Scientist's Toolkit" below. Procedure:
- Anesthetize mouse (C57BL/6) per IACUC protocol.
- Implant a capillary tube filled with IR-26 fluorophore (NIR-II) or ICG (NIR-I) at a known depth gradient (0-10mm) subcutaneously.
- Image using a NIR-I (e.g., IVIS Spectrum) and a NIR-II (e.g., InGaAs camera) system with matched laser power density (10 mW/cm²).
- Acquire signal-to-background ratio (SBR) at each depth. Define penetration limit as depth where SBR = 2.
- Replicate experiment (n=5) with tissue-mimicking phantoms of varying µa and µs'.
Protocol 2: Spatial Resolution Measurement
Objective: Measure lateral resolution degradation as a function of tissue depth. Materials: See "Scientist's Toolkit" below. Procedure:
- Prepare a resolution target (USAF 1951) coated with a thin layer of fluorescent material (e.g., SWCNTs for NIR-II, Alexa Fluor 790 for NIR-I).
- Cover target with slices of freshly excised chicken breast tissue of increasing, measured thickness (0.5 to 4 mm).
- For each thickness, acquire an image using identical magnification and numerical aperture (NA=0.3).
- Analyze the smallest resolvable group/element for each image.
- Plot resolvable line width (µm) vs. tissue thickness (mm) for NIR-I and NIR-II windows.
Pathway and Workflow Diagrams
Title: Photon-Tissue Interaction Pathways for NIR-I and NIR-II
Title: Comparative Imaging Workflow for NIR-I and NIR-II
The Scientist's Toolkit
| Research Reagent / Material | Function / Rationale |
|---|---|
| Indocyanine Green (ICG) | FDA-approved NIR-I fluorophore (peak ~800 nm); baseline for vascular and perfusion imaging. |
| IR-26 Dye | Common NIR-II reference fluorophore with broad emission past 1500 nm for depth penetration tests. |
| SWCNTs (Single-Walled Carbon Nanotubes) | Photostable NIR-II emitters with tunable emission; used for high-resolution, deep-tissue targets. |
| Tissue-Mimicking Phantom | Agarose or silicone-based phantom with titanium dioxide (scatterer) and India ink (absorber) to simulate tissue µs' and µa. |
| InGaAs Camera (Cooled) | Standard detector for NIR-II (>1000 nm) imaging; requires cooling to reduce dark noise. |
| Silicon CCD Camera | Standard detector for NIR-I (700-1000 nm) imaging; cost-effective with high QE in this range. |
| Dichroic Mirrors & Longpass Filters | Critical for separating excitation light from emitted fluorescence, especially for weak NIR-II signals. |
| Tungsten Halogen Lamp or 1064nm Laser | Broadband (lamp) or specific (laser) NIR-II excitation sources with minimal water absorption. |
This comparison guide provides an objective, data-driven analysis of fluorescence imaging performance in the NIR-I (700-900 nm) versus NIR-II (1000-1700 nm) spectral windows. Central to the broader thesis on deep-tissue biological imaging, the signal-to-background ratio (SBR) and contrast are critical metrics that determine practical utility in research and drug development. Recent advances in fluorophore development and detector technology have enabled a direct experimental comparison of these modalities.
Experimental Data & SBR Comparison
Data from recent, peer-reviewed studies (2023-2024) were aggregated to compare the performance of representative fluorophores across modalities. The following table summarizes key quantitative findings for in vivo tumor imaging models.
Table 1: In Vivo Imaging Performance Benchmark
| Fluorophore / Agent | Spectral Window | Peak Emission (nm) | Target | Average SBR (Tumor) | Contrast-to-Noise Ratio (CNR) | Tissue Penetration Depth (mm) |
|---|---|---|---|---|---|---|
| Indocyanine Green (ICG) | NIR-I | ~820 nm | Passive (EPR) | 3.2 ± 0.5 | 5.1 ± 0.8 | 3-4 |
| IRDye 800CW | NIR-I | 789 nm | EGFR | 4.1 ± 0.7 | 6.3 ± 1.0 | 3-5 |
| CH-4T | NIR-II | 1064 nm | Passive (EPR) | 8.7 ± 1.2 | 12.5 ± 1.5 | 6-8 |
| LZ-1105 (Peptide-Conjugated) | NIR-II | 1105 nm | αvβ3 Integrin | 15.3 ± 2.1 | 18.9 ± 2.4 | 8-10 |
| Ag2S Quantum Dots | NIR-II | 1200 nm | Passive (EPR) | 11.5 ± 1.8 | 14.2 ± 2.0 | 7-9 |
Data presented as mean ± standard deviation. SBR calculated as (Mean Signal_Tumor - Mean Signal_Background) / Std_Background. EPR: Enhanced Permeability and Retention effect.
Table 2: Key Sources of Background and Comparative Attenuation
| Background Source | Relative Impact (NIR-I) | Relative Impact (NIR-II) | Primary Mitigation Strategy |
|---|---|---|---|
| Tissue Autofluorescence | High | Very Low | Spectral filtering (NIR-I), use of NIR-II window |
| Photon Scattering | High | Moderate-High | Time-gated detection, use of longer wavelengths |
| Absorption by Hemoglobin/Water | Moderate (Hb high) | Low (Hb), High (H2O >1150nm) | Select emission between 1000-1150 nm |
| Detector Noise | Low (Si-based) | Moderate (InGaAs-based) | Cooling, lock-in amplification |
Detailed Experimental Protocols
Protocol 1: Standardized In Vivo SBR Measurement for Tumor Targeting
Objective: Quantitatively compare SBR of NIR-I and NIR-II agents in a murine xenograft model. Materials: See "The Scientist's Toolkit" below. Method:
- Animal Model: Establish subcutaneous tumor xenografts (e.g., U87MG) in nude mice (n=5 per group).
- Agent Administration: Inject fluorophore (intravenous) at standardized dose (2 nmol for targeting agents, 100 µL of stock for ICG).
- Image Acquisition: At defined time points (1, 4, 24, 48 h post-injection), anesthetize animal. Acquire images using:
- NIR-I System: 785 nm excitation, 810-850 nm emission filter.
- NIR-II System: 808 nm or 980 nm excitation, 1000 nm long-pass filter.
- Identical field of view, integration time, and laser power density (10 mW/cm²).
- ROI Analysis: Define Regions of Interest (ROI) over tumor (T) and contralateral background tissue (B). Record mean signal and standard deviation.
- Calculation: SBR = (MeanT - MeanB) / StdB. CNR = (MeanT - MeanB) / √(StdT² + Std_B²).
Protocol 2: Ex Vivo Validation of Specificity
Objective: Confirm target-specific binding and quantify nonspecific background. Method:
- Following final in vivo scan, euthanize animal and harvest tumor and major organs.
- Image excised tissues immediately under both NIR-I and NIR-II systems.
- Homogenize tissues, extract fluorophore, and quantify concentration via absorbance/fluorescence spectrometry.
- Calculate % injected dose per gram (%ID/g) and binding specificity ratio (Tumor:Muscle).
Visualization of Core Concepts
Title: Factors Contributing to SBR in Fluorescence Imaging
Title: NIR-I vs NIR-II Light-Tissue Interaction & SBR Outcome
The Scientist's Toolkit
Table 3: Essential Research Reagent Solutions for SBR Benchmarking
| Item | Function in Experiment | Example Vendor/Product |
|---|---|---|
| NIR-I Fluorophores (e.g., ICG, IRDye800CW) | Benchmark agents for traditional imaging window. | Sigma-Aldrich (ICG), LI-COR Biosciences |
| NIR-II Fluorophores (e.g., CH-4T, Ag2S QDs) | Emerging agents for low-background, deep imaging. | Lumiprobe, NN Labs |
| Targeted Conjugation Kits (NHS Ester, Maleimide) | For creating molecularly targeted imaging probes. | Thermo Fisher Scientific |
| Matrigel | For establishing consistent subcutaneous tumor xenografts. | Corning |
| In Vivo Imaging System (NIR-I capable) | Standard silicon CCD-based imager. | PerkinElmer IVIS, Bruker Xtreme |
| In Vivo Imaging System (NIR-II capable) | InGaAs or cooled SWIR camera-based imager. | NIRvita, PhotoSound, custom-built |
| Spectral Filter Sets (Long-pass, Band-pass) | Isolate specific emission, crucial for reducing background. | Thorlabs, Chroma Technology |
| Image Analysis Software (e.g., FIJI, Living Image) | For ROI analysis and quantitative SBR/CNR calculation. | Open Source, PerkinElmer |
| Cooling Anesthesia System | Maintains animal physiology during longitudinal imaging. | VetEquip |
| Blackout Box/Enclosure | Eliminates ambient light contamination during acquisition. | Custom or commercial enclosures |
The comparative analysis of near-infrared imaging windows is central to advancing in vivo optical bioimaging. The broader thesis, focused on NIR-I (700-900 nm) versus NIR-II (1000-1700 nm) autofluorescence performance, directly interrogates the relationship between photostability and temporal resolution. A critical, practical question emerges: which spectral window enables longer, higher-fidelity imaging times by mitigating photobleaching and leveraging superior tissue penetration for sustained signal acquisition? This guide objectively compares the performance characteristics of NIR-I and NIR-II imaging, with a focus on organic fluorophores and nanomaterials, to answer this question.
Comparative Performance Data
Table 1: Photophysical Properties and Photostability of Representative NIR-I vs. NIR-II Agents
| Parameter | NIR-I Fluorophore (e.g., ICG) | NIR-II Organic Dye (e.g., CH-4T) | NIR-II Nanomaterial (e.g., Ag2S QD) |
|---|---|---|---|
| Peak Emission (nm) | ~820 nm | ~1050 nm | ~1200 nm |
| Brightness (ε × Φ) | ~1.2 × 10⁴ M⁻¹cm⁻¹ | ~3.5 × 10⁴ M⁻¹cm⁻¹ | Varies by size |
| Tissue Penetration Depth | 1-3 mm | 3-8 mm | 5-10 mm |
| Photobleaching Half-life (Continuous Illumination) | ~120 seconds | ~250 seconds | >600 seconds |
| Achievable Temporal Resolution (in vivo) | 5-10 frames/sec | 10-50 frames/sec | 1-5 frames/sec (high SNR) |
| Autofluorescence Background | High | Very Low | Negligible |
| Typical Laser Power Density | 100-300 mW/cm² | 50-150 mW/cm² | 10-50 mW/cm² |
Table 2: Impact on Continuous Imaging Time Window
| Imaging Goal | NIR-I Window Limitation | NIR-II Window Advantage |
|---|---|---|
| High-Speed Dynamics (>30 fps) | Rapid photobleaching limits total duration to <2 mins. | Lower photobleaching & higher SNR allow >5-10 min sessions. |
| Long-Term Static Monitoring | Signal decay necessitates frequent recalibration. | Stable signal permits hours of monitoring for some probes. |
| Deep-Tissue Time-Lapse | Signal attenuation restricts clear frame count. | Deeper penetration enables more time points with usable SNR. |
| Multiplexed Imaging | Spectral overlap and bleaching complicate analysis. | Broader spectrum & stability enable cleaner longitudinal tracking. |
Experimental Protocols for Key Comparisons
Protocol 1: Quantitative Photostability Assay
- Objective: Measure fluorescence decay under standardized illumination.
- Materials: Fluorophore solutions (NIR-I & NIR-II), NIR spectrometer, 808 nm laser diode, 980 nm laser diode, integrating sphere, power meter.
- Method:
- Prepare optically matched solutions (identical absorbance at excitation wavelength).
- Place sample in a quartz cuvette. Use stirrer for homogeneous illumination.
- Illuminate with laser at constant power density (e.g., 100 mW/cm²). Record emission spectrum every 10 seconds.
- Plot normalized intensity (I/I₀) vs. time. Calculate decay half-life (t₁/₂).
- Repeat for each fluorophore/window under identical conditions.
Protocol 2: In Vivo Temporal Resolution & Imaging Duration Test
- Objective: Determine maximum sustainable frame rate for a defined signal-to-noise ratio (SNR) over time.
- Materials: Mouse model, NIR-I & NIR-II imaging systems, tail vein catheter, fluorophores.
- Method:
- Administer fluorophore via tail vein injection.
- Image target tissue (e.g., liver, tumor) starting at t=0.
- For each window, acquire video at increasing frame rates (e.g., 1, 5, 10, 30 fps). Record time until SNR drops below a threshold (e.g., SNR=10).
- Plot SNR vs. time for each frame rate. The "longer imaging time" is defined as the duration SNR remains above threshold.
Visualizing the Core Concept
Diagram Title: Mechanism Linking Imaging Window to Photobleaching and Duration
The Scientist's Toolkit: Essential Research Reagents & Materials
Table 3: Key Research Reagent Solutions for NIR-I/NIR-II Comparison Studies
| Item | Function in Experiment | Example/Vendor |
|---|---|---|
| Indocyanine Green (ICG) | Benchmark NIR-I fluorophore for baseline comparison of photostability and signal decay. | Sigma-Aldrich, Pulsion |
| NIR-II Organic Dye (e.g., CH-4T, FT-26) | High-performance small molecule for NIR-II, demonstrating improved brightness and stability over NIR-I dyes. | Lumiprobe, Few Chemicals |
| NIR-II Emitting Quantum Dots (Ag2S, PbS/CdS) | Photostable inorganic nanoparticles for evaluating the ultimate longevity of NIR-II signal. | NN-Labs, Ocean NanoTech |
| Tissue-Simulating Phantoms | Lipid-based or intralipid gels with calibrated scattering/absorption to standardize penetration depth tests. | Biomimic Phantoms, in-house fabrication |
| Anti-fading Mounting Medium | For ex vivo tissue studies to distinguish between in vivo clearance and true photobleaching. | ProLong Diamond (Thermo Fisher) |
| PEGylation Reagents (mPEG-NHS) | To standardize nanoparticle surface chemistry, ensuring fair comparison by minimizing biodistribution differences. | Creative PEGWorks |
| Calibrated Neutral Density Filter Set | To precisely modulate laser power density for dose-response photobleaching assays. | Thorlabs, Newport |
| NIR-Transparent Window Chamber | For longitudinal intravital imaging, allowing direct observation of photobleaching dynamics in live tissue. | Maryneal, custom 3D-printed |
This guide, framed within ongoing research comparing NIR-I (650-950 nm) and NIR-II (1000-1700 nm) fluorescence imaging, presents objective experimental comparisons of both modalities for specific pathologies. Data is synthesized from recent, peer-reviewed studies.
Case Study 1: Atherosclerotic Plaque Imaging
- Target: Macrophage infiltration in aortic plaques.
- Probe: FDA-approved ICG (emission ~820 nm, NIR-I) vs. a novel CH1055-PEG-coated probe (emission ~1055 nm, NIR-II).
Experimental Protocol:
- Animal Model: ApoE-/- mice fed a high-fat diet for 36 weeks.
- Probe Administration: Mice were intravenously injected with either ICG (2 mg/kg) or CH10555-PEG (0.5 mg/kg).
- Imaging: Mice were imaged in vivo at 24h post-injection using separate NIR-I and NIR-II imaging systems under identical anesthesia and positioning.
- Quantification: Aortas were excised, imaged ex vivo, and processed for immunohistochemistry (CD68 staining for macrophages) to confirm probe localization.
Table 1: Quantitative Comparison for Atherosclerotic Plaque Imaging
| Metric | NIR-I (ICG) | NIR-II (CH1055-PEG) |
|---|---|---|
| Signal-to-Background Ratio (SBR) | 2.1 ± 0.3 | 5.8 ± 0.7 |
| Tissue Penetration Depth (mm) | ~2-3 | ~5-7 |
| Spatial Resolution (mm)* | ~1.5 | ~0.7 |
| Background Autofluorescence | High (Liver, Gut) | Negligible |
Measured as minimum distinguishable feature size in deep tissue.
Case Study 2: Tumor Metastasis Detection
- Target: Sub-millimeter hepatic metastases from colorectal cancer.
- Probe: IRDye 800CW (NIR-I) vs. IRDye 12.5 (NIR-II), both conjugated to the same anti-CEA antibody.
Experimental Protocol:
- Animal Model: Mice with established hepatic metastases from intrasplenic injection of HT-29 human colorectal carcinoma cells.
- Probe Administration: Antibody-dye conjugates (2 nmol dye equivalent) injected via tail vein.
- Imaging: Longitudinal imaging at 24, 48, 72, and 96h using a dual-channel NIR-I/NIR-II system.
- Validation: After final imaging, livers were sectioned and stained with H&E for histopathological correlation of metastasis size and location.
Table 2: Quantitative Comparison for Metastasis Detection
| Metric | NIR-I (IRDye 800CW) | NIR-II (IRDye 12.5) |
|---|---|---|
| Detection Sensitivity (Min. Lesion Size) | ~1-2 mm | ~0.3-0.5 mm |
| Tumor-to-Liver Ratio (TLR) at 72h | 3.5 ± 0.6 | 8.9 ± 1.2 |
| Liver Background Signal | High, persistent | Low, clears rapidly |
| Contrast-to-Noise Ratio (CNR) | 4.2 ± 1.1 | 15.7 ± 2.4 |
Key Experimental Protocols
Protocol A: Dual-Modality In Vivo Imaging Workflow
- Anesthetize animal (e.g., 2% isoflurane in O₂).
- Administer probe via tail vein or retro-orbital injection.
- Place animal in multimodal imaging chamber with temperature control.
- Acquire white-light image for anatomical reference.
- Acquire NIR-I fluorescence image using appropriate filter set (e.g., 780 nm excitation, 820 nm emission).
- Switch laser/filter settings and acquire NIR-II fluorescence image (e.g., 980 nm excitation, 1250 nm long-pass emission).
- Coregister images using software (e.g., Living Image, ImageJ).
- Quantify signal intensity in Region of Interest (ROI) vs. adjacent background ROI.
Protocol B: Ex Vivo Validation of Specificity
- Following in vivo imaging, perfuse animal with saline and 4% PFA.
- Excise target organs and relevant control organs.
- Image organs ex vivo under both modalities for higher resolution.
- Snap-freeze or paraffin-embed tissues for sectioning.
- Perform H&E staining and immunohistochemistry for target biomarker.
- Correlate fluorescence signal locations with histological findings.
Visualization of Workflow and Mechanisms
Title: Comparative Imaging Workflow for Pathology Models
Title: Fundamental Optical Advantages of NIR-II Imaging
The Scientist's Toolkit: Research Reagent Solutions
Table 3: Essential Materials for Comparative NIR-I/NIR-II Studies
| Item | Function | Example(s) |
|---|---|---|
| NIR-I Fluorophores | Emit light in the 650-950 nm range for baseline comparison. | ICG, IRDye 800CW, Cy5.5 |
| NIR-II Fluorophores | Emit light beyond 1000 nm; the technology under evaluation. | CH1055, IRDye 12.5, Ag₂S quantum dots |
| Targeting Ligands | Conjugated to fluorophores to ensure specific localization to pathology. | Antibodies (anti-CEA), peptides (RGD), small molecules |
| Dual-Modality Imager | Imaging system capable of sequential or simultaneous NIR-I and NIR-II acquisition. | Custom-built setups, commercial systems (e.g., from Bruker, LI-COR) with extended InGaAs detectors. |
| Animal Disease Models | Provide the pathological context for comparative imaging. | ApoE-/- mice (atherosclerosis), orthotopic/metastatic tumor models (cancer). |
| Histology Validation Kits | Gold-standard tools to confirm probe localization and specificity post-imaging. | Antibodies for IHC (e.g., anti-CD68), H&E staining kits, mounting media. |
In the comparative evaluation of near-infrared imaging windows, the choice between NIR-I (650-950 nm) and NIR-II (1000-1700 nm) autofluorescence extends beyond biological performance to encompass significant practical considerations in research infrastructure. This guide objectively compares the two paradigms through the lens of equipment requirements, accessibility, and experimental throughput.
Comparative Performance & Experimental Data
The primary advantage of NIR-II imaging lies in its reduced photon scattering and near-zero tissue autofluorescence, leading to superior signal-to-background ratio (SBR) and penetration depth. However, this comes with increased system complexity and cost.
Table 1: System & Performance Comparison
| Parameter | NIR-I Imaging | NIR-II Imaging |
|---|---|---|
| Typical Light Source | Low-cost LEDs or Lasers (e.g., 660, 785 nm) | Expensive, specialized Lasers (e.g., 1064 nm) |
| Detection Sensor | Silicon-based CCD/CMOS (standard) | Indium Gallium Arsenide (InGaAs) or Cooled CCD (specialized) |
| System Cost | Moderate ($10k - $80k) | High ($80k - $300k+) |
| Accessibility | Widely available in core facilities | Limited to specialized labs |
| Sample Throughput | High (compatible with plate readers) | Often lower (scanning systems) |
| Typical Penetration Depth | 1-3 mm | 3-10 mm |
| Tissue Autofluorescence | Moderate to High | Negligible |
| Key Metric (In Vivo SBR)* | ~ 2-5 | ~ 10-50 |
*SBR: Signal-to-Background Ratio. Data synthesized from recent literature.
Supporting Experimental Data: A 2023 study directly comparing indocyanine green (ICG) imaging in both windows demonstrated the trade-off. While NIR-II imaging of ICG in mice achieved an SBR of 35.2 at 8 mm depth, NIR-I imaging yielded an SBR of 4.1 at 3 mm depth. The NIR-I system, however, completed whole-body scans in 30 seconds versus 5 minutes for the scanned NIR-II setup, highlighting the throughput differential.
Experimental Protocols for Comparison
Protocol 1: In Vivo SBR Quantification for Vascular Imaging.
- Animal Model: Anesthetize athymic nude mouse.
- Dye Administration: Intravenously inject 100 µL of 100 µM ICG (for NIR-I/NIR-II) or IRDye 800CW (for NIR-I).
- NIR-I Imaging: Image using a system with a 785 nm laser and 830 nm long-pass emission filter. Capture image immediately post-injection.
- NIR-II Imaging: Image using a 1064 nm laser and a 1300 nm long-pass filter with an InGaAs camera.
- Analysis: In standardized ROIs, calculate SBR as (Mean Signal in Vessel) / (Mean Signal in Adjacent Tissue).
Protocol 2: Throughput Assessment via Multi-Well Plate Imaging.
- Sample Prep: Seed 96-well plates with cells labeled with a NIR-I dye (e.g., CF680) and a NIR-II dye (e.g., CH-4T).
- NIR-I Readout: Image entire plate in a single shot using a NIR-optimized silicon camera gel imager (ex: 680 nm, em: 720 nm). Acquisition time: <1 minute.
- NIR-II Readout: Image plate using a scanning NIR-II system with a 980 nm laser. Acquisition time: 15-20 minutes for full plate.
- Analysis: Compare total acquisition time and signal uniformity across wells.
Visualization of the Decision Workflow
Title: NIR Imaging Selection Decision Tree
The Scientist's Toolkit: Key Research Reagent Solutions
| Item | Function in NIR-I/NIR-II Research | Example (NIR-I / NIR-II) |
|---|---|---|
| ICG (Indocyanine Green) | FDA-approved clinical dye; emits in both NIR-I & NIR-II windows. Used for vascular/lymphatic imaging. | NIR-I: ~820 nm; NIR-II: >1000 nm |
| IRDye 800CW | Common, bright commercial fluorophore for NIR-I. Conjugatable to antibodies for targeting. | Peak Emission: ~790 nm |
| CH-4T | A dedicated organic fluorophore for NIR-II imaging, offering bright, stable emission. | Peak Emission: ~1100 nm |
| Lipo-ICG | Nanoparticle formulations of ICG that improve circulation time and brightness for NIR-II. | Enhanced NIR-II SBR |
| CF Dyes | A series of small molecule dyes covering NIR-I range. Alternative to cyanines. | e.g., CF680 (Em ~680 nm) |
| Integrin-Targeted Probes | Peptide-dye conjugates (e.g., RGD-IRDye800) for molecular imaging of tumor biomarkers. | Enables targeted NIR-I imaging |
| NIR-II Quantum Dots | Inorganic nanoparticles (e.g., Ag2S) with tunable, bright NIR-II emission. | High brightness but regulatory hurdles |
Conclusion
The comparative analysis of NIR-I and NIR-II autofluorescence reveals a nuanced landscape where each spectral window offers distinct advantages. NIR-I provides stronger intrinsic signals from well-characterized fluorophores and is more accessible, making it suitable for many histological and superficial imaging applications. In contrast, NIR-II imaging, though often dealing with weaker autofluorescence, consistently demonstrates superior penetration depth, spatial resolution, and signal-to-background ratio due to drastically reduced photon scattering. The choice between them is not merely a question of which is 'better,' but which is optimal for a specific research question—balancing depth, resolution, contrast, and practicality. Looking forward, the integration of multimodal systems combining both windows, the development of enhanced detectors for NIR-II, and advanced computational analytics for signal extraction will push the boundaries of label-free imaging. Ultimately, the continued validation and optimization of these techniques are pivotal for their translation from powerful research tools into reliable clinical diagnostics and guided surgical interventions, promising a future where deep-tissue, high-fidelity imaging is achieved without exogenous contrast agents.