Targeted Nanoparticle Probes for Diagnostic Fluorescence Imaging: Advances, Applications, and Clinical Translation
This article provides a comprehensive overview of the latest advancements in targeted nanoparticle probes for diagnostic fluorescence imaging, tailored for researchers, scientists, and drug development professionals.
Targeted Nanoparticle Probes for Diagnostic Fluorescence Imaging: Advances, Applications, and Clinical Translation
Abstract
This article provides a comprehensive overview of the latest advancements in targeted nanoparticle probes for diagnostic fluorescence imaging, tailored for researchers, scientists, and drug development professionals. It explores the foundational principles of fluorescent nanomaterial design, including quantum dots, metal nanoclusters, and carbon dots, and their sensing mechanisms such as FRET and PET. The scope extends to methodological applications in detecting biomarkers, small molecules, and pathogens, alongside detailed protocols for probe optimization and troubleshooting common issues like photobleaching and high background. Finally, the article presents a comparative analysis of different nanoprobes and targeting ligands, discusses validation strategies, and critically assesses the challenges and future directions for clinical translation, including the role of AI and multimodal imaging.
The Building Blocks: Understanding Fluorescent Nanoprobes and Their Core Mechanisms
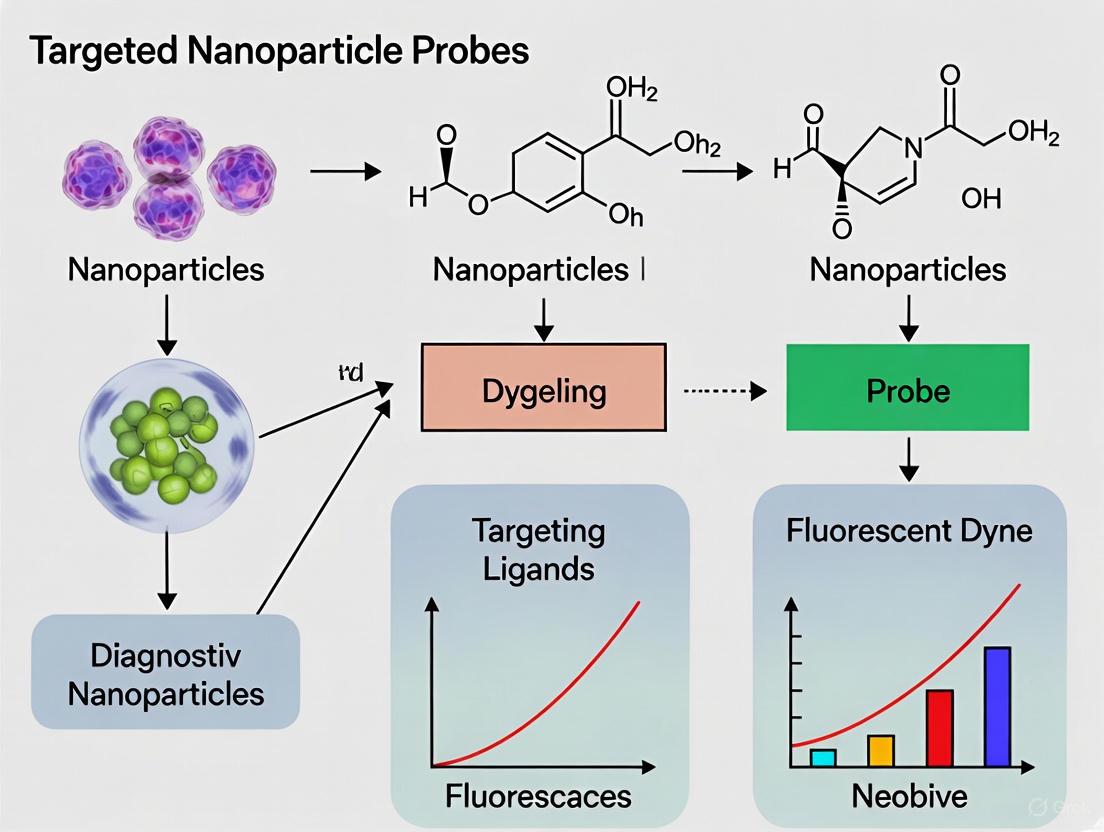
Fluorescent probes are sophisticated chemical tools critical for diagnostic fluorescence imaging, enabling the visualization and quantification of biological targets at the molecular level. These probes function as molecular-level sensors that can detect and image specific biomarkers, providing invaluable insights for early disease diagnosis, treatment monitoring, and pharmaceutical development [1]. The design of targeted nanoparticle probes integrates principles from nanotechnology, molecular recognition, and photophysics to create highly sensitive and specific imaging agents. This application note details the core architectural components of fluorescent probes—the recognition unit, fluorophore, and connector—and provides experimental protocols for their development and validation within the context of advanced diagnostic imaging research.
Core Components and Their Functions
A fluorescent probe is a synthesized molecule that combines molecular recognition with signal transduction. Its effectiveness hinges on the integrated function of three fundamental components, each fulfilling a distinct and essential role [1].
Diagram 1: Core Architecture of a Fluorescent Probe
This diagram illustrates the core architecture of a fluorescent probe, showing the relationship between the three key components and their interaction with the target analyte.
Recognition Unit (Receptor)
The recognition unit is the targeting moiety of the probe, responsible for its specificity. This component is engineered to selectively bind to a target analyte—such as a protein, ion, nucleic acid, or specific cell type—through high-affinity molecular interactions [1]. The binding event is the initial trigger that ultimately leads to a measurable fluorescent signal.
- Function: Selective binding to the target analyte.
- Design Principle: The choice of recognition unit is dictated by the nature of the target. Common examples include:
- Antibodies or antibody fragments: For high-affinity binding to specific protein epitopes.
- Aptamers: Short, single-stranded DNA or RNA oligonucleotides that fold into specific 3D structures for target binding.
- Small molecule ligands: Such as folic acid for targeting folate receptors overexpressed on certain cancer cells.
- Peptides: Engineered sequences for targeting specific cellular receptors.
- Chelators: For selective coordination of metal ions (e.g., NS4 receptor for Cu(I)) [2].
Fluorophore (Fluorescence Unit)
The fluorophore is the signal generator of the probe. It is a molecule that absorbs light at a specific wavelength and, after a short excited-state lifetime, re-emits light at a longer, lower-energy wavelength [3] [4]. The photophysical properties of the fluorophore directly determine the sensitivity, depth penetration, and detectability of the probe.
- Function: Absorption of excitation light and emission of fluorescent signal.
- Key Photophysical Properties:
- Brightness: The product of the molar extinction coefficient (ε, capacity for light absorption) and the fluorescence quantum yield (Φ, efficiency of photon conversion) [3] [4]. A higher brightness enables lower detection limits.
- Stokes Shift: The difference between the peak absorption (excitation) and emission wavelengths. A large Stokes shift minimizes spectral overlap, reducing background noise and improving signal clarity [3] [4].
- Excitation/Emission Wavelength: For in vivo imaging, fluorophores emitting in the near-infrared (NIR) range (650–900 nm) are preferred due to reduced tissue autofluorescence and superior tissue penetration [5].
Connector (Spacer)
The connector, or spacer, is the covalent linker that connects the recognition unit to the fluorophore. While often a simple molecular chain, its design is critical for maintaining the probe's functionality.
- Function: Spatially links the recognition unit and fluorophore.
- Design Considerations:
- Length: The connector must be optimized to ensure that the fluorophore does not sterically hinder the binding of the recognition unit to its target.
- Rigidity/Flexibility: The chemical nature of the linker can influence the distance and orientation between the receptor and fluorophore, which is crucial for sensing mechanisms like FRET [1].
- Biocompatibility and Stability: The connector must be stable in the biological environment to prevent premature cleavage of the probe before it reaches its target.
Fluorescent Nanomaterials and Sensing Mechanisms
Classes of Fluorophores for Nanoprobes
The advancement of nanotechnology has expanded the palette of available fluorophores beyond traditional organic dyes. The following table compares key classes of fluorophores used in constructing targeted nanoparticle probes.
Table 1: Comparison of Fluorescent Nanomaterials for Diagnostic Probes
| Material Class | Core Composition | Size Range | Key Advantages | Limitations & Considerations |
|---|---|---|---|---|
| Quantum Dots (QDs) [1] [5] | CdSe, CdTe, PbS, etc. | 2-10 nm | High brightness, excellent photostability, size-tunable emission. | Potential heavy metal toxicity, large size may alter bio-distribution. |
| Carbon Dots (CDs) [1] | Carbon, Nitrogen | < 10 nm | Good biocompatibility, low toxicity, tunable emission, facile synthesis. | Generally lower brightness compared to QDs. |
| Metal Nanoclusters (MNCs) [1] | Au, Ag atoms | ~1-2 nm | Ultra-small size, good photostability, low toxicity. | Moderate brightness. |
| Silicon Rhodamine Dyes [6] | Organic (Si-rhodamine) | < 2 nm | NIR emission, cell permeability, high brightness for small molecules. | Requires chemical conjugation. |
| Fluorescent Proteins (FPs) [6] | Protein (e.g., GFP) | ~4 nm (diameter) | Genetically encodable, ideal for intracellular expression. | Large size, relatively low photostability, can perturb fused protein function. |
Fundamental Sensing Mechanisms
The interaction between the probe and its target induces a photophysical change in the fluorophore. The primary mechanisms exploited in probe design are summarized below.
Diagram 2: Key Fluorescent Probe Sensing Mechanisms
This diagram outlines the logical flow of the three primary sensing mechanisms: FRET, PET, and ICT, which form the basis for signal generation in fluorescent probes.
- Fluorescence Resonance Energy Transfer (FRET): A distance-dependent energy transfer between two light-sensitive molecules (a donor and an acceptor). Target binding alters the distance between the donor and acceptor, changing the FRET efficiency and the resulting fluorescence output [1].
- Photoinduced Electron Transfer (PET): In this mechanism, the recognition unit acts as an electron donor or acceptor that quenches the fluorophore's fluorescence. Binding of the target analyte blocks this electron transfer, resulting in a fluorescence "turn-on" response [1] [2].
- Intramolecular Charge Transfer (ICT): Probes designed with an electron donor and acceptor linked through a conjugated π-system exhibit a "push-pull" electronic effect. Target binding to either the donor or acceptor moiety alters the electronic properties of the system, leading to a shift in the emission wavelength [1].
Experimental Protocols
Protocol: Conjugation of a Targeting Ligand to a NIR Fluorophore via a PEG Spacer
This protocol describes a standard method for synthesizing a targeted fluorescent probe, using a folate-targeted cyanine dye as a model system for cancer cell imaging [5].
Objective: To conjugate folic acid (recognition unit) to Cy5.5 (fluorophore) using a heterobifunctional Polyethylene Glycol (PEG) spacer (connector) to create a probe for targeting folate receptor-positive cells.
Materials:
- Folic acid
- Cy5.5-NHS ester (commercially available, e.g., from Thermo Fisher Scientific [3])
- Heterobifunctional PEG Spacer (e.g., NH₂-PEG-COOH, MW: 2000 Da)
- Coupling Reagents: N,N'-Dicyclohexylcarbodiimide (DCC) and N-Hydroxysuccinimide (NHS)
- Anhydrous Dimethyl Sulfoxide (DMSO)
- Purification Equipment: Size Exclusion Chromatography (SEC) columns, e.g., Sephadex LH-20 or PD-10 desalting columns.
Procedure:
- Activation of Folic Acid:
- Dissolve 10 mg of folic acid and a 5x molar excess of DCC and NHS in 1 mL of anhydrous DMSO.
- React for 12 hours at room temperature with constant stirring.
- Centrifuge to remove the precipitated dicyclohexylurea (DCU) byproduct. The supernatant contains activated folic acid.
Conjugation to PEG Spacer:
- Add the activated folic acid solution dropwise to a solution of NH₂-PEG-COOH (15 mg in 1 mL DMSO).
- Allow the reaction to proceed for 6 hours at room temperature with stirring. This yields Folate-PEG-COOH.
Activation of Folate-PEG-COOH:
- React the Folate-PEG-COOH intermediate with a 5x molar excess of DCC/NHS (as in Step 1) for 12 hours.
- Centrifuge to remove DCU. The supernatant contains Folate-PEG-NHS.
Conjugation to Fluorophore:
- Add the Folate-PEG-NHS solution to a solution of Cy5.5-NHS ester (2 mg in 0.5 mL DMSO).
- Adjust the pH to ~8.5 using N,N-Diisopropylethylamine (DIPEA) to facilitate the reaction between the NHS ester and the amine group.
- React for 4 hours in the dark with stirring.
Purification and Characterization:
- Purify the final product, Folate-PEG-Cy5.5, using size exclusion chromatography (Sephadex LH-20) with DMSO as the eluent to separate the conjugate from unreacted dyes and coupling reagents.
- Characterize the product using analytical HPLC and confirm its molecular weight with Mass Spectrometry (MS).
- Determine the concentration and labeling efficiency by measuring the absorbance at 675 nm (for Cy5.5) and using its known molar extinction coefficient.
Protocol: Validation of Probe Functionality and Specificity In Vitro
Objective: To confirm that the synthesized fluorescent probe specifically binds to its cellular target and generates a detectable signal.
Materials:
- Cell Lines: Folate receptor-positive (e.g., KB cells) and receptor-negative (e.g., A549 cells) as a negative control.
- Complete Cell Culture Media
- Synthesized Folate-PEG-Cy5.5 probe
- Free Folic Acid (for competitive inhibition assay)
- Phosphate Buffered Saline (PBS)
- Fixative (e.g., 4% paraformaldehyde)
- Mounting medium with DAPI
- Imaging Equipment: Confocal or fluorescence microscope with a Cy5.5-appropriate filter set.
Procedure:
- Cell Preparation:
- Seed KB and A549 cells onto glass-bottom culture dishes or chamber slides and culture for 24-48 hours until 70-80% confluent.
Probe Incubation:
- Divide the KB cells into two groups: an experimental group and a competition group.
- Pre-treat the competition group with a 100x molar excess of free folic acid for 30 minutes.
- To all groups (KB experimental, KB competition, and A549), add the Folate-PEG-Cy5.5 probe at a concentration of 100 nM in culture media.
- Incubate for 2 hours at 37°C in a CO₂ incubator.
Washing and Fixation:
- Gently wash the cells three times with PBS to remove unbound probe.
- Fix the cells with 4% paraformaldehyde for 15 minutes at room temperature.
- Wash again with PBS.
Imaging and Analysis:
- Mount the samples and image using a fluorescence microscope.
- Use identical exposure settings across all samples to allow for quantitative comparison.
- Expected Outcome: Strong fluorescence should be observed only in the folate receptor-positive KB cells (experimental group). This signal should be significantly reduced in the competition group (pre-treated with free folic acid) and absent in the A549 (receptor-negative) cells, confirming the specificity of the probe.
The Scientist's Toolkit: Research Reagent Solutions
Table 2: Essential Reagents and Materials for Probe Development and Testing
| Item | Function/Application | Example Vendors/Sources |
|---|---|---|
| Small-Molecule Fluorophores | Signal generation; available with reactive groups (NHS, maleimide) for conjugation. | Thermo Fisher Scientific (DyLight, Alexa Fluor series) [3]. |
| Quantum Dots | Highly bright and photostable nanocrystals for multiplexed imaging. | Thermo Fisher Scientific (Qdot nanocrystals) [3]. |
| Heterobifunctional PEG Linkers | Biocompatible spacers (e.g., NH₂-PEG-COOH, MAL-PEG-NHS) to connect recognition and fluorescence units. | Broadly available from chemical suppliers (e.g., Sigma-Aldrich, Creative PEGWorks). |
| Coupling Reagents | Facilitate the formation of amide bonds between components (e.g., DCC, EDC, NHS). | Standard chemical suppliers (e.g., Sigma-Aldrich, TCI). |
| Size Exclusion Chromatography Media | Purification of conjugated probes from reaction mixtures. | Cytiva (Sephadex), Bio-Rad (Bio-Gel P), or pre-packed PD-10 columns. |
| Fluorescent Microscopes & Scanners | Detection and spatial resolution of probe signal in cells and tissues. | Major instrument manufacturers (e.g., Zeiss, Leica, Olympus). |
| Flow Cytometers | Quantitative analysis of probe binding and uptake at the single-cell level. | BD Biosciences, Beckman Coulter [4]. |
| Spectrofluorometers | Characterization of probe photophysical properties (excitation/emission spectra, quantum yield). | Horiba, Agilent. |
Fluorescent sensing mechanisms are the cornerstone of modern diagnostic fluorescence imaging, enabling researchers to visualize biological processes at the molecular level with exceptional sensitivity and specificity. These mechanisms, including Förster Resonance Energy Transfer (FRET), Photoinduced Electron Transfer (PET), Intramolecular Charge Transfer (ICT), and Aggregation-Induced Emission (AIE), form a versatile toolkit for developing advanced nanoparticle probes. Each mechanism operates on distinct photophysical principles that translate molecular recognition events into measurable optical signals, providing real-time insights into cellular environments, disease biomarkers, and therapeutic responses [7] [8]. The strategic selection and integration of these mechanisms allow for the rational design of probes that can overcome the limitations of conventional imaging agents, such as poor photostability, low signal-to-noise ratios, and limited targeting capabilities [9].
The significance of these mechanisms extends beyond basic research into translational medicine, where they facilitate early disease diagnosis, intraoperative guidance, and therapeutic monitoring. For instance, FRET-based systems excel at reporting molecular proximity and enzymatic activity, while PET-based constructs offer binary switching behavior ideal for ion detection. ICT probes provide ratiometric measurements that are resilient to environmental variables, and AIEgens overcome the aggregation-caused quenching (ACQ) that plagues traditional fluorophores [10] [11]. When incorporated into targeted nanoparticle platforms, these mechanisms enable the creation of sophisticated diagnostic agents with enhanced biodistribution, tumor accumulation, and multimodal capabilities. This document provides a detailed technical overview of each mechanism, supported by structured data comparisons, experimental protocols, and visualization tools to guide their application in targeted fluorescence imaging research.
Fundamental Principles and Characteristics
The four key mechanisms—FRET, PET, ICT, and AIE—operate through distinct photophysical processes that dictate their application scope and experimental design. FRET is a distance-dependent energy transfer process between a donor fluorophore and an acceptor moiety, occurring through non-radiative dipole-dipole coupling. This mechanism requires significant spectral overlap between donor emission and acceptor absorption, and efficiency decreases with the sixth power of the distance between the pair, typically effective in the 1-10 nm range [12] [8]. FRET is particularly valuable for monitoring molecular interactions, conformational changes, and enzymatic activities in biological systems.
PET functions as an electron transfer switch where a receptor moiety, upon binding with an analyte, alters the electron transfer rate to a fluorophore, resulting in fluorescence quenching or enhancement. This "on-off" switching behavior makes PET probes highly sensitive to specific ions and small molecules [10] [8]. ICT involves a unidirectional electron flow between donor and acceptor groups within the same molecule, resulting in solvatochromic shifts in emission spectra. These probes are exceptionally responsive to microenvironmental changes such as polarity, viscosity, and pH, enabling ratiometric measurements that internal reference for more accurate quantification [8].
AIE represents a distinctive photophysical phenomenon where luminogens are non-emissive in molecularly dispersed states but exhibit strong fluorescence upon aggregation. This behavior directly counters the ACQ effect and is primarily attributed to the restriction of intramolecular motions (RIM), including rotation and vibration, which suppresses non-radiative decay pathways [13] [11]. Tetraphenylethylene (TPE) stands as a prototypical AIE luminogen with a propeller-shaped structure that prevents π-π stacking in aggregated states, making it particularly valuable for imaging in crowded biological environments [11].
Comparative Performance Metrics
Table 1: Comparative Analysis of Key Fluorescent Sensing Mechanisms
| Mechanism | Working Principle | Key Advantages | Typical Detection Limits | Primary Applications in Diagnostics |
|---|---|---|---|---|
| FRET | Distance-dependent energy transfer between donor and acceptor | Distance sensitivity (1-10 nm), rationetric capability, multiplexing potential | Nanomolar (nM) range | Enzyme activity monitoring, protein-protein interactions, nucleic acid detection |
| PET | Electron transfer from receptor to fluorophore core (on-off switching) | High contrast ratio, modular design, sensitivity to specific analytes | Picomolar (pM) to nanomolar (nM) range [7] | Ion detection (Hg²⁺, Zn²⁺, Cu²⁺), pH sensing, redox status monitoring |
| ICT | Charge redistribution across donor-acceptor framework | Ratiometric output, large Stokes shifts, environmental sensitivity | Nanomolar (nM) range [7] | Microenvironment polarity mapping, pH sensing, metal ion detection |
| AIE | Emission enhancement via restricted intramolecular motion in aggregate state | High photostability, strong aggregate-state emission, low background | Nanomolar (nM) range (e.g., hydrazine detection) [7] | Cellular organelle imaging, protein aggregation tracking, tumor margin delineation |
Table 2: Nanoprobe Design Considerations for Different Mechanisms
| Mechanism | Optimal Fluorophore Types | Compatible Nanoparticle Platforms | Key Design Parameters | Common Targeting Ligands |
|---|---|---|---|---|
| FRET | Cyanine dyes, quantum dots, TPE derivatives [13] | Liposomes, polymeric NPs, gold nanoparticles | Donor-acceptor spectral overlap, distance (1-10 nm), orientation factor | Antibodies, peptides, aptamers [9] |
| PET | Anthracene, rhodamine, BODIPY derivatives | Silica nanoparticles, dendrimers | Receptor-fluorophore electronic coupling, binding affinity | Small molecules, ionophores |
| ICT | D-π-A structured fluorophores with push-pull systems | Polymer-based nanoparticles, mesoporous silica | Donor/acceptor strength, conjugation length, solvent polarity | Peptides, antibody fragments [14] |
| AIE | TPE derivatives, hexaphenylsilole analogs | AIEgen self-assemblies, polymer-AIEgen conjugates [15] | Rotor structure flexibility, aggregation propensity, hydrophilic-lipophilic balance | cRGD peptides [14], nuclear localization signals |
Detailed Experimental Protocols
Protocol: FRET-Based Hypoxia Detection Using AIE Nanoprobe
This protocol details the synthesis and application of a FRET-based "off-on" AIE nanoprobe for detecting hypoxic niches in tumor sections, adapted from a published study [13]. The probe leverages azobenzene (Azo) as a hypoxia-responsive linker and quencher, with tetraphenylethene (TPE) as the AIE-active fluorophore.
Reagents and Materials
- TNNT dimer: Synthesized by conjugating two TPE units via an Azo bridge
- DSPE-PEG₂₀₀₀: For nanoparticle stabilization and PEGylation
- Anhydrous dimethylformamide (DMF): For synthesis and purification
- Dichloromethane (DCM): For extraction and washing
- Phosphate buffered saline (PBS): For biological experiments
- 4T1 breast cancer cell line: For in vitro and in vivo models
- Anaerobic chamber: For creating hypoxic conditions (1% O₂)
- Dialysis tubing: Molecular weight cutoff 3.5 kDa
Step-by-Step Procedure
Step 1: Synthesis of TNNT Dimer
- Dissolve TPE-COOH (1.0 mmol) and Azo bridge reagent (0.5 mmol) in 50 mL anhydrous DMF
- Add DCC (1.1 mmol) and DMAP (0.1 mmol) as coupling catalysts
- React under nitrogen atmosphere at room temperature for 12 hours with stirring
- Monitor reaction progress by thin-layer chromatography (TLC)
- Precipitate product in ice-cold water and purify by silica gel column chromatography using DCM/hexane (3:1) as eluent
- Characterize product by ¹H NMR, ¹³C NMR, and mass spectrometry [13]
Step 2: Preparation of PEGylated Nanoassemblies (p-TNNT NAs)
- Dissolve TNNT dimer (5 mg) in 1 mL THF
- Add DSPE-PEG₂₀₀₀ (1 mg in 0.5 mL THF) at 20 wt% ratio
- Inject solution rapidly into 10 mL deionized water under sonication
- Remove THF by dialysis against PBS (pH 7.4) for 6 hours
- Filter through 0.22 μm membrane to sterilize and remove aggregates
- Characterize particle size (expected ~110 nm), PDI (<0.2), and zeta potential by dynamic light scattering [13]
Step 3: In Vitro Hypoxia Response Validation
- Culture 4T1 cells in DMEM with 10% FBS at 37°C, 5% CO₂
- Incubate cells with p-TNNT NAs (10 μg/mL) for 4 hours
- Divide cells into two groups: normoxic (21% O₂) and hypoxic (1% O₂) conditions
- Maintain hypoxic group in anaerobic chamber for 6 hours
- Image cells using confocal microscopy with 405 nm excitation and 460 nm emission collection
- Quantify fluorescence intensity using ImageJ software
Step 4: In Vivo Administration and Tumor Section Imaging
- Establish 4T1 tumor-bearing mouse models (n=5 per group)
- Inject p-TNNT NAs (2 mg/kg) via tail vein
- Allow 24 hours for circulation and tumor accumulation
- Euthanize mice and excise tumors
- Immediately prepare fresh-frozen tumor sections (8 μm thickness)
- Image sections without fixation or staining using fluorescence microscopy
- Compare with positive control (pimonidazole hydrochloride) using immunofluorescence
Technical Notes and Troubleshooting
- Critical Step: Maintain anaerobic conditions throughout hypoxic experiments to prevent Azo cleavage before imaging
- Quality Control: Ensure nanoassemblies have PDI <0.2 for uniform biodistribution
- Optimization: Adjust DSPE-PEG₂₀₀₀ ratio (10-30 wt%) based on particle stability and cellular uptake
- Validation: Confirm hypoxia specificity by comparing with HIF-1α immunohistochemistry
Protocol: ICT-Based Ratiometric Sensing for Microenvironment Mapping
This protocol describes the development and application of an ICT-based ratiometric probe for mapping tumor microenvironment properties such as pH and polarity [8].
Reagents and Materials
- D-π-A structured fluorophore: With strong donor and acceptor groups
- Targeting ligand: cRGD peptide for integrin targeting [14]
- Poly(lactic-co-glycolic acid) (PLGA): For nanoparticle encapsulation
- Fluorescence spectrophotometer: With capability for ratio measurements
- Confocal microscope: With spectral imaging capability
Step-by-Step Procedure
Step 1: Probe Design and Synthesis
- Select electron-donating group (e.g., triphenylamine, dimethylamino)
- Choose electron-withdrawing group (e.g., cyano, aldehyde, imide)
- Connect via π-conjugated bridge to create push-pull system
- Characterize ICT efficiency through solvatochromism testing
- Conjugate with cRGD peptide via EDC/NHS chemistry
- Purify by HPLC and verify by mass spectrometry
Step 2: Nanoparticle Formulation and Characterization
- Dissolve ICT probe (1 mg) and PLGA (10 mg) in 2 mL acetone
- Add dropwise to 10 mL PVA solution (2% w/v) under sonication
- Evaporate organic solvent under reduced pressure
- Centrifuge at 15,000 rpm for 30 minutes to collect nanoparticles
- Resuspend in PBS and characterize size, loading efficiency, and stability
Step 3: Ratiometric Calibration
- Prepare standard solutions with varying pH (5.0-8.0) or polarity (different water-glycerol mixtures)
- Measure emission spectra with excitation at optimal wavelength
- Identify two emission peaks that shift in opposite directions
- Create calibration curve of intensity ratio versus parameter of interest
- Determine linear range and limit of detection
Step 4: Biological Validation
- Incubate nanoparticles with cells (1-100 μg/mL) for 2-4 hours
- Image using confocal microscope with two detection channels
- Calculate pixel-by-pixel ratio to generate parametric images
- Compare with commercial probes for validation
- Perform statistical analysis of ratio distributions in different cellular compartments
Signaling Pathways and Experimental Workflows
FRET-Based "Off-On" Hypoxia Sensing Mechanism
Diagram 1: FRET-Based "Off-On" Hypoxia Sensing Mechanism - This workflow illustrates the mechanism of a FRET-based AIE nanoprobe for tumor hypoxia detection. Under normoxic conditions, FRET occurs between TPE donors and Azo acceptors, quenching fluorescence. In hypoxic environments, azoreductase cleaves Azo linkers, disrupting FRET and restoring TPE emission for detection [13].
AIE Luminogen Design and Bioapplication Workflow
Diagram 2: AIE Luminogen Design and Bioapplication Workflow - This diagram outlines the fundamental AIE process from molecular design to bioimaging application. AIEgens are non-emissive in solution but form aggregates upon cellular uptake, activating emission through restricted intramolecular motion (RIM) for high-contrast bioimaging [11].
Research Reagent Solutions
Table 3: Essential Research Reagents for Fluorescent Probe Development
| Reagent/Category | Specific Examples | Function and Application Notes | Commercial Sources/Alternatives |
|---|---|---|---|
| AIE Luminogens | TPE derivatives, Hexaphenylsilole | Core fluorophores with aggregation-induced emission; ideal for cellular imaging and tracking in dense environments | Sigma-Aldrich, TCI Chemicals, custom synthesis |
| FRET Pairs | Cyanine dyes (Cy3/Cy5), TPE-Azo systems | Donor-acceptor pairs for distance-dependent sensing; optimize spectral overlap for efficiency | Lumiprobe, AAT Bioquest, custom conjugation |
| Targeting Ligands | cRGD peptides, HER2-binding peptides | Enhance specific cellular uptake; conjugate via NHS-ester or click chemistry | Bachem, GenScript, AAPPTec |
| Nanoparticle Matrix | PLGA, DSPE-PEG₂₀₀₀, mesoporous silica | Carrier systems for improved delivery, circulation time, and biocompatibility | Sigma-Aldrich, Avanti Polar Lipids |
| Enzyme Substrates | Azobenzene (hypoxia), MMP-cleavable peptides | Responsive elements for activatable probes; select based on target enzyme expression | Sigma-Aldrich, Peptides International |
| Characterization Tools | Dynamic Light Scattering, Spectrofluorometers | Determine particle size, PDI, and optical properties; validate probe performance | Malvern Panalytical, Horiba, Agilent |
The strategic implementation of FRET, PET, ICT, and AIE mechanisms provides researchers with a diverse toolkit for developing advanced fluorescent nanoprobes for diagnostic imaging. Each mechanism offers distinct advantages: FRET for distance-dependent sensing, PET for binary switching behavior, ICT for environmental responsivity, and AIE for high-contrast imaging in aggregate-prone biological environments. The integration of these mechanisms with targeted nanoparticle platforms enhances their diagnostic potential through improved specificity, sensitivity, and functionality.
Future developments in this field will likely focus on multimodal probes that combine multiple sensing mechanisms to overcome individual limitations and provide complementary information. The incorporation of artificial intelligence for probe design optimization and data analysis represents another promising direction [7]. Additionally, addressing challenges related to biocompatibility, regulatory approval, and manufacturing scalability will be crucial for successful clinical translation. As these technologies mature, they hold significant potential to advance personalized medicine through more precise diagnostic imaging and therapeutic monitoring capabilities.
Fluorescent nanomaterials have revolutionized diagnostic fluorescence imaging, offering superior photostability, tunable emission, and high brightness compared to traditional molecular probes. [16] [1] These materials, including quantum dots (QDs), metal nanoclusters (MNCs), carbon dots (CDs), and metal-organic frameworks (MOFs), provide researchers and drug development professionals with powerful tools for sensitive biomarker detection, deep-tissue imaging, and real-time monitoring of cellular processes. [16] [1] Their unique optical properties and nanoscale dimensions enable applications ranging from super-resolution microscopy to in vivo tumor targeting, forming a critical component of targeted nanoparticle probes in modern theranostics. [16] [17] This article provides a structured comparison of these nanomaterials, detailed experimental protocols for their application, and essential resources for their implementation in fluorescence imaging research.
Comparative Analysis of Fluorescent Nanomaterials
The table below summarizes the key characteristics of four major classes of fluorescent nanomaterials, highlighting their distinct advantages for diagnostic imaging applications.
Table 1: Comparative Analysis of Fluorescent Nanomaterials for Diagnostic Imaging
| Material Type | Size Range | Key Optical Properties | Primary Applications in Imaging | Advantages | Limitations |
|---|---|---|---|---|---|
| Carbon Dots (CDs) | < 10 nm [18] | Tunable emission (UV-NIR), high QY up to 47.6% after passivation [18] [19] | Super-resolution imaging (STED, STORM), multiphoton imaging, FLIM, biomarker sensing [16] [17] | Excellent biocompatibility, low toxicity, facile synthesis, photostability [16] [17] | Variable QY based on precursor and synthesis method [18] |
| Metal Nanoclusters (MNCs) | Atomically precise (e.g., Au~21~, Au~22~) [19] | NIR emission, tunable QY (13.1% to 47.6% via atomic manipulation) [19] [20] | NIR bioimaging, biosensing [20] | Atomically precise structure, good biocompatibility, potential for atomic-level tuning [19] [21] | Complex synthesis requiring precise control [19] |
| Quantum Dots (QDs) | Nanoscale [1] | Size-dependent emission, high brightness, broad excitation [1] | Multiplexed biomarker detection, deep-tissue imaging [1] | High QY, narrow emission bands, excellent photostability [1] | Potential heavy metal toxicity, blinking effect [16] |
| Metal-Organic Frameworks (MOFs) | Varies with structure [22] | Tunable emission via linker/metal choice, stimulus-responsive (e.g., piezochromic) [22] | Sensing, photocatalysis, potential for drug delivery & imaging [22] | Extremely high surface area, structural tunability, porous nature [22] | Stability can vary, potential toxicity of metal components [1] |
Application Notes for Diagnostic Imaging
Carbon Dots (CDs)
CDs excel in advanced optical imaging due to their exceptional photostability and tunable fluorescence. They are ideal probes for super-resolution microscopy techniques like STED (stimulated emission depletion) and STORM (stochastic optical reconstruction microscopy), breaking the diffraction limit to achieve nanoscale resolution. [16] Their large multiphoton absorption cross-sections enable high-resolution imaging deep within tissues, while their compatibility with fluorescence lifetime imaging microscopy (FLIM) provides a contrast mechanism independent of probe concentration, facilitating quantitative cellular imaging. [16] [17] CDs can be engineered for specific targeting and multimodal imaging by integrating capabilities like photoacoustic or magnetic resonance imaging. [16]
Metal Nanoclusters (MNCs)
MNCs, particularly gold clusters, are emerging as programmable nanomaterials with customized structures and near-infrared (NIR) emission, which is beneficial for deep-tissue imaging due to reduced scattering and autofluorescence. [19] [20] Their photophysical dynamics, including non-radiative decay pathways and intersystem crossing, can be regulated at the atomic level. [19] [20] For instance, single-atom manipulation in a cluster pair (Au~21~ and Au~22~) inhibited non-radiative decay and accelerated intersystem crossing, significantly enhancing the photoluminescence quantum yield from 13.10% to 47.63%. [19] This atomic-level tunability makes MNCs powerful for designing highly sensitive and bright probes for biological applications. [21]
Quantum Dots (QDs) and Metal-Organic Frameworks (MOFs)
QDs are valued for their superior brightness and photostability in multiplexed biomarker detection. [1] However, their potential cytotoxicity requires careful consideration for in vivo applications. [16] MOFs offer a highly tunable platform where fluorescence properties can be modulated through linker selection, metal node choice, and postsynthetic modifications. [22] Their porous structure can be loaded with therapeutic agents or other contrast agents, making them promising theranostic platforms. [22]
Experimental Protocols
Protocol: Heavy Metal Ion Detection Using Carbon Dots
This protocol details the use of carbon dots as fluorescent probes for the sensitive and selective detection of heavy metal ions (e.g., Cu²⁺, Hg²⁺) in aqueous samples, based on the fluorescence quenching (FQ) mechanism. [18]
- Principle: The detection relies on the quenching of CD fluorescence upon binding with specific heavy metal ions. Mechanisms include static quenching, dynamic quenching, photoinduced electron transfer (PET), and Förster resonance energy transfer (FRET). [18] [1]
- Materials:
- Carbon Dots Solution: Synthesized, for example, via hydrothermal treatment of carbon precursors (e.g., citric acid, orange peel). [18]
- Standard Solutions: Of target metal ions (e.g., 1000 ppm Cu(NO~3~)~2~, HgCl~2~).
- Buffer Solution: To maintain constant pH (e.g., 10 mM phosphate buffer, pH 7.4).
- Fluorescence Spectrometer.
- Procedure:
- Preparation of Calibration Curve:
- Prepare a series of standard solutions with known concentrations of the target metal ion in buffer.
- Mix a fixed volume of CD solution with each standard solution and incubate for 5-10 minutes at room temperature.
- Measure the fluorescence intensity (FI) of each mixture at the excitation and emission maxima of the CDs.
- Plot the FI (or F~0~/F, where F~0~ is the FI in the absence of the quencher) against the metal ion concentration to obtain a calibration curve. [18]
- Analysis of Unknown Sample:
- Mix the CD solution with the filtered water sample under the same conditions.
- Measure the FI and determine the concentration of the target metal ion using the calibration curve. [18]
- Preparation of Calibration Curve:
- Safety Notes: Wear appropriate personal protective equipment (gloves, safety glasses) when handling metal salt solutions. Dispose of waste according to institutional regulations for heavy metals.
Protocol: Regulating Photophysical Dynamics in Metal Nanoclusters
This protocol outlines the methodology for single-atom manipulation of gold nanoclusters to regulate their emission properties, as demonstrated for the Au~21~/Au~22~ system. [19]
- Principle: Adding a single-gold-atom complex to a surface defect on the Au~21~ nanocluster complements its structure, creating Au~22~. This atomic-level manipulation enhances structural rigidity, reduces non-radiative decay, and accelerates intersystem crossing, leading to higher photoluminescence quantum yield. [19]
- Materials:
- Precursor Solution: Purified [Au~21~(AdmS)~12~(PPh~2~py)~3~]⁺ nanoclusters in CH~2~Cl~2~. [19]
- Reactant: AuPPh~2~pyCl complex.
- Solvents: Anhydrous CH~2~Cl~2~, hexane.
- Instrumentation: Electrospray Ionization Mass Spectrometry (ESI-MS), fluorescence spectrometer, equipment for single-crystal X-ray diffraction.
- Procedure:
- Cluster Transformation:
- Add a solution of the AuPPh~2~pyCl complex to a CH~2~Cl~2~ solution of Au~21~ nanoclusters.
- Stir the mixture at room temperature and monitor the reaction by ESI-MS until the signal for [Au~22~(AdmS)~12~(PPh~2~py)~4~]²⁺ dominates. [19]
- Purification and Crystallization:
- Purify the crude product via solvent washing.
- Cultivate single crystals by diffusing hexane into the CH~2~Cl~2~ cluster solution over ~7 days. [19]
- Photophysical Characterization:
- Confirm the atomic structure of Au~21~ and Au~22~ by single-crystal X-ray diffraction.
- Record UV-Vis absorption spectra to observe distinct chromatic changes.
- Measure photoluminescence (PL) spectra and determine PL quantum yields (PLQY) to quantify the emission enhancement in Au~22~. [19]
- Cluster Transformation:
- Safety Notes: Perform all procedures involving organic solvents in a well-ventilated fume hood.
Signaling Pathways and Experimental Workflows
Fluorescence Sensing Mechanisms in Nanoprobes
The diagram below illustrates the primary mechanisms by which fluorescent nanoprobes, such as CDs and MNCs, detect analytes like metal ions.
Figure 1: Fluorescence Sensing Mechanisms.
Workflow for Nanocluster Synthesis and Tuning
This workflow outlines the key steps for synthesizing atomically precise metal nanoclusters and tuning their photophysical properties through single-atom manipulation.
Figure 2: Workflow for Nanocluster Synthesis and Tuning.
The Scientist's Toolkit
Table 2: Essential Research Reagent Solutions for Fluorescent Nanomaterial Applications
| Reagent/Material | Function/Application | Key Characteristics |
|---|---|---|
| Carbon Precursors (e.g., Citric Acid, Lignin) [18] [23] | Synthesis of Carbon Dots (CDs) via bottom-up hydrothermal methods. | Determines the core structure and influences the quantum yield and emission profile of the resulting CDs. [23] |
| Passivating Agents (e.g., PEG, PEI) [18] [24] | Surface passivation of CDs to enhance quantum yield and stability. | PEG passivation, for example, provides excellent long-term (e.g., 60 days) stability. [24] |
| Atomically Precise Precursors (e.g., Au~21~ clusters) [19] | Serving as a platform for single-atom regulation of photophysical properties. | Enables atomic-level control for structure-property correlation studies. [19] |
| Metal-Ligand Complexes (e.g., AuPPh~2~pyCl) [19] | Used for single-point defect complementation in metal nanoclusters. | Acts as a single-atom "patch" to fill surface defects, enhancing rigidity and emission. [19] |
| Flexible MOF Platforms (e.g., PCN-128) [22] | Matrix for postsynthetic chemical and mechanical modifications. | Its flexibility allows for piezochromic behavior and postsynthetic annulation reactions for bandgap tuning. [22] |
| Heteroatom Dopants (e.g., N, S) [18] [16] | Doping of CDs to modify electronic structure and optical properties. | Enhances quantum yield and enables sensing of specific analytes. [18] |
Core Principles: Linking Nanomaterial Properties to Diagnostic Function
The diagnostic efficacy of nanoparticle probes in fluorescence imaging is governed by a triad of fundamental physicochemical properties: size, morphology, and surface chemistry. These parameters collectively determine the probe's biodistribution, targeting efficiency, signal intensity, and clearance pathways. Size influences circulation half-life and penetration into target tissues; smaller nanoparticles (sub-10 nm) may exhibit renal clearance, while larger ones are often sequestered by the mononuclear phagocyte system [9] [25]. Morphology—including shape and structural architecture—affects optical properties, cellular uptake, and flow dynamics. Surface modification is critical for conferring colloidal stability, reducing nonspecific binding, and enabling active targeting through the attachment of ligands such as antibodies, peptides, or aptamers [26] [9]. For fluorescence imaging specifically, precise control over these properties enhances quantum yield, improves photostability, and minimizes background noise, which is essential for sensitive biomarker detection.
The interplay of these properties directly impacts key performance metrics in diagnostic imaging. For instance, quantum dots (QDs) exhibit size-tunable emission wavelengths due to the quantum confinement effect; larger dots emit at longer wavelengths (e.g., red), while smaller dots emit at shorter wavelengths (e.g., blue) [27]. This allows for multiplexed imaging of multiple biomarkers simultaneously. Furthermore, surface functionalization with polyethylene glycol (PEG) can shield nanoparticles from opsonization, prolonging their circulation time and increasing their accumulation in target tissues via the enhanced permeability and retention (EPR) effect, particularly in tumors [28] [29]. The following diagram illustrates how these core properties synergistically dictate the diagnostic function of nanoparticle probes.
Diagram 1: How nanomaterial properties dictate diagnostic function.
The relationship between nanomaterial properties and their resulting function can be quantitatively summarized to guide probe design. The following tables consolidate critical data on how specific property ranges lead to distinct functional outcomes in diagnostic applications.
Table 1: Influence of Nanoparticle Size on Diagnostic Functionality
| Size Range | Key Functional Outcomes | Imaging Implications | Reference Examples |
|---|---|---|---|
| < 6 nm | Rapid renal clearance, reduced RES uptake, deep tissue penetration. | Shorter imaging windows, suitable for intraoperative imaging. | AuQDs (<2 nm) enable high-resolution cell imaging and renal clearance [25]. |
| 6–20 nm | Balanced circulation time and tumor accumulation via EPR effect. | Optimal for in vivo tumor targeting and sustained imaging. | Semiconductor QDs (2-8 nm) tuned for specific emission wavelengths [27]. |
| 20–100 nm | Prolonged circulation, high RES uptake (liver, spleen). | Potential for background signal in RES organs; requires stealth coating. | SPIONs (~20 nm) used as T2 MRI contrast agents [28]. |
| > 100 nm | Primarily sequestered by the RES; limited tumor penetration. | Limited utility for deep tissue imaging; potential for macrophage imaging. | Not a primary focus in modern fluorescent probe design [9]. |
Table 2: Impact of Nanomaterial Morphology and Composition on Performance
| Morphology/Type | Key Properties | Diagnostic Advantages | Limitations & Notes |
|---|---|---|---|
| Quantum Dots (Spherical) | Size-tunable PL; high quantum yield (50-90%); photostable. | Multiplexed imaging; femtomolar sensitivity; real-time tracking [27]. | Potential heavy metal toxicity (CdSe); blinking can occur [27] [29]. |
| Gold Quantum Dots (AuQDs) | Ultra-small (<2 nm); intrinsic fluorescence; high biocompatibility. | Low toxicity; renal clearance; surface plasmon resonance enhancements [25]. | Complex synthesis for uniformity; quantum yields typically lower than semiconductor QDs [25]. |
| Gold Nanospheres | Tunable LSPR; strong light scattering. | CT contrast; photothermal therapy; surface-enhanced Raman scattering [30]. | Not intrinsically fluorescent; larger sizes limit clearance [25]. |
| Iron Oxide Nanoparticles (Spherical) | Superparamagnetism; T2/T2* MRI contrast. | Multimodal imaging (MRI-Fluorescence); magnetic targeting [31] [28]. | Signal attenuation in MRI at high concentrations; can aggregate [28]. |
| Anisotropic Structures (e.g., Nanorods) | Shape-dependent optical properties; multiple plasmon bands. | Enhanced photostability; higher cellular uptake in some cases [26]. | More complex synthesis and functionalization [26]. |
Table 3: Common Surface Modifications and Their Functional Roles
| Surface Modification | Primary Function | Impact on Diagnostic Probe Performance |
|---|---|---|
| PEGylation | Increases hydrophilicity; reduces opsonization and RES uptake. | Prolongs circulation half-life; enhances passive tumor targeting via EPR [28] [29]. |
| Targeting Ligands (Antibodies, Peptides, Aptamers) | Enables active targeting of overexpressed biomarkers on cell surfaces. | Dramatically improves specificity and signal-to-noise ratio at the disease site [9] [29]. |
| Stimuli-Responsive Linkers (e.g., pH-, enzyme-sensitive) | Controls release of payload or activation of signal in specific microenvironments. | "Activatable" probes that reduce background signal; enable sensing of pathological activity (e.g., MMPs in tumors) [26] [29]. |
| Dyes & Fluorophores | Provides imaging signal. | Enables fluorescence detection; FRET-based sensing with QDs as donors/acceptors [27]. |
Experimental Protocols for Nanoprobe Synthesis and Evaluation
This section provides detailed methodologies for the synthesis, functionalization, and in vitro evaluation of targeted fluorescent nanoprobes, with a focus on gold quantum dots (AuQDs) and quantum dot-infused nanocomposites (QDNCs).
Protocol: Synthesis of Fluorescent Gold Quantum Dots (AuQDs) via Chemical Reduction
Principle: This protocol describes the synthesis of biocompatible, fluorescent AuQDs using chemical reduction of a gold salt (chloroauric acid, HAuCl₄) in the presence of Bovine Serum Albumin (BSA), which acts as both a reducing and a stabilizing agent [25].
Materials:
- Chloroauric acid (HAuCl₄)
- Bovine Serum Albumin (BSA), Fraction V
- Sodium hydroxide (NaOH) solution, 1M
- Deionized water
- Dialysis membrane (MWCO 3.5-5 kDa)
Procedure:
- Solution Preparation: Prepare a 10 mL aqueous solution containing 1 mM HAuCl₄ and 5 mg/mL BSA in a glass vial.
- Reduction Initiation: Under vigorous stirring, rapidly add 100 µL of 1M NaOH to the solution. The mixture will gradually change color.
- Incubation: Incubate the reaction mixture at 37°C for 6-12 hours. The formation of AuQDs will be indicated by the solution turning from pale yellow to a dark brown, exhibiting fluorescence under UV light.
- Purification: Transfer the resulting solution to a dialysis membrane and dialyze against deionized water for 24 hours, changing the water every 6-8 hours, to remove unreacted precursors and salts.
- Characterization:
- UV-Vis Spectroscopy: Confirm the formation of quantum-confined gold species by the absence of a peak at ~520 nm (characteristic of larger AuNPs) and the presence of absorption in the UV region.
- Transmission Electron Microscopy (TEM): Analyze the size, morphology, and dispersion of the AuQDs. The particles should be monodisperse and sub-2 nm in diameter.
- Fluorescence Spectroscopy: Measure the fluorescence emission spectrum, which is typically size-dependent and can be tuned across the visible range [25].
Protocol: Surface Functionalization of Nanoparticles for Active Targeting
Principle: This protocol outlines the conjugation of a targeting ligand (e.g., the RGD peptide, which targets αvβ3 integrin receptors overexpressed on tumor vasculature) to the surface of pre-synthesized nanoparticles (e.g., AuQDs or QDs) via EDC-NHS chemistry, which facilitates amide bond formation between carboxylic acids and amines [9].
Materials:
- Synthesized nanoparticles with surface carboxyl groups (-COOH)
- Targeting ligand (e.g., RGD peptide) with a primary amine group (-NH₂)
- EDC (1-Ethyl-3-(3-dimethylaminopropyl)carbodiimide hydrochloride)
- NHS (N-Hydroxysuccinimide)
- MES buffer (0.1 M, pH 5.5) or PBS (pH 7.4)
- Purification equipment (dialysis membrane or centrifugal filters)
Procedure:
- Activation of Carboxyl Groups: In 1 mL of MES buffer, mix the nanoparticle solution (containing ~1 mg of nanoparticles) with a 10-fold molar excess of EDC and NHS. React for 30 minutes at room temperature with gentle agitation to form an amine-reactive NHS ester on the nanoparticle surface.
- Ligand Conjugation: Add a 20-50 fold molar excess of the targeting ligand (RGD peptide) to the activated nanoparticle solution. Adjust the pH to 7.4 if necessary using PBS. Allow the reaction to proceed for 4-6 hours at room temperature.
- Quenching and Purification: Quench the reaction by adding 10 µL of 2-mercaptoethanol or a small amount of hydroxylamine. Purify the conjugated nanoparticles using dialysis (MWCO appropriate for nanoparticle size) or centrifugal filtration to remove unreacted crosslinkers and peptides.
- Validation: Confirm successful conjugation using techniques such as:
- Fluorescence Spectroscopy: A shift in the emission spectrum may occur.
- Zeta Potential Measurement: A change in surface charge indicates surface modification.
- Gel Electrophoresis: A shift in mobility can confirm conjugation [9].
Protocol: In Vitro Evaluation of Targeted Nanoprobe Binding and Specificity
Principle: This protocol assesses the binding specificity and cellular uptake of targeted versus non-targeted nanoprobes using fluorescence microscopy and flow cytometry on receptor-positive and receptor-negative cell lines.
Materials:
- Receptor-positive cells (e.g., HUVECs for αvβ3 integrin)
- Receptor-negative cells (as a control)
- Targeted nanoprobes (RGD-conjugated)
- Non-targeted nanoprobes (PEGylated only)
- Cell culture medium and reagents
- Flow cytometer or fluorescence microscope
Procedure:
- Cell Preparation: Seed receptor-positive and receptor-negative cells in 12-well plates at a density of 2 x 10⁵ cells per well and culture for 24 hours until 70-80% confluent.
- Incubation with Nanoprobe: Dilute the targeted and non-targeted nanoprobes in serum-free medium. Aspirate the old medium from the wells and add 500 µL of the nanoprobe solution (e.g., 10-50 nM equivalent QD concentration). Incubate for 1-2 hours at 37°C.
- Washing: Remove the nanoprobe solution and wash the cells three times with cold PBS to remove unbound particles.
- Analysis:
- Flow Cytometry: Trypsinize the cells, resuspend in PBS, and analyze immediately. The receptor-positive cells incubated with targeted nanoprobes should show significantly higher mean fluorescence intensity (MFI) than all control groups.
- Fluorescence Microscopy: For direct visualization, fix the washed cells with 4% paraformaldehyde for 15 minutes, mount with a DAPI-containing medium, and image. Targeted probes should show distinct membrane or internalized fluorescence in receptor-positive cells only [9] [25].
- Competitive Binding Assay (Optional): Pre-incubate receptor-positive cells with a 100-fold excess of free RGD peptide for 30 minutes before adding the RGD-conjugated nanoprobes. A significant reduction in fluorescence signal confirms the specificity of the receptor-mediated binding.
The following diagram illustrates the complete experimental workflow from synthesis to in vitro validation.
Diagram 2: Nanoprobe development and evaluation workflow.
The Scientist's Toolkit: Essential Research Reagent Solutions
Table 4: Key Reagents for Developing Targeted Fluorescent Nanoprobes
| Reagent / Material | Function / Role | Specific Example in Protocol |
|---|---|---|
| Chloroauric Acid (HAuCl₄) | Gold precursor for the synthesis of Au nanoparticles and AuQDs. | Starting material for the chemical reduction synthesis of AuQDs [25]. |
| Bovine Serum Albumin (BSA) | Biocompatible reducing and capping agent for nanoparticle synthesis. | Serves as both reductant and stabilizer in the AuQD synthesis protocol [25]. |
| EDC & NHS Crosslinkers | Carbodiimide crosslinkers for activating carboxyl groups for amide bond formation with amines. | Used to conjugate targeting ligands (e.g., RGD peptide) to the nanoparticle surface [9]. |
| Polyethylene Glycol (PEG) | Polymer coating to impart "stealth" properties, reducing nonspecific protein adsorption. | PEGylation of nanoparticles to prolong circulation time and improve biodistribution [28] [29]. |
| Targeting Ligands (Peptides, Aptamers) | Biological molecules that confer specific binding to overexpressed cellular receptors. | RGD peptide for targeting αvβ3 integrin in the functionalization protocol [9]. |
| Quantum Dots (CdSe/ZnS, InP) | Semiconductor nanocrystals with superior brightness and photostability for imaging. | Can be incorporated into nanocomposites (QDNCs) for ultra-sensitive biomarker detection [27]. |
| Fluorescence Dyes (e.g., Cy5.5) | Organic molecules used for labeling and signal generation in optical imaging. | Conjugated to nanoparticles for near-infrared fluorescence (NIRF) imaging [26] [30]. |
From Bench to Bedside: Applications in Biomarker Detection and Cancer Imaging
The early and accurate diagnosis of diseases relies on the sensitive detection of biomarkers, including proteins, nucleic acids, metal ions, and whole cells like Circulating Tumor Cells (CTCs) [32]. Nanoparticles have emerged as a revolutionary platform for this purpose, owing to their unique physical and chemical properties [33]. Their high surface-to-volume ratio allows for dense immobilization of recognition elements (e.g., antibodies, DNA strands), improving target capture efficiency and detection sensitivity [32]. Furthermore, nanomaterials such as noble metals and quantum dots possess distinctive optical properties, including tunable fluorescence and strong light-matter interactions due to localized surface plasmon resonance (LSPR), which are exploited to create highly sensitive and selective diagnostic assays [33] [32]. This document provides detailed application notes and protocols for using targeted nanoparticle probes in the fluorescence-based detection of diverse biomarkers, framed within the context of diagnostic imaging research.
Research Reagent Solutions
The following table details key reagents and their functions in nanoparticle-based detection assays.
Table 1: Essential Research Reagents for Nanoparticle-Based Detection
| Reagent/Material | Function/Explanation |
|---|---|
| Gold Nanoparticles (AuNPs) | Serve as potent fluorescence quenchers in FRET assays or as colorimetric reporters due to their tunable Surface Plasmon Resonance (SPR) [33] [34]. |
| Quantum Dots (QDs) | Act as robust fluorophores with broad absorption, narrow, tunable emission, and high photostability for multiplexed fluorescence detection [33] [32]. |
| Magnetic Nanoparticles | Enable efficient separation and enrichment of target biomarkers (e.g., CTCs) from complex mixtures like blood using an external magnetic field [34]. |
| EpCAM Antibodies | Biological recognition elements conjugated to nanoparticles to specifically capture CTCs based on epithelial cell adhesion molecule expression [35] [34]. |
| DNAzymes | Catalytic DNA sequences used as recognition elements for specific metal ions (e.g., Pb²⁺); their activation leads to a detectable signal change [33]. |
| Specific Antibodies/Aptamers | Recognition elements (e.g., single-chain antibody fragments, aptamers) conjugated to nanoparticles to bind specific protein or nucleic acid targets [33] [32]. |
Detection Modalities and Nanomaterial Properties
Nanoparticles can be engineered to exploit various detection modalities. The selection of core material and surface functionalization dictates the mechanism of detection and the applicable biomarkers.
Table 2: Nanoparticle Probes for Diverse Biomarker Detection
| Biomarker Category | Detection Mechanism | Nanomaterial Used | Example Target & Performance |
|---|---|---|---|
| Metal Ions | Fluorescence quenching/recovery via FRET [33] | AuNPs, QDs [33] | Cu²⁺ sensor using pyridine-perylene-AuNPs; CN⁻ detection with QDs (μM concentration) [33] |
| Metal Ions | Colorimetric aggregation assay [33] | AuNPs [33] | K⁺ with crown-ether-AuNPs; Pb²⁺ with DNAzyme-AuNPs (μM concentration) [33] |
| Proteins/ Small Molecules | FRET-based displacement assay [33] | QDs, AuNPs [33] | TNT detection with QD-antibody and quencher; Glucose with dextran-AuNPs and Con A (1–40 mM) [33] |
| Nucleic Acids | Fluorescence or SERS enhancement on capture [32] | AgNPs, AuNPs [32] | Hepatitis B virus DNA with AgNP aggregates (LOD: 50 fM) [32] |
| Circulating Tumor Cells (CTCs) | Immunomagnetic capture & fluorescence identification [34] | Magnetic NPs, QDs [34] | CTC isolation via EpCAM-functionalized magnetic beads; identification with QD-labeled antibodies [34] |
| Circulating Tumor Cells (CTCs) | Size-based/deformability physical capture [35] | Microfluidic chips (often with nanotextured surfaces) [35] | Isolation of CTCs from blood based on larger size and stiffness, independent of surface markers [35] |
Detailed Experimental Protocols
Protocol: FRET-Based Detection of a Protein Biomarker
This protocol details the detection of a protein biomarker using Quantum Dots (QDs) as donors and gold nanoparticles (AuNPs) as quenchers in a FRET-based assay [33].
Primary Materials:
- CdSe/ZnS core/shell QDs (emission tuned to match the acceptor's absorption).
- Spherical gold nanoparticles (d = 20 nm).
- Specific antibody or aptamer against the target protein.
- A dark quencher dye conjugated to a protein analog.
- Phosphate Buffered Saline (PBS), pH 7.4.
- Fluorescence spectrophotometer.
Step-by-Step Procedure:
- QD Functionalization: Conjugate the QDs with the specific antibody fragment using standard EDC-NHS chemistry or via his-tag interactions. Purify the conjugates using size-exclusion chromatography [33].
- Quencher Assembly: Incubate the functionalized QDs with the quencher-dye-conjugated protein analog for 1 hour at room temperature to form the QD-quencher assembly. This quenches the QD fluorescence via FRET [33].
- Sample Incubation: Add the sample (e.g., serum) containing the target protein to the QD-quencher assembly. Incubate for 1 hour at 37°C with gentle shaking.
- Signal Measurement: Transfer the solution to a cuvette and measure the fluorescence intensity using a spectrophotometer. The presence of the target protein will displace the quencher, recovering the QD fluorescence signal [33].
- Data Analysis: Plot the fluorescence recovery against protein concentration to generate a calibration curve.
The following workflow diagram illustrates the key steps in this FRET-based detection method:
Protocol: Immunomagnetic Capture and Fluorescence Detection of CTCs
This protocol describes the isolation of CTCs from whole blood using EpCAM-functionalized magnetic nanoparticles, followed by fluorescence identification [35] [34].
Primary Materials:
- EpCAM antibody-conjugated magnetic nanoparticles.
- Anti-CD45 antibodies conjugated with a fluorophore (e.g., FITC) for leukocyte staining.
- Fluorescent dyes (e.g., DAPI) for nuclear staining and QD-conjugated anti-cytokeratin antibodies for epithelial marker staining.
- Pre-treatment reagents (e.g., red blood cell lysis buffer).
- Magnetic separation stand.
- Fluorescence microscope or flow cytometer.
Step-by-Step Procedure:
- Blood Pre-processing: Collect peripheral blood in EDTA tubes. Lyse red blood cells using a commercial lysis buffer and centrifuge to obtain a pellet of peripheral blood mononuclear cells (PBMCs) and CTCs [35].
- Immunomagnetic Capture: Resuspend the cell pellet in a buffer containing EpCAM-conjugated magnetic nanoparticles. Incubate for 30-60 minutes at 4°C with gentle rotation to allow binding.
- CTC Enrichment: Place the tube on a magnetic stand for 5-10 minutes. Carefully aspirate the supernatant containing unbound cells. Remove the tube from the magnet and wash the captured cells with PBS 2-3 times to remove non-specifically bound cells [34].
- Fluorescence Staining: Resuspend the magnetically captured cells in a buffer containing DAPI, CD45-FITC, and QD-anti-cytokeratin. Incubate for 30 minutes in the dark.
- Identification and Analysis: After washing, analyze the cells under a fluorescence microscope or flow cytometer. CTCs are typically identified as DAPI⁺ (nucleated), CD45⁻ (non-leukocyte), and cytokeratin⁺ (epithelial origin) [35].
The following diagram summarizes the immunomagnetic capture and identification process for CTCs:
Signaling Pathways and Logical Workflows
The Epithelial-Mesenchymal Transition (EMT) in CTC Heterogeneity
A significant challenge in CTC detection is their heterogeneity, driven largely by the Epithelial-Mesenchymal Transition (EMT) [36]. This process confers metastatic potential and complicates detection based solely on epithelial markers like EpCAM. Understanding this pathway is crucial for designing robust detection panels.
Multiplexed Detection Logic for Improved Diagnostic Accuracy
Many biomarkers are aberrantly expressed in multiple diseases, making single-biomarker detection prone to false positives. Multiplexed detection of several biomarkers associated with a single disease significantly improves diagnostic accuracy [32]. The following logic workflow outlines the rationale and implementation of a multiplexed assay.
The rapid and accurate detection of pathogens is a cornerstone of modern disease control, particularly in cases with significant economic and food security implications, such as the African Swine Fever Virus (ASFV). This double-stranded DNA virus causes a highly contagious and lethal hemorrhagic disease in domestic and wild pigs, with mortality rates approaching 100% in naive populations [37] [38]. Since its emergence in China in 2018, ASFV has led to the culling of tens of millions of pigs globally, devastating the swine industry and threatening global food security [39] [38]. Given the absence of widely effective vaccines or treatments, disease control relies heavily on rapid diagnosis, strict biosecurity measures, and the culling of infected animals [40] [38].
Within this context, nanotechnology has emerged as a transformative tool for pathogen detection. Nanoparticle-based biosensors offer the potential for rapid, sensitive, and field-deployable diagnostics, addressing critical limitations of conventional methods like polymerase chain reaction (PCR), which often require sophisticated laboratory infrastructure and skilled personnel [41] [42]. This application note details how engineered nanoparticles, particularly within fluorescence imaging systems, are being leveraged to detect ASFV with high sensitivity and specificity. We frame these technological advances within the broader thesis of developing targeted nanoparticle probes for diagnostic fluorescence imaging, highlighting their role in advancing personalized medicine and point-of-care diagnostics [41] [43].
Nanoparticle-Based Case Studies in ASFV Detection
The application of nanoparticles in ASFV diagnostics primarily focuses on enhancing the sensitivity, specificity, and speed of nucleic acid detection. The following case studies illustrate the practical implementation of these technologies.
Case Study 1: Gold Nanoparticle (AuNP) Biosensor for Multi-Genotype ASFV Detection
A proof-of-concept biosensor utilizing gold nanoparticles (AuNPs) was developed to detect the highly conserved p72 gene of ASFV across multiple genotypes. The system employs oligonucleotide probes adsorbed onto the surface of AuNPs, which stabilize the nanoparticles in a salt solution. In the presence of the target ASFV DNA sequence, the probes hybridize with the target, leading to a change in the surface properties of the AuNPs. This change causes nanoparticle aggregation upon salt addition, resulting in a visible color shift from red to blue that can be detected spectrophotometrically [42].
Key Performance Metrics:
- Sensitivity: Successfully detected 550 copies of synthetic ASFV DNA.
- Specificity: Demonstrated no cross-reactivity with non-target bacterial DNA.
- Genotypic Coverage: In-silico analysis using Clustal Omega for multiple sequence alignments showed that probes 2 (40 bp, 50.0% GC content) and 5 (60 bp, 54.2% GC content) provided strong binding across multiple ASFV genotypes.
- Rapidity: The core detection reaction was completed within 5 minutes [42].
This system underscores the importance of probe design, with statistical analysis revealing that GC content was significantly correlated with sensitivity (Spearman’s ρ = -0.80, p = 0.016) [42].
Case Study 2: CRISPR-Cas12a/Gold-Nanoparticle Lateral Flow Assay
Researchers have integrated the collateral cleavage activity of CRISPR-Cas12a with gold nanoparticle-based lateral flow strips to create a portable, instrument-free diagnostic (termed "Cas-gold"). Upon recognition of a target ASFV DNA sequence (e.g., from the DNA polymerase or pp220 genes), the activated Cas12a enzyme indiscriminately cleaves a single-stranded DNA (ssDNA) reporter. This cleavage event can be configured on a lateral flow strip, where the intact reporter molecule captures AuNP-antibody conjugates, producing a visible test line. When cleavage occurs, the reporter is destroyed, and the test line disappears, indicating a positive result [40].
Key Performance Metrics:
- Sensitivity: Comparable to the gold-standard qPCR method when tested on veterinary samples (blood and anal swabs).
- Specificity: The Cas12a/crRNA complex showed high specificity for ASFV, with no cross-reactivity against other common swine pathogens like Pseudorabies virus (PRV) or Porcine circovirus (PCV). The system also demonstrated low tolerance for single- or double-nucleotide mutations in the target sequence.
- Utility: Enabled rapid, equipment-free detection suitable for field applications [40].
Case Study 3: Nano-Fluorescence Probes for Signal Enhancement
Fluorescent nanomaterials, such as quantum dots (QDs) and upconversion nanoparticles (UCNPs), are being explored to overcome limitations of traditional fluorescent dyes, including photobleaching, autofluorescence, and limited tissue penetration. While directly documented in ASFV detection is limited in the searched literature, the principles are well-established in lymphatic imaging and are directly applicable to pathogen diagnostics [43]. Near-infrared (NIR) nano-fluorescent probes, in particular, offer deeper tissue penetration and reduced background signal by minimizing interference from biomolecules in biological samples [43]. These probes can be functionalized with targeting ligands (e.g., antibodies, aptamers) for specific binding to ASFV antigens or integrated into assays like loop-mediated isothermal amplification (LAMP) to enhance the fluorescence signal for ultrasensitive detection [44].
Table 1: Comparison of Featured Nanoparticle-Based ASFV Detection Platforms
| Platform | Core Nanoparticle | Detection Mechanism | Key Performance | Best Use Case |
|---|---|---|---|---|
| AuNP Biosensor [42] | Gold Nanoparticle (AuNP) | Colorimetric (Aggregation) | 550 copies, 5 min, multi-genotype | Resource-limited field settings |
| CRISPR-Cas12a/AuNP [40] | Gold Nanoparticle (Lateral Flow) | Immunochromatography | Sensitivity comparable to qPCR | Specific, equipment-free field testing |
| Nano-Fluorescence Probes [43] | QDs, UCNPs, Organic Dyes | Fluorescence Signal Amplification | Enhanced brightness, stability, deep tissue penetration | High-sensitivity lab and clinical imaging |
Experimental Protocols
Protocol: AuNP Oligonucleotide Probe Biosensor for ASFV
This protocol is adapted from the proof-of-concept study for detecting ASFV via a colorimetric AuNP biosensor [42].
I. Research Reagent Solutions Table 2: Essential Reagents for AuNP Biosensor
| Reagent/Material | Function | Specifications/Notes |
|---|---|---|
| Citrate-capped AuNPs | Signal transducer | ~20-40 nm diameter |
| Oligonucleotide Probes | Target capture | Designed against conserved p72 gene region (e.g., Probes 2 & 5 from [42]) |
| ASFV Target DNA | Analytic | Synthetic DNA or extracted viral DNA |
| Salt Solution (e.g., PBS, MgCl₂) | Induces aggregation | Concentration must be optimized |
| Spectrophotometer / Plate Reader | Signal readout | Measures absorbance shift; visual inspection is also possible |
II. Step-by-Step Procedure
- Probe Adsorption: Incubate the citrate-capped AuNPs with the designed oligonucleotide probes for a predetermined time (e.g., 30-60 minutes) at room temperature. This allows the ssDNA probes to adsorb onto the AuNP surface via electrostatic interactions.
- Sample Incubation: Mix the probe-conjugated AuNPs with the prepared sample containing the target ASFV DNA. Allow the mixture to incubate for 5-20 minutes to facilitate specific hybridization between the probe and the target.
- Salt-Induced Aggregation: Introduce a optimized concentration of salt solution to the mixture. The presence of salt screens the repulsive charges between nanoparticles.
- Negative Result: If the target DNA is absent, the probes remain unhybridized and folded on the AuNP surface, failing to protect them from salt-induced aggregation. This causes a color change from red to blue.
- Positive Result: If the target DNA is present, probe-target hybridization creates a rigid DNA duplex that sterically stabilizes the AuNPs against aggregation, preserving the red color.
- Result Interpretation: Analyze the color change visually or quantitatively using a spectrophotometer to measure the absorbance ratio at wavelengths corresponding to dispersed (e.g., 520 nm) and aggregated (e.g., 620 nm) AuNPs.
Protocol: Cas12a/Gold-Nanoparticle Lateral Flow Assay
This protocol outlines the steps for a portable, paper-based ASFV detection method combining CRISPR-Cas12a and AuNPs [40].
I. Research Reagent Solutions Table 3: Essential Reagents for Cas-gold Assay
| Reagent/Material | Function |
|---|---|
| Recombinant FnCas12a Protein | Target-activated nuclease enzyme |
| crRNA | Guides Cas12a to specific ASFV target (e.g., DNA Pol or pp220 gene) |
| RPA Reagents (TwistAmp basic kit) | Isothermal amplification of target DNA |
| ssDNA-FQ Reporter | Substrate for trans-cleavage (FAM-TTATT-Quencher) |
| Custom Lateral Flow Strip | Contains test (anti-FAM) and control line antibodies |
| Gold Nanoparticle-Antibody Conjugate | Visual signal reporter on the strip |
II. Step-by-Step Procedure
- Nucleic Acid Amplification: Perform Recombinase Polymerase Amplification (RPA) on the extracted sample DNA at 39°C for 15-20 minutes to amplify the target ASFV gene region.
- CRISPR-Cas12a Reaction: Incubate the RPA-amplified product with the preassembled Cas12a/crRNA complex and the FAM-quencher labeled ssDNA reporter. If the target DNA is present, Cas12a is activated and cleaves the reporter, releasing the FAM molecule.
- Lateral Flow Detection: Apply the reaction mixture to the sample pad of the custom lateral flow strip.
- The solution migrates along the strip.
- The key innovation: The intact, uncleaved reporter molecule (present only in negative samples) is designed to be captured by antibodies at the test line, binding the AuNP conjugate and producing a visible band.
- Positive Result: Activation of Cas12a cleaves the reporter. The cleaved fragments cannot bind at the test line, so no band appears at the test line. A control line should always appear to indicate proper strip function.
- Negative Result: No Cas12a activation occurs, the intact reporter is captured at the test line, and a band appears at the test line.
The following workflow diagram illustrates the core detection mechanism of the Cas-gold assay:
The Scientist's Toolkit
A successful nanoparticle-based diagnostic assay requires careful selection of reagents and materials. The following table catalogs essential components for developing and deploying these systems.
Table 4: Essential Research Reagent Solutions for Nanoparticle-Based Fluorescence Detection
| Reagent/Material | Category | Critical Function & Notes |
|---|---|---|
| Gold Nanoparticles (AuNPs) | Signal Transducer | Colorimetric signal generation via aggregation or as a label in lateral flow assays. Size (10-40 nm) and surface chemistry are critical [40] [42]. |
| Quantum Dots (QDs) / UCNPs | Fluorescent Probe | Superior fluorescence properties for signal amplification. Offer high quantum yield, photostability, and size-tunable emissions. NIR variants reduce autofluorescence [43]. |
| CRISPR-Cas12a Protein | Molecular Recognizer | Provides high-specificity DNA targeting and signal amplification via trans-cleavage of reporters [39] [40]. |
| crRNAs | Targeting Guide | Designed against conserved ASFV genes (e.g., p72, DNA Pol, pp220). Design is crucial for assay sensitivity and genotypic coverage [40] [38]. |
| Oligonucleotide Probes | Targeting Probe | For functionalizing AuNPs or as fluorescent reporters. GC content, length, and secondary structure impact performance [42]. |
| RPA/ LAMP Kits | Amplification | Isothermal amplification for rapid, equipment-free target nucleic acid enrichment [39] [40] [44]. |
| Lateral Flow Strips | Readout Platform | Portable, user-friendly result visualization. Often require custom conjugation of antibodies with nanoparticles [40]. |
| Fluorescence Dyes (e.g., FAM) | Reporter Molecule | Label ssDNA reporters for Cas12a assays or primers for LAMP. Require compatible imaging systems [39] [44]. |
Nanoparticle-based biosensors represent a paradigm shift in the detection of pathogens like ASFV, moving diagnostics from centralized laboratories to the point of need. The case studies presented here—ranging from simple colorimetric AuNP sensors to sophisticated CRISPR-Cas/nanoparticle hybrids—demonstrate the potential for developing rapid, sensitive, and specific field-deployable tools. These advancements align with the broader thesis of creating targeted nanoparticle probes for diagnostic fluorescence imaging, offering a path toward personalized veterinary medicine and robust global disease surveillance networks [41] [43].
Despite the promising advances, challenges remain in the clinical translation of these nanoprobes, including ensuring batch-to-batch reproducibility, long-term stability, and navigating regulatory pathways [41]. Future research directions will likely focus on creating multiplexed detection systems to identify multiple pathogens or ASFV genotypes simultaneously, integrating these assays with smartphone-based readout technologies for data digitization, and further engineering nanoparticles to enhance their sensitivity and specificity. By addressing these challenges, nanoparticle-based diagnostics will play an increasingly critical role in controlling ASF and other transboundary animal diseases, ultimately safeguarding animal health and global food security.
The Enhanced Permeability and Retention (EPR) effect represents a fundamental principle in oncology, describing the pathological tendency of macromolecules and nanoparticles to accumulate preferentially in tumor tissues compared to normal tissues [45]. First observed in 1984 and formally named in 1986, this phenomenon has become a cornerstone for developing targeted cancer nanomedicines and imaging agents [45] [46]. The EPR effect stems from key pathophysiological abnormalities in solid tumors: defective vascular architecture with enhanced permeability, impaired lymphatic drainage, and unique inflammatory mediator production [45] [46]. Tumor vasculature exhibits irregular architecture, deficient basement membranes, and fenestrated structures that render them highly permeable to macromolecules, with gap sizes ranging from 100-780 nm [45] [46]. Simultaneously, the lack of efficient lymphatic drainage in tumor tissue prevents the removal of extravasated materials, leading to their prolonged retention [45].
For fluorescence imaging research, the EPR effect provides a critical passive targeting mechanism for nanoparticle probes. Nanoparticles beyond approximately 40 kDa molecular weight and within specific size parameters can selectively extravasate and accumulate in the tumor interstitium, enabling enhanced imaging contrast and detection sensitivity [45] [47]. This review details the quantitative parameters, experimental protocols, and research tools for leveraging the EPR effect in advanced cancer fluorescence imaging.
Quantitative Analysis of EPR Parameters
Successful exploitation of the EPR effect for imaging requires careful consideration of key nanoparticle parameters that govern tumor accumulation and retention. The following tables summarize critical quantitative factors researchers must optimize for effective EPR-mediated tumor targeting.
Table 1: Optimal Nanoparticle Characteristics for EPR-Mediated Tumor Targeting
| Parameter | Optimal Range | Impact on EPR Effect | Experimental Evidence |
|---|---|---|---|
| Size | 20-200 nm | Size-dependent extravasation through tumor vasculature; <200 nm for effective penetration | Cut-off size varies by tumor type (200-1200 nm); 100 nm Doxil shows clinical efficacy [45] [48] |
| Molecular Weight | >40 kDa | Reduced renal clearance, prolonged circulation half-life | Threshold for significant tumor retention [45] |
| Surface Charge | Near-neutral or slightly negative | Reduced non-specific uptake, optimized circulation time | Cationic particles show higher liver accumulation; anionic/neutral preferred [45] |
| Shape | Spherical or high aspect ratio | Influences margination, adhesion, and transport dynamics | Spherical most common; anisotropic shapes under investigation [46] |
Table 2: Pharmacokinetic Parameters of EPR-Based Nanoparticles
| Parameter | Doxorubicin (Free Drug) | Doxil (Liposomal) | Significance |
|---|---|---|---|
| Elimination Half-life | Short (hours) | Prolonged (3-4 days) | Longer circulation enhances EPR-mediated accumulation [48] |
| Clearance Rate | Rapid | Slow (0.04 L/h) | Reduced clearance increases tumor exposure [48] |
| Distribution Volume | Large | Approximates blood volume | Confined distribution enhances tumor targeting [48] |
| Tumor Uptake | Moderate | 10-15 fold higher than free drug | Demonstrates EPR effect in clinical setting [45] |
Experimental Protocols for EPR Evaluation
Protocol: Intravital Microscopy Analysis of Nanoparticle Delivery
This protocol enables real-time, quantitative assessment of nanoparticle extravasation and distribution in live tumor models using intravital microscopy (IVM) [49].
Materials and Reagents:
- Fluorescently-labeled nanoparticles (see Section 5 for options)
- Tumor-bearing animal model (e.g., murine dorsal window chamber)
- Inverted multiphoton laser scanning microscope
- Anesthesia system (isoflurane preferred)
- Image analysis software (e.g., SimFCS for FLIM analysis)
Procedure:
- Animal Preparation: Anesthetize tumor-bearing animal using approved institutional protocol. Maintain physiological temperature throughout imaging session.
- Nanoparticle Administration: Administer fluorescent nanoparticles via tail vein injection at optimized concentration (dose-dependent on nanoparticle type).
- Image Acquisition:
- Position animal on microscope stage with tumor tissue accessible to objective.
- Acquire baseline images prior to nanoparticle injection.
- Collect time-series images at 1-5 minute intervals for up to 24 hours post-injection.
- Utilize multiple imaging modalities as available: fluorescence intensity, fluorescence lifetime imaging (FLIM), FRET.
- Data Analysis:
- Quantify fluorescence intensity in vasculature versus extravascular space over time.
- Calculate extravasation rate constants from time-series data.
- Use phasor approach to FLIM data for fit-free analysis of nanoparticle microenvironment [50].
- Generate maps of nanoparticle distribution and concentration.
Troubleshooting Tips:
- Poor image quality may result from excessive animal movement; ensure proper anesthesia depth.
- Low signal-to-noise ratio may require optimization of nanoparticle fluorescence intensity or concentration.
- Non-specific binding can be addressed by incorporating PEG coatings or adjusting surface charge.
Protocol: Live Cell Fluorescence Microscopy for Cellular Uptake Studies
This protocol details a robust workflow for quantifying nanoparticle internalization in cancer cells under conditions that mimic the tumor microenvironment [51].
Materials and Reagents:
- Cancer cell line relevant to research focus
- 0.17 mm thick microscopy coverslips
- 1% agarose in appropriate buffer or conditioned medium
- Custom microscopy sample holder (3D printable design available [51])
- Cell culture reagents and media
- Confocal or epifluorescence microscope
Procedure:
- Cell Preparation:
- Culture cells under standard conditions until 70-80% confluency.
- Harvest cells gently using appropriate dissociation method.
- Centrifuge at 1430 rcf for 2 minutes at room temperature.
- Resuspend pellet in small volume of supernatant (approximately 1μL).
- Sample Preparation:
- Pipette 1μL cell suspension onto clean coverslip.
- Cover with 1% agarose block (1×1 cm) using flat spatula.
- Assemble sample holder with agarose block inside chamber.
- Secure coverslip with Scotch tape.
- For time-lapse experiments, add second coverslip to prevent drying.
- Nanoparticle Treatment:
- Add fluorescent nanoparticles directly to agarose block or pre-incubate with cells.
- For conditioned agarose, incorporate nanoparticles during agarose preparation.
- Image Acquisition:
- Acquire images using appropriate magnification (40x-100x recommended).
- For internalization studies, use z-stacking to confirm intracellular localization.
- Maintain physiological temperature if possible.
- Image Analysis:
- Use Cellpose software for automated cell segmentation [51].
- Apply custom Fiji/ImageJ macros for batch analysis of multiple parameters.
- Quantify fluorescence intensity per cell, subcellular localization, and uptake kinetics.
Troubleshooting Tips:
- Poor cell adhesion: Ensure proper agarose concentration and avoid mechanical disturbance.
- Uneven cell distribution: Optimize cell density in initial suspension.
- Phototoxicity: Reduce laser power and increase exposure time instead.
EPR Enhancement Strategies and Experimental Workflow
EPR Enhancement and Assessment Workflow
The diagram illustrates the integrated workflow for developing EPR-optimized imaging probes, from rational nanoparticle design to validation using advanced imaging techniques. Vascular modulation approaches include VEGF inhibition for temporary vascular normalization and nitric oxide donors to enhance permeability [45]. Matrix modulation strategies employ enzyme-responsive nanoparticles and collagenase treatment to degrade physical barriers [46]. Physical methods like mild hyperthermia and sonoporation can temporarily enhance vascular permeability and nanoparticle delivery [45].
The Scientist's Toolkit: Research Reagent Solutions
Table 3: Essential Research Reagents for EPR and Cancer Imaging Studies
| Reagent/Category | Specific Examples | Research Application | Key Considerations |
|---|---|---|---|
| Nanoparticle Platforms | PEGylated liposomes (Doxil), PLGA nanoparticles, silica NPs (C' dots), iron oxide NPs | Passive targeting via EPR effect; modular design for multifunctionality | Size control, surface charge, biodegradability, encapsulation efficiency [45] [47] [46] |
| Fluorescence Probes | ICG, Cyanine dyes (Cy5, Cy7), Quantum dots, Aggregation-induced emission (AIE) gens | Signal generation for detection and imaging | Excitation/emission profiles, photostability, quantum yield, biocompatibility [47] [52] |
| Active Targeting Ligands | Folate, Transferrin, Anti-HER2 scFv, RGD peptides, Aptamers | Enhanced specificity beyond EPR effect | Binding affinity, receptor expression, conjugation chemistry, immunogenicity [53] [47] |
| Activatable Probes | pH-sensitive, Enzyme-cleavable (MMP-substrates), FRET-based quenched probes | Signal activation in TME; reduced background | Activation mechanism, specificity, activation ratio, kinetics [52] |
| Analysis Software | Cellpose, Fiji/ImageJ, SimFCS, Phasor analysis tools | Image processing, segmentation, FLIM analysis | Automation capability, batch processing, user interface, compatibility [50] [51] |
Advanced Technical Considerations
Fluorescence Lifetime Imaging (FLIM) and Phasor Analysis
The phasor approach to FLIM provides a powerful fit-free method for analyzing complex fluorescence decays in biological systems, particularly valuable for assessing nanoparticle behavior in the tumor microenvironment [50]. This method transforms fluorescence lifetime data into a graphical phasor plot where each pixel of an image is represented as a vector, with the sine and cosine transforms of the lifetime data defining its coordinates. Clusters in phasor plots correspond to distinct molecular species or microenvironments, enabling quantitative mapping of nanoparticle distribution, release kinetics, and interactions without requiring complex fitting algorithms [50]. This approach is especially valuable for monitoring drug release from nanocarriers or detecting changes in the tumor microenvironment that affect nanoparticle behavior.
Addressing Tumor Heterogeneity in EPR Effect
A significant challenge in clinical translation of EPR-based imaging is the profound heterogeneity of the EPR effect between different tumor types, patients, and even within different regions of the same tumor [45] [46]. This heterogeneity stems from variations in vascular density, perfusion, interstitial fluid pressure, extracellular matrix composition, and stromal cell content. To address this limitation, researchers are developing multi-stage nanoparticle systems that can adapt to biological barriers, as well as companion imaging agents to pre-assess EPR capability in individual patients [46]. Additionally, strategies that combine EPR-mediated passive targeting with active targeting ligands can help overcome heterogeneity limitations by providing multiple mechanisms for tumor accumulation [53] [47].
Clinical Translation Considerations
While numerous EPR-based imaging agents show promising results in preclinical models, successful clinical translation requires careful attention to nanoparticle pharmacokinetics, safety profiles, and manufacturing reproducibility [47]. Key considerations include optimizing the balance between circulation time and clearance, minimizing reticuloendothelial system uptake, ensuring batch-to-batch consistency, and demonstrating clear clinical advantage over existing imaging modalities [47] [48]. The development of activatable fluorescent probes that remain quenched until reaching the tumor microenvironment offers particular promise for clinical translation by reducing background signal and improving target-to-noise ratios [52].
Core Principles and Definitions
Multimodal and theranostic probes represent a transformative approach in biomedical science, integrating diagnostic and therapeutic functions into a single chemical entity. These advanced agents are engineered to enable precise visualization of biological processes while simultaneously delivering targeted treatment, thereby paving the way for personalized medicine [54] [9].
Multimodal imaging probes combine complementary imaging modalities to overcome the limitations inherent in any single technique. For instance, integrating magnetic resonance imaging (MRI) with fluorescence imaging (FLI) creates a powerful hybrid approach: MRI provides high spatial resolution and deep tissue penetration for detailed anatomical information, while FLI offers high sensitivity and real-time capabilities for surgical guidance and cellular-level monitoring [54]. This synergy allows researchers to obtain comprehensive information about disease sites that would be inaccessible with either modality alone.
Theranostic agents represent a more advanced concept that merges therapeutic capabilities with diagnostic functions. The term "theranostics" describes systems that can simultaneously diagnose, deliver therapy, and monitor treatment response in real-time [55] [9]. This integrated approach holds tremendous potential for improving therapeutic efficacy and accuracy by ensuring that treatment is precisely targeted and dynamically adjusted based on individual patient response.
The development of these sophisticated probes has been accelerated through nanotechnology and advanced chemical synthesis techniques. Nanoparticles provide an ideal platform for constructing multimodal theranostic agents due to their unique advantages, including high payload capacity, lengthy circulation times, ease of integrating multiple functional components, and enhanced contrast generation capabilities [55]. These nanostructures can incorporate diverse contrast-generating materials, targeting ligands, and therapeutic compounds in precisely controlled ratios, enabling the creation of truly multifunctional systems.
Representative Probes and Their Applications
Recent research has yielded numerous innovative probes that demonstrate the practical implementation of multimodal theranostic concepts across various disease models, particularly in oncology.
Advanced Multimodal Theranostic Probes
Table 1: Characteristics of Representative Multimodal Theranostic Probes
| Probe Name | Components | Imaging Modalities | Therapeutic Mechanisms | Target/Application |
|---|---|---|---|---|
| TBPN-AM [54] | Mn(II) complex + NIR photosensitizer | Fluorescence/MRI | Type I PDT + CDT | Mitochondria-targeting anticancer therapy |
| Ferumoxytol-FITC-VDA [56] | Iron oxide core + FITC fluorophore + VDA | MRI + Intravital microscopy | Vascular disruption | Glioblastoma multiforme |
| MFR-AS1411 [57] | Cobalt-ferrite + Rhodamine + Aptamer | Radionuclide + Fluorescence + MRI | Not specified (Targeted imaging) | Nucleolin-expressing cancers |
| UCMOFs@D [58] | UCNPs + MOFs + Doxorubicin | UCL/MRI | Chemotherapy | pH-responsive drug delivery |
Key Design Innovations
The TBPN-AM probe exemplifies the trend toward unimolecular theranostic agents that combine multiple functions within a single chemical entity. This small-molecule approach offers advantages over nanomaterial-based composites, including better reproducibility, uniform spatial dispersion, and more stable pharmacokinetic profiles [54]. TBPN-AM's design incorporates a D-π-A fragment serving as a photosensitizer with red fluorescence emission and a Mn(II) complex unit functioning as both a T1 MRI contrast agent and chemodynamic therapy agent. This integration enables accurate identification of tumor location and real-time therapy guidance while generating synergistic anticancer effects through combined photodynamic and chemodynamic mechanisms [54].
The Ferumoxytol-based system demonstrates an alternative strategy utilizing nanoparticle platforms. This approach employed carbohydrate-coated iron oxide nanoparticles conjugated with FITC fluorophores and vascular disrupting agents (VDAs) to create dual-mode probes for correlating macroscopic MRI findings with microscopic intravital microscopy data [56]. This multimodal imaging approach enabled quantitative correlation between MRI contrast enhancement at the macroscopic level and nanoparticle accumulation in the tumor microenvironment, providing crucial validation for theranostic targeting efficiency.
A third innovative design incorporates upconversion nanoparticles (UCNPs), which offer unique advantages for bioimaging, including low toxicity, narrow-band emission, tunable emission properties, long fluorescence lifetime, excellent photostability, and high quantum yield [58]. These nanoparticles can be excited by near-infrared light, which experiences minimal absorption and scattering in biological tissues, enabling high-quality imaging with superior resolution and signal-to-noise ratio. When combined with gadolinium for MRI contrast and loaded with therapeutic agents like doxorubicin, these UCNP-based systems create powerful theranostic platforms for simultaneous imaging and treatment [58].
Experimental Protocols
Protocol: Synthesis and Characterization of TBPN-AM
Principle: This protocol outlines the synthesis of a unimolecular theranostic agent that integrates fluorescence imaging, MRI capability, and combined photodynamic-chemodynamic therapy functions.
Materials:
- Photosensitizer moiety with D-π-A structure
- Mn(II) chelating unit
- Coupling reagents for covalent conjugation
- Organic solvents for synthesis and purification
- Cell culture medium for in vitro testing
- Animal models for in vivo validation
Procedure:
- Synthesis: Covalently connect the near-infrared emissive aggregation-induced emission (AIE) luminogen photosensitizer unit with the Mn(II) chelating module using appropriate coupling chemistry [54].
- Purification: Purify the conjugate using column chromatography and characterize using NMR, mass spectrometry, and HPLC to verify structure and purity.
- Photophysical Characterization:
- Measure fluorescence emission spectrum in relevant solvents
- Determine fluorescence quantum yield using standard references
- Evaluate photostability under repeated illumination
- Relaxivity Measurements:
- Prepare aqueous solutions at varying concentrations
- Measure T1 relaxation times using clinical MRI scanner
- Calculate longitudinal relaxivity (r1) from slope of 1/T1 vs concentration plot
- ROS Generation Assessment:
- Use fluorescent ROS sensors (e.g., DCFH-DA) to detect reactive oxygen species production
- Compare ROS generation under light irradiation and in dark conditions
- Evaluate oxygen dependence for Type I PDT mechanism confirmation
- Cellular Studies:
- Incubate with cancer cell lines (e.g., 4T1, HeLa) at varying concentrations
- Perform confocal microscopy for subcellular localization
- Conduct MTT or CCK-8 assays for viability assessment
- Evaluate therapeutic efficacy under light irradiation vs dark conditions
Validation: The synthesized TBPN-AM should exhibit strong near-infrared fluorescence, high longitudinal relaxation rate (>5 mM⁻¹s⁻¹), mitochondria-targeting capability, and significant anticancer effects through synergistic photodynamic-chemodynamic action [54].
Protocol: Multimodal Imaging of Glioblastoma with Ferumoxytol-Based Nanoparticles
Principle: This protocol describes the use of dual-mode nanoparticles for correlating macroscopic MRI findings with microscopic intravital microscopy data in orthotopic glioblastoma models.
Materials:
- Ferumoxytol nanoparticles (Feraheme)
- FITC fluorophore for fluorescence tagging
- Vascular disrupting agent (Azademethylcolchicine)
- MMP14-cleavable linker
- Orthotopic glioblastoma mouse model
- Clinical MRI scanner (e.g., 1.5T or higher)
- Two-photon intravital microscope
Procedure:
- Nanoparticle Conjugation:
- Conjugate FITC to Ferumoxytol using carbodiimide chemistry
- Link VDA to Ferumoxytol-FITC via MMP14-cleavable peptide linker
- Purify conjugates using size exclusion chromatography
- Characterize hydrodynamic size using dynamic light scattering
- Physicochemical Characterization:
- Analyze morphology using transmission electron microscopy
- Measure fluorescence emission spectrum
- Determine transverse relaxivity (r2) using MRI phantom studies
- In Vivo Imaging:
- Establish orthotopic glioblastoma models in immunocompromised mice
- Acquire baseline T2-weighted MRI scans pre-injection
- Administer nanoparticles intravenously (dose: 5 mg Fe/kg)
- Perform MRI at 24 hours post-injection using T2-weighted sequences
- Quantify contrast enhancement by measuring T2 relaxation times in tumor regions
- Intravital Microscopy:
- Prepare cranial window for optical access in anesthetized animals
- Perform two-photon microscopy using appropriate excitation (e.g., 480 nm for FITC)
- Acquire time-lapse images to monitor nanoparticle accumulation
- Quantify fluorescence spatial decay rate within tumor microenvironment
- Histological Validation:
- Euthanize animals and collect tumor tissues
- Process for hematoxylin and eosin staining
- Perform immunofluorescence staining for relevant biomarkers
- Correlate in vivo imaging findings with ex vivo histology
Validation: Successful implementation demonstrates significantly lower tumor T2 relaxation time and spatial decay rate in tumors targeted with VDA-conjugated nanoparticles compared to unconjugated nanoparticles, indicating specific accumulation and therapeutic effect [56].
Research Reagent Solutions
Table 2: Essential Research Reagents for Multimodal Theranostic Probe Development
| Reagent Category | Specific Examples | Function/Purpose |
|---|---|---|
| Nanoparticle Cores | Iron oxide, Quantum dots, Upconversion nanoparticles, Gold nanoparticles | Provide imaging contrast, serve as scaffold for multifunctionality |
| Fluorophores | FITC, Rhodamine, NIR dyes, AIE luminogens | Enable fluorescence imaging, surgical guidance, cellular tracking |
| Targeting Ligands | AS1411 aptamer, Folate, Peptides, Antibodies, Small molecules | Confer specificity for target cells or tissues |
| Therapeutic Payloads | Doxorubicin, Vascular disrupting agents, Photosensitizers | Mediate therapeutic effects (chemotherapy, PDT, etc.) |
| Surface Modifiers | PEG, Polymeric coatings, Silica shells | Enhance biocompatibility, prolong circulation, reduce immunogenicity |
| Contrast Elements | Gadolinium, Manganese, Iron, Radionuclides (⁶⁷Ga) | Enable MRI, CT, or nuclear imaging modalities |
Signaling Pathways and Mechanisms
Diagram 1: Mechanism of Mitochondria-Targeted Theranostic Probe
Technical Challenges and Future Perspectives
Despite significant progress, several technical challenges impede the widespread clinical translation of multimodal theranostic probes. Key limitations include potential toxicity, nonspecific accumulation in the reticuloendothelial system, suboptimal biocompatibility, complex synthesis procedures, and batch-to-batch variability [9]. Additionally, maintaining probe stability in physiological environments while achieving controlled biodistribution remains challenging.
Future development should focus on creating more sophisticated surface modification strategies, novel targeting ligands with improved specificity, and "smart" responsive systems that activate only in the presence of specific disease biomarkers [9]. The integration of artificial intelligence for probe design and image analysis represents another promising direction. Furthermore, standardization of synthesis protocols and rigorous safety evaluation will be crucial for clinical adoption.
The continuing evolution of multimodal theranostic probes will undoubtedly enhance our ability to diagnose diseases at earlier stages, deliver targeted therapies with precision, and monitor treatment response in real time, ultimately advancing the paradigm of personalized medicine.
Solving the Puzzle: A Practical Guide to Troubleshooting and Enhancing Performance
Fluorescence imaging is a cornerstone of modern biomedical research, particularly in the development of targeted nanoparticle probes for diagnostic applications. However, researchers frequently encounter technical challenges that can compromise data quality, including no staining, low specific signal, and high background fluorescence. These issues are especially pertinent when working with complex nanoprobe systems, where confirming successful targeting and signal accuracy is paramount. This application note provides a structured guide to troubleshooting these common problems, featuring detailed protocols and quantitative data to enable robust and reproducible imaging experiments.
Table 1: Quantitative Performance of Background Reduction Techniques
| Technique | Signal-to-Noise Ratio Improvement | Limit of Detection Improvement | Key Applications |
|---|---|---|---|
| Silicon-on-Insulator (SOI) Substrates [59] | Improvement of >18x (TIRF microscopy) | From 0.05 mM to 50 nM fluorescein | Microfluidic chips, single-molecule detection |
| LED Photobleaching [60] | Effective removal of lipofuscin & fixation background | Not quantified | Aldehyde-fixed tissues, post-mitotic tissues (e.g., brain, muscle) |
| Far-Red Fluorophore Use [61] | Significant contrast improvement over blue/green autofluorescence | Not quantified | Tissues with high collagen/NADH (e.g., liver, connective tissue) |
Core Imaging Challenges and Strategic Solutions
Low Specific Signal and Signal Amplification
Low specific signal can stem from various factors, including low analyte concentration, unvalidated antibodies, inefficient tissue permeabilization, or suboptimal fluorophore selection [62]. For low-abundance molecular targets, simply increasing the primary antibody concentration is often insufficient; signal amplification strategies are required.
- Indirect Detection: Switching from a labeled primary antibody to an unlabeled primary antibody followed by a labeled secondary antibody can boost signal. As most secondary antibodies are polyclonal, multiple secondaries can bind to a single primary, increasing the number of reporter molecules at the target site [62].
- Biotin-Streptavidin (LSAB) Method: This method adds an additional amplification layer. The sample is incubated with a primary antibody, followed by a biotinylated secondary antibody, and then a streptavidin-fluorophore conjugate. This leverages the high affinity of the biotin-streptavidin interaction to recruit more fluorophores [62].
- Tyramide Signal Amplification (TSA): TSA is a powerful enzymatic method. An HRP-conjugated secondary antibody catalyzes the deposition of fluorescently-labeled tyramide substrates onto the tissue near the enzyme site. This results in a high-density labeling of the target and can enhance sensitivity by as much as 200-fold compared to standard IHC [62]. The fluorescent label is covalently bound, allowing for antibody stripping and sequential multicolor staining.
For targeted nanoparticle probes, selecting a detection strategy during the initial validation phase is critical. The high fluorochrome density on reagents like Dextramers can similarly enhance signals for low-affinity or low-abundance targets [63].
High Background Fluorescence
High background can obscure specific signal and is caused by factors such as autofluorescence, nonspecific antibody binding, insufficient washing, or inadequate blocking [62]. The following techniques are effective for background reduction.
- Fc Receptor Blocking: On immune cells, antibodies can bind non-specifically to Fc receptors. Blocking with normal serum (from a non-immunized animal) or Fab fragment antibodies from the same host species as the secondary antibody can prevent this interaction [62].
- Use of Cross-Adsorbed Secondary Antibodies: In multiplexed experiments, cross-reactivity can cause high background. Cross-adsorbed secondary antibodies are affinity-purified to remove components that bind to off-target species, significantly reducing background [62].
- Autofluorescence Quenching:
- Chemical Quenching: Reagents like Sudan Black B or TrueBlack Lipofuscin Autofluorescence Quencher can effectively quench lipofuscin autofluorescence [62] [61]. For aldehyde-induced autofluorescence, treatment with sodium borohydride can be attempted, though results can be variable [61].
- Photobleaching: A highly effective and accessible method involves pre-treating tissue sections with broad-spectrum white LED light in the presence of an antifade agent (e.g., sodium azide) for 48 hours at 4°C. This protocol (detailed below) greatly reduces autofluorescence from lipofuscin and aldehydes without affecting the specific signal from immunofluorescence probes [60].
The workflow for diagnosing and resolving signal and background issues is summarized in the following diagram:
Experimental Protocols
This protocol effectively reduces autofluorescence from lipofuscin and aldehyde fixation in tissue sections prior to immunofluorescence staining.
Materials:
- White phosphor LED desk lamp (with diffuser/opaque plastic removed)
- Transparent square petri dish (100 mm x 100 mm) as a slide chamber
- Scaffold to elevate slide chamber
- Reflective dome (e.g., aluminum foil-lined box)
- Tris-buffered saline (TBS)
- Sodium azide
Procedure:
- Construct the photobleaching apparatus: Place the LED lamp on the bench, orienting the array upwards. Position the scaffold over the lamp and place the slide chamber on top. Cover the entire setup with the reflective dome.
- Prepare the bleaching solution: Add sodium azide to TBS to a final concentration of 0.05%.
- Photobleaching treatment: In a 4°C cold room, pour 50 mL of azide-TBS solution into the slide chamber. Submerge the slide-mounted tissue sections in the solution. Turn on the LED lamp and incubate for 48 hours at 4°C.
- Proceed with immunofluorescence: Following photobleaching, perform standard immunofluorescence protocols, including antigen retrieval, blocking, and antibody staining.
This protocol provides a detailed method for significant signal amplification, ideal for detecting low-abundance targets.
Materials:
- Primary antibody against target antigen
- HRP-conjugated secondary antibody
- Fluorescently-labeled tyramide substrate (from kits, e.g., Biotium or Thermo Fisher Scientific)
- Hydrogen peroxide (H₂O₂)
Procedure:
- Primary and secondary antibody incubation: Incubate the sample with the specific primary antibody. After washing, incubate with an HRP-conjugated secondary antibody.
- Tyramide reaction: Prepare the fluorescently-labeled tyramide substrate according to the manufacturer's instructions, which typically involves dilution in a buffer containing a low concentration of H₂O₂. Add this mixture to the sample and incubate for several minutes. The HRP enzyme catalyzes the activation of the tyramide, leading to its covalent deposition on and near the target site.
- Washing and imaging: Wash the sample thoroughly to stop the reaction and proceed with imaging.
The Scientist's Toolkit: Research Reagent Solutions
| Item | Function | Application Note |
|---|---|---|
| Cross-Adsorbed Secondary Antibodies | Reduces background by minimizing cross-reactivity with off-target immunoglobulins in multiplex experiments [62]. | Essential for species-on-species staining and highly multiplexed panels. |
| TrueBlack Lipofuscin Autofluorescence Quencher | A refined chemical reagent that quenches lipofuscin autofluorescence with reduced far-red background compared to Sudan Black B [62]. | Ideal for aging tissues, brain, and cardiac muscle. |
| Tyramide Signal Amplification Kits | Enzyme-based system for depositing numerous fluorophores at the target site, providing up to 200-fold sensitivity enhancement [62]. | Critical for detecting low-abundance targets; allows for multiplexing via sequential staining. |
| Silicon-on-Insulator (SOI) Wafers | Provides an ultra-flat surface for microfluidic chip fabrication, drastically reducing background from light scattering [59]. | Enables high-sensitivity fluorescence (e.g., TIRF) and single-molecule detection in microfluidic devices. |
| Far-Red Fluorophores (e.g., CoraLite 647) | Emit light in a spectral region where most endogenous autofluorescence (from collagen, NADH) is minimal [61]. | The optimal choice for imaging in tissues with high inherent autofluorescence. |
Successfully addressing staining artifacts in fluorescence imaging requires a systematic approach that combines strategic planning with validated troubleshooting techniques. The methods outlined here—ranging from sophisticated signal amplification like TSA to practical background reduction through photobleaching—provide a robust toolkit for researchers. By applying these protocols and leveraging the detailed quantitative data, scientists can overcome the common challenges of no staining, low signal, and high background, thereby enhancing the reliability and quality of their data in the development and application of targeted nanoparticle probes for diagnostic imaging.
Combating Photobleaching and Phototoxicity in Live-Cell Imaging
Photobleaching and phototoxicity present significant challenges in live-cell imaging, particularly in the context of advancing targeted nanoparticle probes for diagnostic fluorescence imaging. Photobleaching diminishes signal intensity over time, while phototoxicity compromises cellular viability and function, potentially leading to experimental artifacts [64]. These issues are especially pertinent when imaging sensitive organelles like mitochondria, which are highly vulnerable to light-induced damage [64]. This Application Note provides detailed mechanisms, quantitative comparisons, and validated protocols to mitigate these effects, enabling more reliable and physiologically relevant imaging data for diagnostic probe development.
Mechanisms and Impact
Fundamental Principles
Photobleaching is the irreversible destruction of a fluorophore's ability to emit light, typically caused by molecular oxygen interaction and excessive photon flux. This process directly reduces signal-to-noise ratio and compromises quantitative measurements [65].
Phototoxicity encompasses light-induced cellular damage, primarily through the generation of reactive oxygen species (ROS). Mitochondria are particularly susceptible targets, with phototoxicity leading to impaired function, altered morphology, and ultimately, cell death [64]. This damage can skew experimental outcomes, especially in long-term kinetic studies and high-resolution imaging.
Interdependence and Experimental Consequences
The relationship between these phenomena is synergistic: efforts to compensate for photobleaching (e.g., by increasing excitation intensity) often exacerbate phototoxicity, creating a detrimental cycle. This is particularly problematic for evaluating targeted nanoparticle probes, where maintaining native cellular physiology is crucial for accurate assessment of targeting efficiency and diagnostic potential.
Mitigation Strategies
Fluorophore Engineering and Selection
Strategic molecular engineering of fluorophores represents a powerful approach to combat photobleaching. As shown in Table 1, replacing traditional N,N-dimethylamino substituents in rhodamine dyes with four-membered azetidine rings significantly improves photophysical properties.
Table 1: Performance Comparison of Rhodamine Dyes
| Dye Structure | Quantum Yield (Φ) | Fluorescence Lifetime (τ, ns) | Relative Brightness | Cell Permeability |
|---|---|---|---|---|
| Rhodamine 110 | 0.88 | 3.3 | High | High |
| Tetramethylrhodamine (TMR) | 0.41 | 2.2 | Baseline | High |
| Azetidinyl-rhodamine (JF549) | 0.88 | 3.8 | ~2× TMR | High |
| Pyrrolidine-rhodamine | 0.74 | 3.6 | ~1.8× TMR | High |
| Piperidine-rhodamine | 0.10 | 0.6 | ~0.24× TMR | High |
The azetidine modification doubles the quantum efficiency and substantially improves photostability while preserving cell permeability—a crucial combination for intracellular labeling of targeted probes [65]. This structural adjustment mitigates the formation of twisted internal charge transfer (TICT) states, a major pathway for non-radiative decay and photobleaching.
Imaging Instrumentation and Parameters
Optimizing imaging hardware and acquisition parameters provides immediate practical benefits:
- Confocal Systems with Advanced Optics: Modern systems incorporate spinning disk technology to minimize photobleaching and phototoxicity by reducing light exposure [66].
- Low-Illumination Strategies: Utilize the minimum excitation intensity necessary for adequate signal detection.
- Temporal Sparing: Reduce frame rate and increase exposure intervals for time-lapse experiments.
- Spectral Optimization: Match filter sets precisely to fluorophore spectra to minimize unnecessary excitation.
- Environmental Control: Maintain cells in incubator-integrated systems to ensure physiological conditions during imaging [66].
Nanoprobe Design Considerations
For developing targeted nanoparticle probes, material composition and activation mechanisms significantly influence photostability:
- Hydrophobic Core Tuning: Incorporating hydrophobic monomers (e.g., butyl methacrylate) into nanoparticle cores can enhance cellular association and internalization, allowing lower imaging doses [67].
- Activatable Probe Designs: Ultra-pH-sensitive (UPS) nanoprobes remain quenched until activated in specific microenvironmental conditions (e.g., tumor acidosis), providing high target-to-background ratios while minimizing overall light exposure [67].
- Surface Functionalization: Ligand-based targeting (antibodies, peptides, aptamers) improves specificity, reducing the need for high probe concentrations [9].
Experimental Protocols
Protocol 1: Evaluating Photostability of Targeted Nanoparticle Probes
Purpose: Quantitatively compare the photostability of different fluorophore constructs under standardized imaging conditions.
Materials:
- JF549-HaloTag Ligand [65]
- Traditional TMR-HaloTag ligand
- Cells expressing HaloTag fusion protein
- Live-cell imaging medium
- Confocal microscope system with environmental control
Procedure:
- Seed cells expressing HaloTag fusion protein in 8-well chambered coverslips at 70% confluence.
- Incubate with 50 nM JF549 or TMR HaloTag ligand for 30 minutes at 37°C.
- Replace with fresh imaging medium.
- Acquire time-lapse images using identical laser power (5% of maximum), exposure time (200 ms), and acquisition interval (30 seconds) for 10 minutes.
- Quantify fluorescence intensity in regions of interest over time.
Data Analysis:
- Normalize fluorescence intensity to initial time point.
- Fit decay curves to exponential functions to determine half-life.
- Compare photon yields and track lengths for single-molecule imaging.
Table 2: Essential Reagents for Photostability Assessment
| Reagent/Category | Specific Examples | Function/Application |
|---|---|---|
| Cell-Permeable Fluorophores | JF549-HaloTag ligand [65] | High-photostability intracellular labeling |
| Self-Labeling Tag Systems | HaloTag, SNAP-tag [65] | Specific protein targeting |
| Live-Cell Imaging Media | Low-riboflavin media [66] | Reduced background fluorescence |
| Environmental Control Systems | Incubator-integrated imagers [66] | Maintenance of cell viability |
| Activatable Nanoparticles | Ultra-pH-sensitive (UPS) nanoprobes [67] | Target-activated signal amplification |
Protocol 2: Assessing Mitochondrial Phototoxicity in Live Cells
Purpose: Systematically evaluate light-induced damage to mitochondria during fluorescence imaging.
Materials:
- Cells stained with mitochondrial-specific fluorophore (e.g., MitoTracker)
- ROS detection dye (e.g., CellROX)
- Live-cell imaging system with temperature and CO₂ control
- Image analysis software
Procedure:
- Culture cells in appropriate medium and stain with mitochondrial dye according to manufacturer's protocol.
- Load parallel samples with ROS detection dye.
- Expose stained cells to varying illumination intensities (1%, 5%, 10%, 20% of laser power) for 5 minutes.
- Return to incubator and monitor recovery for 24 hours using brightfield imaging every hour.
- Assess mitochondrial morphology (fragmentation, swelling), and ROS production.
- Measure cell viability at 24 hours post-illumination.
Data Analysis:
- Quantify changes in mitochondrial network complexity using morphological analysis.
- Measure integrated intensity of ROS signal in illuminated versus control cells.
- Calculate percentage of non-viable cells at endpoint.
The following diagram illustrates the interconnected strategies for mitigating photobleaching and phototoxicity covered in these protocols:
Advanced Applications: Targeted Nanoparticle Probes
Optimizing Nanoprobe Performance
The development of targeted nanoparticle probes for diagnostic fluorescence imaging requires special consideration of photobleaching and phototoxicity:
- Hydrophobic Core Design: Tuning nanoparticle core composition with hydrophobic monomers (e.g., butyl methacrylate) enhances cellular association and internalization efficiency, enabling lower probe concentrations and reduced illumination [67].
- Orthogonal Signal Amplification: Smart probe designs that combine high tumor accumulation with microenvironment-triggered activation (e.g., pH-sensitive nanoparticles) provide exponential signal amplification while minimizing background and required excitation intensity [67].
- Multimodal Approaches: Combining fluorescence with other imaging modalities (e.g., MRI) allows cross-validation and reduces reliance on continuous fluorescence imaging [31] [9].
Protocol 3: Testing Targeted Nanoparticle Probes with Reduced Phototoxicity
Purpose: Evaluate targeted nanoparticle probes under conditions that minimize photodamage while maintaining imaging fidelity.
Materials:
- Targeted nanoparticle probes (e.g., ligand-functionalized UPS nanoparticles)
- Appropriate cell lines or animal models
- Multi-modal imaging system (fluorescence with MRI or CT capability)
- Low-riboflavin imaging media [66]
Procedure:
- Administer targeted nanoparticles to biological samples.
- Utilize intermittent imaging protocols with extended time intervals between acquisitions.
- Employ hardware-based phototoxicity reduction (e.g., confocal spinning disk systems).
- Correlate fluorescence signals with complementary modalities (e.g., MRI) to validate findings with minimal light exposure.
- Assess cellular function and viability post-imaging to confirm maintained physiological conditions.
Effective management of photobleaching and phototoxicity is essential for advancing targeted nanoparticle probes in diagnostic fluorescence imaging. Through strategic combination of engineered fluorophores (e.g., azetidine-modified dyes), optimized imaging parameters, advanced instrumentation, and smart nanoprobe designs, researchers can significantly reduce light-induced artifacts while obtaining high-quality data. The protocols outlined herein provide a framework for implementing these strategies, enabling more reliable assessment of diagnostic probes and facilitating their translation to clinical applications.
Strategies for Reducing Autofluorescence and Non-Specific Binding
In the field of diagnostic fluorescence imaging research, the efficacy of targeted nanoparticle probes is often compromised by two significant technical challenges: background autofluorescence and nonspecific binding. Autofluorescence, the inherent fluorescence emitted by biological tissues and materials, can obscure specific signals, while nonspecific binding leads to off-target localization of probes, both of which drastically reduce the signal-to-background ratio (SBR) and imaging reliability [68] [69]. For researchers and drug development professionals working with nanoparticle-based imaging agents, implementing robust strategies to mitigate these issues is paramount for achieving accurate, reproducible, and high-contrast imaging results. This application note details evidence-based protocols and reagent solutions to enhance the specificity and quality of fluorescence imaging data, framed within the context of advancing targeted nanoparticle probes for diagnostic applications.
Understanding and Mitigating Autofluorescence
Autofluorescence arises from various sources, including ingested molecules like chlorophyll from standard rodent chow, the sample itself, imaging media, and even the imaging vessel [68] [69]. Its intensity and spectral properties are heavily influenced by experimental parameters, which can be strategically optimized.
Dietary Intervention for Rodent Models
A major source of autofluorescence in preclinical rodent imaging originates from chlorophyll in standard alfalfa-based chow, which exhibits strong fluorescence when excited, particularly in the gastrointestinal tract [68].
Protocol 1: Dietary Switch to Purified Diet
- Objective: To significantly reduce gut autofluorescence in live animal imaging studies.
- Materials: OpenStandard Diet without dye (e.g., D11112201 from Research Diets, Inc.) or equivalent purified diet.
- Procedure:
- House mice or rats in standard conditions with social housing and ad libitum access to water.
- Divide animals into experimental groups. For the test group, replace standard chow (e.g., Lab Diet 5P75 ProLab RMH 3000) with the purified diet.
- Maintain the animals on the purified diet for a minimum of one week prior to imaging to clear autofluorescent components from the digestive system.
- Proceed with fluorescence imaging, ensuring both control (standard chow) and test (purified diet) groups are imaged under identical parameters.
- Expected Outcome: Studies have shown that a purified diet can reduce background autofluorescence in the gastrointestinal tract by more than two orders of magnitude, drastically improving SBR [68].
Optical Window Optimization
Shifting excitation and emission to longer wavelengths within the near-infrared (NIR) windows reduces tissue scattering, absorbance, and autofluorescence.
Protocol 2: Leveraging NIR-II/SWIR Imaging
- Objective: To minimize tissue scattering and autofluorescence by utilizing longer wavelengths.
- Materials: A preclinical imager equipped with NIR-II capable excitation lasers (e.g., 760 nm, 808 nm) and an indium gallium arsenide (InGaAs) detector for emission collection beyond 1000 nm [68]. A contrast agent emitting in the NIR-II region (e.g., certain quantum dots or single-wall carbon nanotubes) is required.
- Procedure:
- Administer the NIR-II-emitting contrast agent to the animal or sample.
- Set the imager to excite at 760 nm or 808 nm instead of shorter wavelengths like 670 nm.
- Collect emission in the NIR-II region (e.g., 1000-1600 nm) using a long-pass emission filter (e.g., >1000 nm or >1250 nm).
- For comparison, acquire images with standard NIR-I (700-975 nm) settings.
- Expected Outcome: Excitation at 760 nm or 808 nm and emission collection in the NIR-II window can reduce autofluorescence by over two orders of magnitude compared to standard NIR-I imaging with 670 nm excitation [68].
Practical Laboratory Adjustments
Simple adjustments to sample preparation and imaging setup can yield significant reductions in background.
Protocol 3: Sample Preparation and Media Optimization
- Objective: To identify and eliminate sources of autofluorescence from cell culture and imaging substrates.
- Materials: FluoroBrite DMEM or similar low-fluorescence media, glass-bottom imaging dishes, phosphate-buffered saline (PBS).
- Procedure:
- Check Media and Vessels: Prior to imaging, test the autofluorescence of culture media and plastic vessels under your specific imaging conditions. Switch to low-fluorescence media (e.g., Gibco FluoroBrite DMEM) and glass-bottom dishes for live-cell imaging [69].
- Wash Steps: After labeling samples with fluorescent dyes or nanoparticles, wash the sample 2-3 times with a buffered saline solution like PBS to remove unbound fluorophores [69] [70].
- Optimize Dye Concentration: Titrate the concentration of the fluorescent dye used for labeling. Using excessively high concentrations can lead to unbound dye and high background, while low concentrations may yield weak signal [69].
- Choose Alternative Fluorophores: If sample autofluorescence is high in a specific channel, re-label with a dye that emits in a different, less noisy spectral region (e.g., switch from green to far-red) [69].
Table 1: Impact of Experimental Choices on Autofluorescence and Signal-to-Background Ratio (SBR)
| Experimental Parameter | Change | Impact on Autofluorescence | Impact on SBR | Quantitative Effect |
|---|---|---|---|---|
| Animal Diet [68] | Standard Chow → Purified Diet | Major Reduction | Major Improvement | >100-fold reduction in gut autofluorescence |
| Excitation Wavelength [68] | 670 nm → 760 nm / 808 nm | Major Reduction | Major Improvement | >100-fold reduction in autofluorescence |
| Emission Window [68] | NIR-I (<975 nm) → NIR-II (>1000 nm) | Major Reduction | Major Improvement | >100-fold reduction in autofluorescence |
| Imaging Vessel [69] | Plastic → Glass | Reduction | Improvement | Eliminates bright vessel fluorescence |
| Imaging Media [69] | Standard DMEM → FluoroBrite DMEM | Reduction | Improvement | Reduces medium-derived background |
The following workflow diagram summarizes the decision-making process for selecting the appropriate autofluorescence reduction strategy:
Overcoming Non-Specific Binding
Non-specific binding (NSB) occurs when fluorescent probes interact with non-target components, such as cellular structures or assay surfaces, leading to false-positive signals and reduced target-specific contrast [71] [72].
Probe Selection and Characterization
The inherent properties of the fluorescent probe are a critical determinant of its non-specific binding tendency.
Protocol 4: Screening for Non-Stickiness in Probe Libraries
- Objective: To identify fluorescent compounds or nanoparticle surfaces with low non-specific adsorption.
- Materials: A library of candidate probes; diverse mammalian cell lines (e.g., HS578T, CAMA1); high-content imaging system or plate reader.
- Procedure:
- Incubate different cell lines with each candidate compound from the library (e.g., at 0.25 nM) for a set period (e.g., 30 min) [72].
- Wash the cells thoroughly with PBS or buffer to remove unbound probes.
- Image the cells immediately (in-flux measurement) and after a further incubation period in probe-free media (e.g., 60 min; out-flux measurement) [72].
- Quantify the cellular fluorescence at both time points. Calculate a "Non-Stickiness Index" (NSI) that reflects high cellular uptake during incubation and efficient removal during the out-flux period [72].
- Select probes with the highest NSI for further application, as they demonstrate minimal non-specific retention.
Assay and Surface Blocking
For immunoassays and surface-based detection, blocking is an essential step to mask non-specific binding sites.
Protocol 5: Standardized Washing and Blocking for Immunoassays
- Objective: To minimize non-specific adsorption of probes to assay surfaces and non-target cellular components.
- Materials: Blocking agents (e.g., BSA, serum, casein); buffered saline with detergent (e.g., PBS with 0.1% Tween-20).
- Procedure:
- After immobilizing the target (e.g., cells, proteins, exosomes) on a surface, incubate with an excess of a non-reactive protein solution (e.g., 1-5% BSA) for 30-60 minutes at room temperature.
- Prepare fluorescent nanoparticle probes in a solution containing a blocking agent and a mild detergent.
- Apply the probe solution to the sample and incubate.
- Perform multiple rigorous wash steps (3-5 times) with a buffer containing detergent (e.g., PBS-Tween) after the labeling incubation to dissociate weakly bound, non-specific probes [69] [70].
- For nanoparticle uptake studies, optimize the number of washes and handle samples at low temperatures (e.g., on ice) to minimize efflux during processing [70].
Advanced Imaging for Specificity Validation
Even with optimization, some non-specific binding may occur. Advanced microscopy techniques can directly identify and exclude these events.
Protocol 6: Super-Resolution Multicolor Fluorescence Colocalization (SR-MFC)
- Objective: To visually identify and discard signals from non-specific binding sites, ensuring high reliability.
- Materials: Setup for single-molecule localization microscopy (SMLM), such as STORM or PALM; antibodies or probes for target of interest and a confirmatory marker.
- Procedure:
- Label the target of interest (e.g., a cell surface receptor on exosomes) with a fluorescent probe.
- Use a second, spectrally distinct fluorescent probe to label a confirmatory marker for the same target.
- Image the sample using SMLM, which provides nanometer-scale spatial resolution.
- Analyze the resulting images for precise colocalization of the two probes. Genuine specific binding events will show clear colocalization, while non-specific binding sites will exhibit signal from only one probe [71].
- Quantify only the colocalized signals, thereby excluding non-specific interactions from the final analysis. This method has been shown to achieve a low false-positive rate and high reliability in detecting biomarkers like exosomes [71].
Table 2: Strategies to Counter Non-Specific Binding Across Applications
| Strategy | Principle | Typical Application | Key Experimental Consideration |
|---|---|---|---|
| Probe "Non-Stickiness" Screening [72] | Selects compounds with high cellular out-flux | Development of new intracellular probes | Requires a diverse cell panel and quantitative live-cell imaging |
| Optimized Washing [69] [70] | Removes unbound and weakly bound probes | All fluorescence assays (cells, tissues, immunoassays) | Number of washes and buffer composition (e.g., detergent) must be optimized |
| Surface Blocking | Masks non-reactive sites on assay surfaces | Immunoassays, microplate studies | Choice of blocking agent (BSA, serum, casein) is target-dependent |
| Super-Resolution Colocalization (SR-MFC) [71] | Discriminates specific vs. non-specific binding via nanoscale imaging | Validation of high-stakes assay results (e.g., biomarker detection) | Requires specialized super-resolution microscope and two target-specific labels |
| Sample Handling Control [70] | Minimizes biological activity that alters binding | Cellular uptake studies | Perform washing and handling at low temperatures (e.g., on ice) |
The logical relationship between the sources of non-specific binding and the appropriate correction strategies is outlined below:
The Scientist's Toolkit: Essential Reagents and Materials
The following table details key reagents and materials cited in the protocols above, which form an essential toolkit for researchers aiming to optimize fluorescence imaging applications.
Table 3: Research Reagent Solutions for Fluorescence Imaging Optimization
| Reagent / Material | Function / Purpose | Example Product / Citation |
|---|---|---|
| Purified Diet | Eliminates chlorophyll-derived gut autofluorescence in live animal imaging | OpenStandard Diet (Research Diets, Inc.) [68] |
| NIR-II Emitting Probe | Enables imaging in the short-wave infrared window for reduced scattering & autofluorescence | Indocyanine Green (ICG); certain Quantum Dots (e.g., PbS) [68] [73] |
| Low-Fluorescence Media | Provides nutrients for live cells while minimizing background during imaging | Gibco FluoroBrite DMEM [69] |
| Glass-Bottom Dishes | Low-autofluorescence substrate for imaging cells, avoiding bright plastic fluorescence | Various suppliers [69] |
| Blocking Agents | Masks non-specific binding sites on assay surfaces and samples | Bovine Serum Albumin (BSA), serum, casein [71] |
| Detergent in Wash Buffer | Helps dissociate weakly bound, non-specific probes during washing steps | PBS with 0.1% Tween-20 [69] [70] |
| "Non-Sticky" Probe Library | Provides a resource for identifying fluorescent ligands with low non-specific binding | Rhodamine-derived combinatorial library [72] |
The development of highly sensitive diagnostic assays is paramount in advancing fluorescence imaging research, particularly for the detection of low-abundance biomarkers in complex biological matrices. The performance of these assays is critically dependent on the meticulous optimization of molecular probe design and functionalization. This document details the key factors—GC content, probe length, and surface functionalization—that govern assay sensitivity, providing structured quantitative data, detailed experimental protocols, and essential reagent solutions to guide researchers in the development of targeted nanoparticle probes for diagnostic applications. The principles outlined herein are framed within the broader context of a thesis focused on enhancing the specificity and signal strength of probes used in the detection of disease-specific markers, such as point mutations in cancer and inflammatory biomarkers [74] [14] [75].
Core Principles and Quantitative Optimization
The design of nucleic acid probes and their surface functionalization involves balancing multiple factors to achieve optimal binding affinity, specificity, and signal-to-noise ratio. The following structured data summarizes key optimization parameters.
Table 1: Optimization Parameters for Nucleic Acid Probes
| Parameter | Optimal Range | Impact on Assay Performance | Technical Considerations |
|---|---|---|---|
| Probe Length | 15-30 nucleotides [74] | Shorter probes offer greater specificity for single-base mismatches; longer probes increase affinity but may reduce discrimination [74]. | Kinetic and thermodynamic differences for mismatches are more pronounced with shorter probes. |
| GC Content | 40-60% [74] | Higher GC content increases duplex stability (melting temperature, Tm); too high can lead to non-specific binding or secondary structures [74]. | Aim for a Tm of 50-70°C; use software to calculate and uniformize Tm for probe sets. |
| Probe Structure | Cyclized peptides (e.g., cRGD) [14] | Cyclization enhances structural rigidity, improves binding stability and specificity for targets like integrin αvβ3 [14]. | Superior to linear peptides in resisting proteolysis and achieving high-target affinity. |
Table 2: Probe Functionalization and Signaling Strategies
| Strategy | Mechanism | Reported Performance | Application Example |
|---|---|---|---|
| Enzyme-assisted (CRISPR-Cas9) | sgRNA guides Cas9 to cleave wild-type sequences, enriching mutant targets for PCR detection [74]. | Achieved 0.1% sensitivity for mutation detection [74]. | Depletion of Abundant Sequences by Hybridization (DASH) [74]. |
| Nucleic Acid Analog (PNA) | Uncharged peptide backbone increases hybridization affinity and specificity for DNA/RNA targets [74]. | Enhances single-base discrimination at the molecular level [74]. | KRAS G12D and EGFR T790M mutation detection [74]. |
| FRET-based Aptasensor | Graphene oxide (GO) quenches fluorophore-labeled aptamer; target binding displaces aptamer, restoring fluorescence [75]. | Limit of detection (LOD) of 2.27 fg/mL for C-reactive protein (CRP) [75]. | Ultra-sensitive detection of inflammatory biomarkers in serum [75]. |
| Rapid Surface Conjugation (SYC) | Selenol-yne click reaction enables covalent attachment of payloads (dyes, polymers, particles) to live cell surfaces [76]. | ~90% conjugation yield within 58 seconds; demonstrated on HeLa, B16-OVA, and Jurkat T cells [76]. | Cell surface glycosylation to modulate cell-cell interactions and immune responses [76]. |
Experimental Protocols
Protocol 1: Ultra-Sensitive FRET Aptasensor for Protein Detection
This protocol outlines the steps for developing a graphene oxide (GO)-based FRET aptasensor for the detection of C-reactive protein (CRP), demonstrating exceptional sensitivity [75].
Research Reagent Solutions
- FAM-labeled Aptamer Stock Solution (100 µM): Dissolve the CRP-specific aptamer (5'-FAM-GGC AGG AAG ACA AAC ATA TAA TTG AGA TCG TTT GAT GAC TTT GTA AGA GTG TGG AAT GGT CTG TGG TGC TGT-3') in ultrapure deionized water. Store at -20°C [75].
- GO Suspension (4 mg/mL): Disperse graphene oxide powder in Milli-Q water and sonicate to obtain a homogeneous brown solution [75].
- Phosphate Buffered Saline (PBS): 10 mM phosphate buffer, 137 mM NaCl, 2.7 mM KCl, pH 7.4 [75].
- CRP Standard Solutions: Prepare serial dilutions of CRP in PBS or appropriate buffer for generating a calibration curve [75].
Procedure
- Optimization of GO Concentration: In a 300 µL quartz cuvette, mix 1 µL of FAM-aptamer (330 nM final concentration) with varying volumes of GO suspension (0 - 0.09 mg/mL final concentration). Dilute to volume with Milli-Q water. Incubate for 5 minutes at room temperature with gentle shaking. Measure fluorescence (excitation: 450 nm, emission: 520 nm) to determine the concentration that achieves maximum quenching (e.g., 0.03 mg/mL) [75].
- Assay Execution: To the optimized FAM-aptamer/GO mixture, add the sample or CRP standard. Incubate at room temperature for 5 minutes with gentle shaking to allow CRP-aptamer binding and displacement from GO [75].
- Signal Detection and Analysis: Record the fluorescence emission spectrum at 520 nm. The recovered fluorescence intensity is proportional to the CRP concentration. Generate a standard curve using known CRP concentrations to quantify unknown samples [75].
Protocol 2: Rapid Cell Surface Functionalization via Selenol-Yne Click Chemistry
This protocol describes a rapid method for functionalizing live cell surfaces with diverse payloads using selenol-yne click (SYC) reaction, useful for creating targeted imaging agents [76].
Research Reagent Solutions
- Cholesteryl Selenol (Chol-SeH) Stock: A lipophilic anchor for integrating selenol moiety into cell membranes. Prepare in anhydrous DMSO and store under inert atmosphere [76].
- Alkyne-Functionalized Payloads: Dissolve alkyne-modified molecules (e.g., FITC-A for fluorescence, polyMAG-A for glycopolymer engineering) in suitable solvents [76].
- Cell Culture Media: Appropriate complete media for the cell line of interest (e.g., HeLa, Jurkat T cells) [76].
- Phosphate Buffered Saline (PBS), pH 7.4: For washing cells [76].
Procedure
- Cell Preparation: Harvest and wash the cells (e.g., HeLa, T-cells) with PBS. Resuspend the cell pellet in a suitable buffer at a density of 1-5 x 10^6 cells/mL [76].
- Surface Selenolation: Incubate the cell suspension with Chol-SeH (e.g., 50 µM) for a predetermined time (e.g., 15-30 minutes) at 37°C to allow membrane incorporation. Wash cells twice with PBS to remove excess anchor [76].
- SYC Conjugation: Add the alkyne-functionalized payload (e.g., FITC-A, pM-A) directly to the selenol-labeled cell suspension. Incubate for a short duration (1-5 minutes) at room temperature. The conjugation reaction is very fast, with yields reaching 90% in under a minute [76].
- Washing and Analysis: Wash the cells thoroughly with PBS to remove unreacted reagents. Analyze functionalized cells via flow cytometry or fluorescence microscopy for payload attachment and cellular viability assessment (e.g., using CCK-8 assay) [76].
Signaling Pathways and Workflow Visualizations
The Scientist's Toolkit
Table 3: Essential Research Reagent Solutions for Probe Development
| Reagent / Material | Function / Description | Example Application / Note |
|---|---|---|
| Peptide Nucleic Acids (PNA) | Uncharged nucleic acid analog; enhances hybridization stability and single-base discrimination [74]. | Ideal for detecting point mutations (e.g., in KRAS, EGFR genes) [74]. |
| Cyclic RGD Peptides (e.g., cRGDfK) | Targeting motif for integrin αvβ3; cyclization improves stability and binding specificity [14]. | Used in tumor-targeting fluorescent probes and drug delivery systems [14]. |
| Graphene Oxide (GO) | FRET quencher with high surface area and efficient energy transfer capability [75]. | Core component in "turn-off/on" aptasensors for ultra-sensitive detection [75]. |
| Selenol-Yne Click (SYC) Reagents | Enables ultrafast, bioorthogonal conjugation of payloads to live cell surfaces [76]. | Chol-SeH anchor and alkyne-functionalized dyes/polymers; conjugation in <1 min [76]. |
| CRISPR-Cas9 System | RNA-guided nuclease for selective enrichment of mutant DNA sequences by cleaving wild-type templates [74]. | Requires specific sgRNA design and PAM site consideration; used in DASH method [74]. |
Weighing the Options: Comparative Analysis, Clinical Validation, and Future Pathways
The efficacy of nanoparticle-based diagnostic fluorescence imaging is fundamentally governed by the specificity of its targeting ligands. These biomolecules direct nanocarriers to biomarkers on the surface of target cells, enabling precise visualization of pathological sites. Within the realm of targeted nanotherapeutics, four primary classes of ligands have emerged as critical tools: antibodies, aptamers, peptides, and small molecules [77]. Each ligand class possesses distinct characteristics influencing its affinity, selectivity, immunogenicity, and suitability for diagnostic applications. The selection of an appropriate ligand is not merely a technical choice but a strategic decision that impacts the sensitivity, resolution, and overall success of fluorescence imaging protocols. This document provides a comparative analysis and detailed application protocols for these ligand classes, contextualized within diagnostic fluorescence imaging research for scientists and drug development professionals.
The choice of targeting ligand involves balancing a multitude of factors, from molecular size and production cost to immunogenicity and conjugation efficiency. The table below provides a structured, quantitative comparison of these properties to inform experimental design.
Table 1: Comparative Properties of Nanoparticle Targeting Ligands
| Property | Antibodies | Aptamers | Peptides | Small Molecules |
|---|---|---|---|---|
| Molecular Size | Large (~150 kDa) | Small (8-25 kDa) | Small (1-10 kDa) | Very Small (<1 kDa) |
| Affinity | High (nM-pM) | High (nM-pM) | Variable (µM-nM) | Variable (µM-nM) |
| Production Cost | High | Low | Low to Moderate | Low |
| Immunogenicity | High | Low [78] | Low to Moderate | Typically Low |
| Tumor Penetration | Limited | Excellent [77] | Good | Excellent |
| Conjugation Chemistry | Standardized (e.g., EDC, click chemistry) [79] | Highly customizable (site-specific modification) [77] | Simple (amine, thiol groups) | Variable, can be complex |
| Production Time | Months (in vivo) | Weeks (SELEX & synthesis) [78] | Weeks (synthesis) | Weeks-Months |
| Stability | Moderate (sensitive to temperature) | High (thermostable) [78] | Moderate to High | Generally High |
| Key Advantage | High specificity, therapeutic action [77] | Low cost, high stability, tunable [77] [78] | Small size, potential for endosomal escape [77] | Low cost, favorable pharmacokinetics [77] |
| Primary Limitation | High immunogenicity, large size [77] | Susceptible to nuclease degradation without modification [77] | Variable biodistribution and toxicology [77] | Can lack high specificity [77] |
Detailed Ligand Profiles and Application Notes
Antibodies
Application Notes: Antibodies are high-molecular-weight proteins renowned for their exceptional specificity and affinity for target antigens, such as receptors overexpressed on cancer cells (e.g., EGFR, HER2) [77]. Their primary strength in diagnostics lies in this specificity, which can minimize background signal. Furthermore, some antibodies can confer a therapeutic effect by blocking signaling pathways upon binding [77]. However, their large size can hinder deep penetration into solid tumors, and their high immunogenicity risk can lead to accelerated blood clearance [77]. Conjugation to nanoparticles must consider orientation; random conjugation can block antigen-binding sites, whereas site-specific strategies like click chemistry or Fc-glycan engineering preserve binding affinity and efficiency [79].
Experimental Protocol: Site-Specific Antibody Conjugation to Lipid Nanoparticles (LNPs)
- Objective: To functionalize LNPs with anti-EGFR antibodies for targeted fluorescence imaging of epithelial cancers.
- Materials:
- DSPE-PEG-Maleimide lipid (e.g., from Biochem PEG [80])
- Anti-EGFR monoclonal antibody (e.g., Cetuximab biosimilar)
- Fluorescent dye (e.g., Cy5.5)
- Prepared blank LNPs
- Reduction buffer (TCEP)
- Purification columns (e.g., Sephadex G-25)
- HEPES-buffered saline (HBS), pH 7.4
- Method:
- LNP Preparation: Formulate LNPs using a standard microfluidic mixing technique to incorporate 1 mol% DSPE-PEG-Maleimide into the lipid bilayer.
- Antibody Reduction: Incubate the anti-EGFR antibody (1 mg/mL) with a 10-fold molar excess of TCEP for 1 hour at 4°C to partially reduce hinge-region disulfide bonds, generating free thiol groups.
- Purification: Purify the reduced antibody using a desalting column equilibrated with degassed HBS to remove excess TCEP.
- Conjugation: Immediately mix the thiolated antibody with the maleimide-functionalized LNPs at a 50:1 molar ratio of antibody to LNP. React for 12 hours at 4°C under gentle agitation.
- Quenching & Purification: Quench the reaction by adding a 100-fold molar excess of L-cysteine. Purify the conjugated Ab-LNPs from unreacted antibody via size-exclusion chromatography.
- Characterization: Use dynamic light scattering (DLS) to determine particle size and zeta potential. Confirm conjugation efficiency and quantify antibody loading using a micro-BCA assay or SDS-PAGE.
Aptamers
Application Notes: Aptamers are single-stranded DNA or RNA oligonucleotides selected in vitro through the Systematic Evolution of Ligands by EXponential enrichment (SELEX) process [77] [78]. They offer a compelling alternative to antibodies, with high affinity and specificity, low immunogenicity, and excellent tumor penetration due to their small size [77]. A key advantage is their synthetic nature, which ensures high batch-to-batch reproducibility and ease of chemical modification for conjugation or stability (e.g., 2'-fluoro or 2'-O-methyl ribose modifications to resist nucleases) [78]. Their versatility is demonstrated in applications ranging from biomarker detection to targeted drug delivery [81].
Experimental Protocol: Conjugation of Thiol-Modified Aptamers to Maleimide-NPs
- Objective: To functionalize nanoparticles with a DNA aptamer for specific detection of a cardiovascular disease biomarker (e.g., C-reactive protein).
- Materials:
- Thiol-modified DNA aptamer
- Maleimide-functionalized quantum dots (QDs) or gold nanoparticles (AuNPs)
- Urea, TBE buffer
- TCEP
- Denaturing polyacrylamide gel electrophoresis (PAGE) equipment
- Method:
- Aptamer Reduction: Dissolve the thiol-modified aptamer in reduction buffer containing 5 mM TCEP for 1 hour at room temperature to ensure the thiol group is in its reactive state.
- Purification: Purify the reduced aptamer using a desalting column or via denaturing PAGE to remove TCEP and ensure monomeric aptamer.
- Conjugation: Incubate the purified, reduced aptamer with maleimide-functionalized nanoparticles at a 100:1 molar ratio in PBS for 16-24 hours at 4°C.
- Purification: Remove unbound aptamers by repeated centrifugation and washing (for AuNPs) or size-exclusion chromatography.
- Validation: Confirm successful conjugation and retained binding affinity using a technique like surface plasmon resonance (SPR) or an enzyme-linked oligonucleotide assay (ELONA).
Peptides
Application Notes: Peptides are short chains of amino acids that can be identified through phage display libraries or derived from natural protein sequences [77]. Their small size facilitates deep tissue and tumor penetration. While their affinity can be lower than antibodies or aptamers, multivalent presentation on nanoparticles can significantly enhance avidity. Certain cell-penetrating peptides (CPPs) can also mediate endosomal escape, a crucial step for intracellular delivery of some diagnostic agents [77]. Their stability can be improved by incorporating D-amino acids or cyclization.
Experimental Protocol: Coupling RGD Peptide to PEGylated LNPs via EDC/NHS Chemistry
- Objective: To target LNPs to αvβ3 integrin expressed on tumor vasculature using a cyclic RGD peptide.
- Materials:
- c(RGDfK) peptide
- LNPs containing a terminal carboxylic acid on the PEG lipid (e.g., DSPE-PEG-COOH)
- EDC and NHS
- MES buffer (pH 5.5)
- Method:
- Activation: Activate the carboxyl groups on the LNP surface by incubating the particles with a 10 mM solution of EDC and 5 mM NHS in MES buffer for 15 minutes at room temperature.
- Purification: Purify the activated LNPs using a desalting column to remove excess crosslinkers and transfer the particles to a borate buffer (pH 8.5).
- Conjugation: Add the RGD peptide (bearing a primary amine) to the activated LNPs and react for 2 hours at room temperature.
- Quenching & Purification: Quench the reaction with hydroxylamine and purify the peptide-coupled LNPs via dialysis or ultrafiltration.
- Functional Assay: Validate targeting efficacy using an in vitro cell binding assay with αvβ3 integrin-positive cells, comparing fluorescence intensity to untargeted LNPs.
Small Molecules
Application Notes: Small molecules (e.g., folic acid, carbohydrates) are low-molecular-weight compounds that typically bind to receptors with high specificity, though often with lower affinity than biologics [77]. Their primary advantages are low cost, low immunogenicity, and favorable pharmacokinetics due to their small size. However, their development is often non-systematic, and they may lack the exquisite specificity of larger ligands, potentially leading to off-target binding [77]. Folate is a classic example, targeting the folate receptor overexpressed on many cancer cells.
Visualizing Ligand Selection and Application Workflows
The following diagrams outline the logical pathway for selecting a targeting ligand and the general workflow for applying functionalized nanoparticles in diagnostic imaging.
Diagram 1: Ligand Selection Logic for Imaging Probes
Diagram 2: Workflow for Targeted Imaging Probe Development
The Scientist's Toolkit: Essential Research Reagents
The following table details key reagents and materials essential for developing and working with ligand-targeted nanoparticles for fluorescence imaging.
Table 2: Essential Reagents for Targeted Nanoparticle Research
| Reagent/Material | Function/Application | Examples & Notes |
|---|---|---|
| Heterobifunctional PEG Linkers | Spacer between NP and ligand; reduces steric hindrance, improves stability and circulation time. | DSPE-PEG-Maleimide: For thiol conjugation. DSPE-PEG-COOH: For amine coupling via EDC/NHS. Available from suppliers like Biochem PEG [80]. |
| Crosslinking Reagents | Covalently conjugate ligands to NPs or linker molecules. | EDC/NHS Chemistry: Standard for carboxyl-to-amine coupling. Strain-Promoted Click Chemistry (e.g., DBCO-Azide): For site-specific, bioorthogonal conjugation [79]. |
| Fluorescent Dyes & Tags | Provide the signal for detection and imaging. | Cy5.5, FITC: Common organic fluorophores. Quantum Dots (QDs): Inorganic nanoparticles with high brightness and photostability. Must be compatible with NP encapsulation/conjugation chemistry. |
| Purification Systems | Separate conjugated NPs from unreacted ligands and reagents. | Size-Exclusion Chromatography (SEC): e.g., Sepharose CL-4B columns. Dialysis/Tangential Flow Filtration (TFF): For buffer exchange and concentration. |
| Characterization Instruments | Analyze physicochemical properties of NPs pre- and post-conjugation. | Dynamic Light Scattering (DLS): For hydrodynamic size and PDI. Zeta Potential Analyzer: For surface charge. UV-Vis/NIR Spectrophotometry: For dye and aptamer quantification. |
| In Vitro Binding Assay Components | Validate targeting specificity and affinity. | Cell Lines: With high/low expression of target receptor. Flow Cytometry & Confocal Microscopy: To quantify and visualize cellular uptake and binding. |
The development of targeted nanoparticle probes represents a paradigm shift in diagnostic imaging, enabling the visualization of molecular and cellular processes with unprecedented specificity. These advanced probes are engineered to home in on specific biological targets, such as tumor microenvironments or disease-specific biomarkers, thereby enhancing the diagnostic capabilities of various imaging modalities [41]. For researchers and drug development professionals, selecting the appropriate imaging technology is crucial for successful experiment design and data interpretation. This article provides a systematic evaluation of five prominent imaging modalities—fluorescence, photoacoustic, PET, MRI, and CT—within the context of targeted nanoparticle probes, offering detailed application notes and experimental protocols to guide research in this rapidly evolving field.
Comparative Analysis of Imaging Modalities
Technical Specifications and Performance Metrics
The selection of an imaging modality must be guided by its fundamental technical parameters, which collectively determine its suitability for specific research applications. The table below provides a quantitative comparison of key performance metrics across the five imaging modalities.
Table 1: Technical specifications and performance metrics of imaging modalities
| Imaging Modality | Spatial Resolution | Penetration Depth | Temporal Resolution | Sensitivity | Key Strengths | Primary Limitations |
|---|---|---|---|---|---|---|
| Fluorescence Imaging | 1-10 μm [82] | 1-2 mm (conventional); up to several cm (NIR-II) [82] [83] | Seconds to minutes [83] | High (nanomolar to picomolar) [82] | Real-time imaging, high specificity with targeted probes, cost-effective | Limited tissue penetration, autofluorescence, photobleaching [82] |
| Photoacoustic Imaging | 10-200 μm [84] | Up to 5-7 cm [84] | Seconds to minutes [84] | Moderate (micromolar) [84] | Excellent optical contrast with ultrasonic resolution, functional imaging | Limited clinical standardization, background from endogenous chromophores |
| PET | 4-5 mm (clinical); 1-2 mm (preclinical) [85] | No practical limit | Minutes | Very high (picomolar) [83] | Unlimited penetration, ultra-high sensitivity, quantitative capability | Radiation exposure, poor spatial resolution, requires cyclotron [83] |
| MRI | 25-100 μm (preclinical); 1 mm (clinical) [83] | No practical limit | Minutes to hours | Low (millimolar to micromolar) [83] | Excellent soft-tissue contrast, multi-parametric imaging, no radiation | Low sensitivity, high cost, long acquisition times [83] |
| CT | 50-200 μm (preclinical); 0.5 mm (clinical) [83] | No practical limit | Seconds to minutes | Low (millimolar) [83] | Excellent bone visualization, fast acquisition, widely available | Poor soft-tissue contrast, radiation exposure, limited molecular information [83] |
Applications in Targeted Nanoparticle Research
Each imaging modality offers distinct advantages for evaluating targeted nanoparticle probes, with applications spanning from initial probe validation to therapeutic monitoring.
Fluorescence Imaging: Ideal for validating nanoparticle targeting efficiency in cell cultures and small animal models due to its high sensitivity and real-time imaging capabilities. Recent advances in near-infrared-II (NIR-II) fluorophores (e.g., cyanine dyes, quantum dots) have significantly improved penetration depth and reduced background autofluorescence [82]. Targeted fluorescence probes using antibodies, peptides, or aptamers enable specific visualization of cell-surface receptors, enzyme activity, and metabolic processes [41].
Photoacoustic Imaging: Particularly valuable for tracking nanoparticle biodistribution and quantifying accumulation in deep tissues. The modality's ability to provide quantitative absorption coefficient mapping enables precise quantification of contrast agent concentration [86]. Methylene blue-enhanced photoacoustic imaging has demonstrated capability to detect sentinel lymph nodes at depths up to 5.2 cm in biological tissues, highlighting its potential for guiding minimally invasive procedures [84].
PET: Excellently suited for whole-body biodistribution studies of radiolabeled nanoparticles and pharmacokinetic analysis. The high sensitivity of PET allows for tracking minimal amounts of targeted probes, facilitating quantitative assessment of target engagement [85] [83]. Integration with MRI (PET/MRI) combines functional information with exquisite anatomical detail, particularly beneficial for neurological and oncological applications [85].
MRI: Optimal for anatomical localization of targeted nanoparticles and assessing functional parameters such as vascular permeability, tumor perfusion, and receptor density. Superparamagnetic iron oxide nanoparticles (SPIONs) and gadolinium-based agents serve as effective contrast agents for molecular MRI [41] [26]. The development of bio-responsive MRI probes that alter signal properties in response to specific environmental stimuli (e.g., pH, enzyme activity) provides unique insights into tumor microenvironment [41].
CT: Primarily used for anatomical reference and monitoring structural changes during therapy. Nanoparticle-based CT contrast agents (e.g., gold nanoparticles, bismuth sulfide nanoparticles) offer enhanced contrast compared to conventional iodinated agents, enabling longer imaging windows and targeted imaging of specific pathologies [41] [26].
Table 2: Nanoparticle contrast agents for different imaging modalities
| Imaging Modality | Nanoparticle Types | Targeting Ligands | Representative Applications |
|---|---|---|---|
| Fluorescence Imaging | Quantum dots, dye-loaded liposomes/polymers, carbon dots, upconversion nanoparticles [82] [26] | Antibodies, peptides, aptamers, small molecules [41] | Intraoperative guidance, cellular tracking, molecular pathway visualization [83] |
| Photoacoustic Imaging | Gold nanorods, carbon nanotubes, organic dye-loaded nanoparticles, semiconducting polymer nanoparticles [84] [41] | Antibodies, peptides | Sentinel lymph node mapping, tumor vasculature imaging, brain imaging [86] [84] |
| PET | Radiolabeled liposomes, polymeric nanoparticles, inorganic nanoparticles (e.g., (^{89})Zr, (^{64})Cu) [41] | Antibodies, peptides, small molecules | Whole-body biodistribution studies, pharmacokinetic analysis, tumor detection [83] |
| MRI | SPIONs, gadolinium-based nanoparticles, manganese oxide nanoparticles [41] [26] | Antibodies, peptides, polysaccharides | Lymph node imaging, cell tracking, vascular profiling, responsive imaging [41] |
| CT | Gold nanoparticles, bismuth sulfide nanoparticles, tantalum oxide nanoparticles [41] [26] | Antibodies, peptides | Blood pool imaging, tumor targeting, atherosclerosis imaging [41] |
Experimental Protocols
Protocol 1: Fluorescence Molecular Imaging with Targeted Nanoparticles
Purpose: To acquire and quantitatively analyze fluorescence signals from targeted nanoparticle probes in preclinical models.
Materials:
- NIR fluorescence imaging system (e.g., PerkinElmer Solaris, custom NIRF systems) [87]
- Targeted fluorescent nanoparticles (e.g., folate-conjugated BODIPY, antibody-labeled quantum dots) [82]
- Anesthesia system (e.g., isoflurane vaporizer)
- Hair removal cream
- Blackout box to eliminate ambient light [87]
Procedure:
- Animal Preparation: Anesthetize the animal using appropriate anesthetic (e.g., ketamine/xylazine mixture or isoflurane). Remove hair from the imaging area using clippers followed by hair removal cream to minimize light scattering and absorption [84] [87].
System Calibration:
- Power on the fluorescence imaging system and allow the light source to stabilize.
- Acquire background image with no animal or phantom present.
- Image a reference standard with known fluorescence intensity to normalize data across imaging sessions [87].
Administration of Nanoparticles:
- Inject fluorescent nanoparticles via tail vein or other appropriate route. Typical doses range from 5-20 nmol of fluorophore per kg body weight for small animal imaging [82].
- Record exact injection time and dose for pharmacokinetic analysis.
Image Acquisition:
- Position animal in the imaging chamber ensuring the region of interest is within the field of view.
- Set appropriate excitation and emission filters based on nanoparticle spectral properties [87].
- Acquire time-series images according to experimental timeline (e.g., 5 min, 30 min, 1 h, 2 h, 4 h, 24 h post-injection).
- Maintain consistent exposure times, working distance, and illumination intensity throughout the study [87].
Image Analysis:
- Use ImageJ or MATLAB for quantitative analysis [82].
- Define regions of interest (ROIs) for target tissues and background regions.
- Calculate signal-to-noise ratio (SNR) using the formula: SNR = (Mean Signal Intensity - Mean Background Intensity) / Standard Deviation of Background [87].
- Calculate contrast using appropriate formulas, being consistent in background selection as this significantly impacts quantitative results [87].
Troubleshooting Tips:
- High background autofluorescence: Switch to longer wavelength NIR fluorophores or use spectral unmixing techniques.
- Signal attenuation in deep tissues: Employ NIR-II fluorophores or utilize time-domain fluorescence imaging to separate surface from deep signals.
- Photobleaching: Optimize exposure time and use neutral density filters to reduce excitation intensity.
Protocol 2: Deep-Tissue Photoacoustic Imaging with Contrast Enhancement
Purpose: To visualize and quantify targeted nanoparticle distribution in deep tissues using photoacoustic imaging.
Materials:
- Integrated photoacoustic-ultrasound system (e.g., modified clinical US array) [84]
- Tunable pulsed laser source (e.g., Nd:YAG-pumped dye laser, OPO laser) [86] [84]
- Targeted contrast nanoparticles (e.g., methylene blue-loaded nanoparticles, gold nanorods) [84]
- Ultrasound coupling gel
- Chicken breast tissue (for depth calibration) [84]
Procedure:
- System Setup:
Depth Calibration:
In Vivo Imaging:
- Anesthetize animal and remove hair from imaging area.
- Apply ultrasound coupling gel to ensure optimal acoustic contact.
- Acquire baseline PA image before nanoparticle administration.
- Inject targeted nanoparticles (e.g., 0.1 ml of 30 mM methylene blue or equivalent dose for other contrast agents) [84].
- Acquire sequential PA images at desired time points.
- Co-register with US images for anatomical reference.
Signal Processing:
Quantitative Analysis:
- Calculate absorption coefficient maps using Monte Carlo methods for light transport [86].
- Determine nanoparticle concentration using known absorption coefficients of contrast agent.
- Compute SNR as mean PA signal from region of interest divided by standard deviation of background signal [84].
- Calculate image contrast as (Signal - Background) / Background [84].
Troubleshooting Tips:
- Poor SNR at depth: Increase laser fluence within safety limits, use more averages, or employ contrast agents with higher absorption coefficients.
- Image artifacts: Ensure homogeneous coupling, minimize air gaps, and check for laser instability.
- Low sensitivity: Optimize detector bandwidth (4-8 MHz typical for clinical arrays) and center frequency for expected feature sizes.
Diagram 1: Fluorescence imaging workflow for targeted nanoparticle evaluation
The Scientist's Toolkit: Essential Research Reagent Solutions
Successful implementation of imaging studies with targeted nanoparticles requires carefully selected reagents and materials. The following table outlines essential research tools for investigators in this field.
Table 3: Essential research reagents and materials for targeted nanoparticle imaging
| Category | Specific Examples | Function/Application | Key Considerations |
|---|---|---|---|
| Fluorescent Dyes & Probes | FITC, Rhodamine, Cyanine dyes (Cy3, Cy5, Cy7), Alexa Fluor dyes, BODIPY derivatives, ICG [82] | Provide optical contrast for fluorescence imaging | Consider quantum yield, photostability, Stokes shift, and biocompatibility [82] |
| Targeting Ligands | Trastuzumab (anti-HER2), RGD peptides, Folate, Aptamers, Fab fragments, Nanobodies [82] [41] | Enable specific binding to molecular targets | Evaluate affinity, specificity, immunogenicity, and conjugation efficiency [41] |
| Nanoparticle Scaffolds | Liposomes, Polymeric nanoparticles (PLGA), Gold nanoparticles, Silica nanoparticles, Quantum dots, Iron oxide nanoparticles [82] [41] [26] | Serve as platforms for contrast agent delivery and targeting | Optimize size, surface chemistry, loading capacity, and clearance profile |
| Contrast Agents for Photoacoustics | Methylene blue, Gold nanorods, Carbon nanotubes, Semiconducting polymer nanoparticles [84] [41] | Enhance photoacoustic signal through optical absorption | Consider absorption coefficient, photothermal stability, and biocompatibility |
| Radiolabels for PET | (^{18})F, (^{64})Cu, (^{89})Zr, (^{68})Ga [41] [83] | Enable positron emission for PET imaging | Match half-life to experimental timeline, consider chelation chemistry |
| MRI Contrast Agents | Gadolinium chelates, Superparamagnetic iron oxide nanoparticles (SPIONs), Manganese-based agents [41] [26] | Alter relaxation times to enhance MRI contrast | Evaluate relaxivity, specificity, and safety profile |
| CT Contrast Agents | Iodinated compounds, Gold nanoparticles, Bismuth sulfide nanoparticles [41] [26] | Attenuate X-rays for enhanced CT contrast | Consider atomic number, concentration, and kinetic profile |
Diagram 2: Decision pathway for selecting imaging modalities
The systematic evaluation of fluorescence, photoacoustic, PET, MRI, and CT imaging modalities reveals a complementary landscape of technologies for assessing targeted nanoparticle probes. Fluorescence imaging offers unparalleled sensitivity and real-time capabilities for superficial structures and cellular phenomena, while photoacoustic imaging bridges the gap between optical contrast and ultrasound resolution for deeper tissues. PET provides unmatched sensitivity for whole-body biodistribution studies, whereas MRI delivers exquisite soft-tissue contrast and functional information. CT remains invaluable for anatomical reference and high-resolution structural imaging.
The optimal choice of imaging modality depends critically on the specific research question, considering factors such as required penetration depth, spatial and temporal resolution needs, and the availability of appropriate contrast agents. For comprehensive evaluation, multimodal approaches that combine complementary technologies often provide the most complete picture of nanoparticle behavior in biological systems. As nanoparticle design continues to advance, the synergy between sophisticated probes and innovative imaging technologies will undoubtedly accelerate progress in diagnostic imaging and therapeutic monitoring.
In the field of diagnostic fluorescence imaging, the development of targeted nanoparticle probes represents a frontier in molecular diagnostics. These advanced probes enable visualization of biological processes at the cellular and subcellular levels, providing unprecedented opportunities for early disease detection, treatment monitoring, and personalized medicine. The performance of these nanoprobes hinges on three fundamental metrics: limit of detection (LOD), which defines the lowest concentration of an analyte that can be reliably distinguished from background noise; specificity, which measures a probe's ability to exclusively recognize its intended target amidst complex biological environments; and sensitivity, which quantifies the true positive rate in detecting the target biomarker. Proper benchmarking of these parameters is not merely an academic exercise—it is the cornerstone of translational research that bridges laboratory innovation and clinical application. For researchers and drug development professionals, rigorous evaluation protocols provide the critical data necessary to optimize probe design, validate performance claims, and ultimately advance promising candidates toward clinical implementation. This application note provides a comprehensive framework for benchmarking these essential performance parameters, with specific focus on fluorescent nanomaterials including quantum dots, metal nanoclusters, carbon dots, and metal-organic frameworks that are increasingly employed in biomarker detection and imaging applications.
Core Concepts and Definitions
Fundamental Metrics and Their Calculations
The evaluation of fluorescent nanoprobes relies on a standardized set of metrics derived from binary classification outcomes. These outcomes are typically represented in a confusion matrix, which cross-tabulates the probe's experimental results with known ground truth values.
Table 1: Fundamental Performance Metrics for Fluorescent Nanoprobe Evaluation
| Metric | Calculation | Interpretation | Optimal Range |
|---|---|---|---|
| Sensitivity (Recall) | TP / (TP + FN) | Proportion of actual positives correctly identified | >0.8 for diagnostic applications |
| Specificity | TN / (TN + FP) | Proportion of actual negatives correctly identified | >0.9 for diagnostic applications |
| Precision | TP / (TP + FP) | Proportion of positive identifications that are correct | Context-dependent |
| Limit of Detection (LOD) | 3σ/slope | Lowest analyte concentration reliably detected | Lower values indicate superior performance |
| F1-Score | 2 × (Precision × Recall) / (Precision + Recall) | Harmonic mean of precision and recall | >0.85 for balanced performance |
TP = True Positive; TN = True Negative; FP = False Positive; FN = False Negative; σ = standard deviation of blank measurements
Sensitivity and specificity are particularly valuable when true positive and true negative rates are equally important, such as in definitive diagnostic applications. In contrast, precision and recall become more informative when dealing with imbalanced datasets where negative results vastly outnumber positives, a common scenario in rare biomarker detection or variant calling across genomes [88].
Signaling Mechanisms in Fluorescent Nanoprobe Design
The performance of fluorescent nanoprobes is fundamentally governed by their underlying signaling mechanisms. These mechanisms exploit photophysical processes that translate molecular recognition events into detectable fluorescence signals.
Table 2: Key Signaling Mechanisms in Fluorescent Nanoprobe Design
| Mechanism | Principle | Applications | Impact on LOD |
|---|---|---|---|
| FRET | Distance-dependent energy transfer between donor and acceptor | Molecular beacon designs, protease activity sensing | High sensitivity due to signal amplification |
| PET | Electron transfer between fluorophore and recognition unit | Ion detection, small molecule sensing | Very low background in "off-state" |
| ICT | Electron donor-acceptor system with "push-pull" effect | pH sensing, polarity probes | Moderate to high sensitivity |
| AIE | Luminescence enhancement upon aggregate formation | Cell tracking, membrane imaging | Low background in dispersed state |
FRET efficiency depends strongly on the distance between donor and acceptor molecules (optimal under 10 nm) and requires spectral overlap between donor emission and acceptor excitation wavelengths. PET-based probes typically exhibit fluorescence restoration upon target binding, which prevents electron transfer between the luminescent material and acceptor, making them particularly suited for detecting metal ions. ICT-based systems demonstrate high environmental sensitivity, with emission wavelengths that shift in response to changes in their microenvironments [1].
Figure 1: Signaling mechanisms governing fluorescent nanoprobe performance and their key characteristics.
Experimental Workflow for Probe Benchmarking
Comprehensive Benchmarking Protocol
A robust benchmarking protocol for fluorescent nanoprobes requires systematic evaluation across multiple parameters and conditions. The following workflow outlines a standardized approach to ensure reproducible and comparable results.
Figure 2: Comprehensive workflow for benchmarking fluorescent nanoprobe performance.
Probe Preparation and Characterization Protocol
Materials Required:
- Carboxylated fluorescent nanoparticles (e.g., FluoSpheres, 40-nm or 200-nm)
- Amine-PEG-azide (MW: 1.6-2 kDa)
- EDC/NHS coupling reagents
- DNA aptamer probes with complementary handle sequences
- Purification columns or centrifugal filters
- Zeta potential analyzer and dynamic light scattering instrument
Procedure:
- Nanoparticle Activation: Resuspend carboxylated nanoparticles in MES buffer (pH 6.0) and activate with EDC (50 mM) and NHS (25 mM) for 30 minutes with gentle agitation.
- PEG Passivation: Purify activated nanoparticles and react with amine-PEG-azide at a concentration of 3.5 × 10^7 PEG molecules per 200-nm particle for 2 hours at room temperature. This step neutralizes surface charge from approximately -43 mV to -15 mV, indicating successful passivation [89].
- Handle Conjugation: Conjugate DBCO-modified oligonucleotide handles to azide-functionalized nanoparticles via copper-free click chemistry. Use a 100:1 molar ratio of handle to nanoparticle.
- Aptamer Attachment: Anneal DNA aptamer probes to the conjugated handles by heating to 85°C for 5 minutes followed by slow cooling to room temperature.
- Quality Control: Characterize functionalized nanoparticles using zeta potential measurements and dynamic light scattering. Verify size distribution (PDI < 0.1 indicates monodisperse preparation) and colloidal stability.
Limit of Detection (LOD) Determination Protocol
Materials Required:
- Serial dilutions of target analyte
- Black-walled microplates or glass slides
- Fluorescence plate reader or confocal microscope
- Reference standard (blank sample)
Procedure:
- Dose-Response Curve: Prepare at least eight serial dilutions of the target analyte spanning three orders of magnitude, plus a blank (zero analyte) control.
- Signal Acquisition: Incubate nanoprobes with each analyte concentration in triplicate for a standardized time period. Measure fluorescence signals using optimized excitation/emission parameters.
- Data Analysis: Plot fluorescence intensity versus analyte concentration and fit with an appropriate regression model (typically four-parameter logistic fit). Calculate LOD using the formula: LOD = 3σ/S, where σ is the standard deviation of blank measurements and S is the slope of the calibration curve.
- Validation: Confirm LOD with independent samples at the calculated detection limit. The signal should be distinguishable from blank with 95% confidence.
Table 3: Exemplary LOD Values for Various Fluorescent Nanomaterials
| Nanomaterial Type | Target Analyte | Reported LOD | Signaling Mechanism | Reference |
|---|---|---|---|---|
| NIR-II "off-on-off" probe | H2S | 5 nM | Absorption redshift + fluorophore structure change | [90] |
| Peptide-based probe | HER2 receptor | 21 nM (Kd) | Target binding-induced fluorescence | [14] |
| DNA aptamer-nanoparticle | VEGF protein | 3-12 nM (EC50) | Target-induced conformational change | [89] |
| Quantum dots | Metal ions | Varies by target | FRET or PET quenching | [1] |
Specificity and Sensitivity Assessment Protocol
Materials Required:
- Target analyte and structurally similar analogs
- Non-target biomolecules (proteins, nucleic acids, lipids)
- Cell cultures or tissue samples with known biomarker expression
- Flow cytometer or high-content imaging system
Procedure:
- Cross-Reactivity Testing: Incubate nanoprobes with target analyte and potential interfering substances at physiologically relevant concentrations. Include structurally similar compounds to assess molecular discrimination.
- Confusion Matrix Construction: For binary detection applications, compare nanoprobe results against ground truth to calculate true positives (TP), false positives (FP), true negatives (TN), and false negatives (FN).
- Metric Calculation:
- Sensitivity (Recall) = TP / (TP + FN)
- Specificity = TN / (TN + FP)
- Precision = TP / (TP + FP)
- F1-Score = 2 × (Precision × Recall) / (Precision + Recall)
- Statistical Validation: Repeat measurements across multiple batches (n ≥ 3) and report means with confidence intervals. Use ROC curve analysis for threshold optimization if applicable.
Advanced Probe Designs and Their Performance
Activatable and "Off-On-Off" Probe Architectures
Recent advances in probe design have introduced sophisticated activation mechanisms that significantly improve specificity and signal-to-noise ratios. Unlike conventional "always-on" probes that emit continuous signals, activatable probes remain silent until encountering specific environmental triggers or target biomarkers.
The "off-on-off" probe architecture represents a particularly advanced design that minimizes background interference. As demonstrated in a NIR-II-excited fluorescent probe for liver cancer detection, these probes exhibit near-ideal zero initial fluorescence, turn on specifically in disease tissues in response to biomarkers like hydrogen sulfide (H2S), and then turn off again upon migration to normal tissues due to differential ROS levels. This approach achieved an remarkable turn-on/off ratio of approximately 12,000-fold and enabled identification of orthotopic liver tumors as small as 4 mm with 100% accuracy in a blind study [90].
Performance Benchmarking of Advanced Probes
Table 4: Comparative Performance of Advanced Fluorescent Nanoprobe Designs
| Probe Design | Activation Mechanism | Target | LOD/Sensitivity | Specificity Features |
|---|---|---|---|---|
| "Always-on" probes | Continuous emission | Various | Variable | Limited by nonspecific accumulation |
| "Off-on" probes | Environmental trigger (pH, enzyme, etc.) | Disease biomarkers | Improved vs always-on | Reduced background but persistent after activation |
| "Off-on-off" NIR-II probe | H2S activation, ROS deactivation | Liver cancer | 5 nM LOD | Near-zero background, 12,000-fold turn-on/off ratio |
| MMP-responsive probe | Enzyme cleavage | Tumors with high MMP2/9 | Not specified | AIR effect enhances tumor retention |
| Dual-targeted probe (TCNTP) | cNGR + CPP + NLS motifs | Cancer cells | Not specified | Enhanced specificity through multiple targeting |
The Scientist's Toolkit: Essential Research Reagents
Table 5: Key Research Reagent Solutions for Fluorescent Nanoprobe Development
| Reagent Category | Specific Examples | Function | Considerations |
|---|---|---|---|
| Nanoparticle Cores | Polystyrene FluoSpheres, Quantum Dots, Carbon Dots, Metal Nanoclusters | Signal generation | Quantum yield, photostability, biocompatibility |
| Surface Passivation | Amine-PEG-azide, F-127-D-Gal polymer | Biocompatibility, reduced non-specific binding | Molecular weight, grafting density |
| Targeting Ligands | RGD peptides, HER2-binding peptides, DNA aptamers | Molecular recognition | Affinity, specificity, stability in physiological conditions |
| Fluorescent Reporters | Cy dyes, IRDye800CW, NIR-II AIEgens | Signal generation | Excitation/emission profiles, brightness, photostability |
| Conjugation Handles | DBCO, azide, NHS esters, maleimide | Probe assembly | Reaction efficiency, orthogonality |
| Characterization Tools | Zeta potential analyzer, DLS, fluorescence spectrometer | Quality control | Size distribution, surface charge, optical properties |
Troubleshooting and Optimization Strategies
Addressing Common Performance Limitations
Even with carefully designed probes, researchers often encounter challenges in achieving optimal performance metrics. The following strategies address common limitations:
Improving Limit of Detection:
- Incorporate signal amplification strategies such as enzymatic amplification or plasmonic enhancement
- Optimize fluorophore density to minimize self-quenching while maximizing brightness
- Implement background suppression techniques such as time-gated detection for autofluorescence reduction
- Utilize NIR-II window (1000-1700 nm) to reduce tissue autofluorescence and improve penetration depth [90]
Enhancing Specificity:
- Employ multi-targeting approaches using two or more recognition elements
- Implement activatable designs that require simultaneous presence of multiple biomarkers
- Optimize passivation protocols to reduce nonspecific binding
- Incorporate cleavable linkers that respond to disease-specific enzymes [14]
Balancing Sensitivity-Specificity Trade-offs:
- Generate ROC curves to identify optimal threshold values
- Utilize precision-recall curves for imbalanced datasets where negatives vastly outnumber positives
- Consider context-dependent requirements—screening applications may prioritize sensitivity, while confirmatory tests may emphasize specificity [88]
Robust benchmarking of detection limits, specificity, and sensitivity is not merely a technical requirement for publication—it is the foundation for translating fluorescent nanoprobes from research tools to clinical diagnostics. The protocols outlined in this application note provide a standardized framework for generating comparable, reproducible performance data across different probe platforms and laboratories. As the field advances toward increasingly sophisticated designs such as "off-on-off" probes and multiplexed sensing platforms, consistent application of these benchmarking principles will accelerate the development of sensitive, specific, and clinically viable imaging agents that ultimately improve disease detection and patient outcomes.
The clinical translation of targeted nanoparticle probes for diagnostic fluorescence imaging represents a promising yet challenging frontier in biomedical research. These nanoprobes, designed for high-sensitivity imaging of molecular targets, face significant hurdles in their journey from laboratory innovation to clinical application. The unique physicochemical properties of nanomaterials—including size, surface charge, and composition—introduce complex biological interactions and regulatory considerations that must be systematically addressed [91] [41]. This document outlines the primary challenges and provides standardized protocols to facilitate the development of safe, effective, and regulatable fluorescent nanoprobes.
The translation gap is particularly evident when examining the progression of nanomedicine. While over 700 health-related products employing nanomaterials have been documented, only a limited number of fluorescent nanoprobe formulations have successfully navigated the regulatory pathway to clinical use [92]. Key obstacles include achieving optimal biocompatibility, demonstrating consistent manufacturing quality, and providing comprehensive safety data that meets evolving regulatory standards across different geographical regions [91] [93].
Key Translation Challenges and Quantitative Analysis
Biological and Biocompatibility Challenges
The interaction between fluorescent nanoprobes and biological systems presents multiple challenges that directly impact both diagnostic efficacy and patient safety.
Immune Recognition and Clearance: Nanoparticles are frequently recognized by the immune system as foreign bodies, leading to rapid clearance by the reticuloendothelial system (RES) and reduced targeting efficiency. Complement activation-related pseudoallergy (CARPA) represents a significant concern, potentially causing inflammatory responses and anaphylaxis [94] [95]. The protein corona phenomenon—where biomolecules adsorb to nanoparticle surfaces—further alters targeting specificity and biological interactions [94].
Toxicity Mechanisms: Nanoparticles can induce toxicity through multiple pathways, with oxidative stress being a primary mechanism. The generation of reactive oxygen species (ROS) can lead to cellular damage, inflammation, and DNA damage [95]. Positively charged nanoparticles typically exhibit higher cytotoxicity due to stronger electrostatic interactions with negatively charged cell membranes [95].
Biodistribution and Targeting Efficiency: While the Enhanced Permeability and Retention (EPR) effect has been leveraged for passive tumor targeting, its consistency in human tumors remains variable. Active targeting strategies using specific ligands must overcome physiological barriers including endothelial walls, cellular membranes, and enzymatic degradation [41] [94].
Material and Manufacturing Challenges
The complex composition of fluorescent nanoprobes introduces substantial manufacturing and characterization hurdles.
Batch-to-Batch Variability: Reproducible synthesis of multifunctional nanoprobes remains challenging due to the complexity of combining targeting ligands, fluorescent agents, and other functional components. Small variations in synthesis conditions can significantly alter physicochemical properties and biological performance [41] [93].
Scalability and Stability: Transitioning from small-scale laboratory synthesis to industrial-scale manufacturing requires meticulous process optimization. Fluorescent nanoprobes must maintain stability during storage and use, with particular attention to photobleaching resistance and colloidal stability in physiological environments [82] [93].
Characterization Complexity: Comprehensive characterization must assess multiple parameters including particle size, size distribution, surface charge, encapsulation efficiency, fluorescent properties, and targeting ligand density [93].
Regulatory and Commercialization Challenges
The evolving regulatory landscape for nanotechnology-enabled health products presents significant hurdles for clinical translation.
Classification Ambiguity: Regulatory agencies struggle with classifying multifunctional nanoprobes that combine diagnostic and therapeutic capabilities. The distinction between medicinal products, medical devices, and combination products varies between regulatory jurisdictions [92] [96].
Safety Assessment Requirements: Conventional toxicological testing methods may be insufficient for nanoparticles, requiring specialized studies on biodistribution, degradation profiles, and potential immunotoxicity [92] [95]. Regulatory agencies increasingly demand thorough characterization of physicochemical properties and their relationship to biological effects [92].
Pathway Differences Between Regions: The regulatory frameworks for nanomedicine products differ significantly between major markets including the United States (FDA), European Union (EMA), and China (NMPA), creating challenges for global development strategies [91] [92].
Table 1: Comparative Analysis of Targeting Ligands for Fluorescent Nanoprobes
| Ligand Type | Specificity | Stability | Immunogenicity | Cost | Ease of Modification |
|---|---|---|---|---|---|
| Antibodies | Very high | Moderate | Moderate to high | High | Moderate [41] [9] |
| Peptides | High | Moderate to high | Low | Moderate | High [41] [9] |
| Aptamers | High | High | Very low | Low to moderate | Very high [41] [9] |
| Small Molecules | Moderate to high | High | Very low | Low | Very high [41] [9] |
Table 2: Toxicity Profiles of Nanoparticle Components Used in Fluorescent Probes
| Nanoparticle Type | Toxicity Concerns | Key Influencing Factors | Risk Mitigation Strategies |
|---|---|---|---|
| Metal-Based | Cytotoxicity, oxidative stress, genotoxicity [95] | Size, surface charge, ion release [95] | Surface coating, size control [82] |
| Carbon-Based | Neurotoxicity, pulmonary inflammation [95] | Aspect ratio, functionalization [95] | Functionalization, purification [82] |
| Lipid-Based | Immunotoxicity, CARPA, hepatotoxicity [94] [95] | Lipid composition, surface charge [95] | PEGylation, lipid optimization [94] |
| Polymeric | Inflammatory responses, degradation toxicity [95] | Polymer type, degradation rate [95] | Biocompatible polymers, controlled degradation [94] |
Experimental Protocols
Protocol 1: Comprehensive Characterization of Fluorescent Nanoprobes
Objective: To standardize the physicochemical characterization of targeted fluorescent nanoprobes for regulatory documentation.
Materials and Equipment:
- Dynamic Light Scattering (DLS) instrument
- Transmission Electron Microscope (TEM)
- Zeta potential analyzer
- Spectrofluorometer
- High-Performance Liquid Chromatography (HPLC) system
- Centrifugal filters (100 kDa MWCO)
Procedure:
Size and Size Distribution Analysis
- Dilute the nanoprobe formulation in purified water to achieve approximately 0.1 mg/mL concentration.
- Perform DLS measurements in triplicate at 25°C with an equilibration time of 120 seconds.
- Report the hydrodynamic diameter, polydispersity index (PDI), and size distribution profile.
- For TEM analysis, deposit 10 μL of sample on carbon-coated copper grids, stain with 1% uranyl acetate if necessary, and image at appropriate magnifications.
- Measure at least 200 particles from multiple images to determine core size distribution.
Surface Charge Measurement
- Dilute samples in 1 mM KCl solution to maintain consistent ionic strength.
- Measure zeta potential using electrophoretic light scattering in triplicate.
- Report mean zeta potential and standard deviation.
Fluorescent Properties Quantification
- Prepare dilution series in PBS (pH 7.4) and relevant biological media.
- Measure excitation/emission spectra using spectrofluorometer.
- Calculate quantum yield using appropriate reference standards.
- Evaluate photostability by continuous illumination and monitoring fluorescence intensity decay over time.
Targeting Ligand Density Assessment
- For antibody-conjugated probes, use HPLC with UV-Vis detection to determine antibody concentration based on peak area at 280 nm.
- Calculate ligand density per nanoparticle based on known nanoparticle concentration.
- Validate functionality through cell binding assays with appropriate controls.
Data Analysis and Reporting: Document all raw data, calculation methods, and acceptance criteria. For regulatory submissions, include batch-to-batch comparison data demonstrating manufacturing consistency [92] [93].
Protocol 2: In Vitro Biocompatibility and Targeting Assessment
Objective: To evaluate cytotoxicity, cellular uptake, and targeting specificity of fluorescent nanoprobes.
Materials and Equipment:
- Relevant cell lines (including target-positive and target-negative controls)
- Cell culture facilities and reagents
- Flow cytometer with fluorescence detection
- Confocal microscope
- MTT or Alamar Blue viability assays
- Incubators and biological safety cabinet
Procedure:
Cytotoxicity Assessment
- Seed cells in 96-well plates at appropriate density and culture until 70-80% confluent.
- Treat cells with nanoprobe concentrations spanning the proposed diagnostic range (typically 0.001-100 μg/mL) for 24-72 hours.
- Include vehicle controls and positive cytotoxicity controls.
- Assess viability using MTT assay according to manufacturer's protocol.
- Calculate IC50 values and determine no-observed-adverse-effect-level (NOAEL).
Cellular Uptake and Internalization
- Seed cells on coverslips in 12-well plates and culture until appropriate confluence.
- Incubate with fluorescent nanoprobes at predetermined concentration for varying time points (1-24 hours).
- For internalization pathway studies, pre-treat with endocytic inhibitors (chlorpromazine for clathrin-mediated endocytosis, genistein for caveolae-mediated endocytosis, etc.).
- Fix cells with 4% paraformaldehyde, permeabilize with 0.1% Triton X-100 if intracellular staining is required.
- Stain with appropriate counterstains (e.g., DAPI for nuclei, phalloidin for actin).
- Image using confocal microscopy with consistent settings across experimental groups.
- Quantify fluorescence intensity per cell using image analysis software.
Targeting Specificity Validation
- Compare uptake between target-positive and target-negative cell lines.
- Perform competitive inhibition experiments by pre-incubating cells with excess free targeting ligand.
- Evaluate dose-dependent binding using flow cytometry.
- Calculate specificity ratio (uptake in target-positive cells versus target-negative cells).
Data Interpretation: Establish acceptance criteria for targeting specificity (typically >3:1 ratio between target-positive and negative cells) and cytotoxicity (≥80% cell viability at proposed diagnostic concentration) [41] [95].
Protocol 3: In Vivo Biodistribution and Toxicity Study
Objective: To assess pharmacokinetics, biodistribution, and acute toxicity of fluorescent nanoprobes in animal models.
Materials and Equipment:
- Appropriate animal model (typically rodents)
- Fluorescence imaging system (e.g., IVIS Spectrum)
- Animal housing with environmental control
- Materials for blood collection and tissue processing
- Histology equipment
- Clinical chemistry analyzers
Procedure:
Pharmacokinetics and Biodistribution
- Administer fluorescent nanoprobes via intended clinical route (typically intravenous) at proposed diagnostic dose.
- Collect blood samples at predetermined time points (5, 15, 30 minutes, 1, 2, 4, 8, 24, 48 hours).
- Process plasma by centrifugation and measure fluorescence intensity.
- Calculate pharmacokinetic parameters: half-life (t½), area under curve (AUC), clearance (CL).
- At terminal time points (e.g., 4, 24, 48 hours), euthanize animals and collect major organs (liver, spleen, kidneys, heart, lungs, brain, etc.).
- Weigh organs and homogenize for fluorescence quantification.
- Calculate percentage of injected dose per gram of tissue (%ID/g).
Toxicological Assessment
- Monitor animals for clinical signs of toxicity (behavior, food/water consumption, weight loss) throughout study.
- Collect blood for hematology and clinical chemistry analysis at study termination.
- Process tissues for histopathological examination (H&E staining).
- Score tissue damage using standardized grading systems.
- Pay particular attention to RES organs (liver, spleen) and excretion pathways (kidneys).
Imaging and Contrast Assessment
- Perform in vivo fluorescence imaging at multiple time points post-injection.
- Quantify target-to-background ratios in regions of interest.
- Compare with appropriate control probes (non-targeted formulations).
Regulatory Considerations: This study should follow Good Laboratory Practice (GLP) standards if intended for regulatory submission. Include both sexs in study design when appropriate [94] [95].
Visualization of Key Processes
Clinical Translation Workflow
Diagram 1: Clinical Translation Workflow
Nanotoxicity Signaling Pathways
Diagram 2: Nanotoxicity Signaling Pathways
The Scientist's Toolkit: Essential Research Reagents and Materials
Table 3: Research Reagent Solutions for Fluorescent Nanoprobe Development
| Reagent/Material | Function | Application Notes |
|---|---|---|
| Ionizable Lipids | LNP core structure, mRNA encapsulation [96] | Critical for endosomal escape; optimize to reduce hepatotoxicity [95] |
| PEGylated Lipids | Steric stabilization, reduced RES uptake [94] | Minimize PEG-associated immunogenicity; optimal PEG density required [95] |
| Targeting Ligands | Specific cell recognition and binding [41] | Selection based on specificity, immunogenicity, and conjugation efficiency [9] |
| Fluorescent Dyes | Signal generation for imaging [82] | Consider quantum yield, photostability, and Stokes shift for in vivo application [82] |
| Biocompatible Polymers | Nanoparticle matrix (e.g., PLGA) [95] | Control degradation rate to minimize inflammatory responses [94] |
| Surface Modifiers | Modulation of biodistribution and pharmacokinetics [41] | Include targeting peptides, antibodies, or other homing molecules [9] |
The successful clinical translation of targeted fluorescent nanoprobes requires meticulous attention to biocompatibility, manufacturing consistency, and regulatory requirements throughout the development process. By implementing the standardized protocols outlined in this document, researchers can systematically address the key challenges in nanoprobe development. Emerging technologies including organ-on-a-chip models and artificial intelligence-assisted design are expected to enhance predictive accuracy in preclinical testing and optimize nanoprobe design parameters [91]. Continued collaboration between researchers, manufacturers, and regulatory agencies remains essential for bridging the translation gap and realizing the full clinical potential of targeted fluorescent nanoprobes for diagnostic imaging.
Conclusion
Targeted nanoparticle probes for fluorescence imaging represent a transformative tool in molecular diagnostics, offering unparalleled sensitivity and specificity for detecting diseases like cancer at their earliest stages. The integration of diverse nanomaterials, sophisticated sensing mechanisms, and advanced targeting strategies has significantly expanded their application scope from in vitro biosensing to in vivo theranostics. However, the path to widespread clinical adoption is contingent upon overcoming persistent challenges, including probe stability, potential toxicity, nonspecific accumulation, and complex manufacturing processes. Future progress hinges on interdisciplinary efforts to develop smarter, biocompatible probes, leverage AI for design and image analysis, and create standardized validation frameworks. The continued convergence of nanotechnology with molecular biology and imaging science promises to unlock new frontiers in personalized medicine, enabling precise diagnosis, real-time treatment monitoring, and improved patient outcomes.
References
- 1. Recent advances in fluorescent nanomaterials designed ... [https://pmc.ncbi.nlm.nih.gov/articles/PMC12053759/]
- 2. Recognition- and Reactivity-Based Fluorescent Probes for ... [https://pmc.ncbi.nlm.nih.gov/articles/PMC4542203/]
- 3. Fluorescent Probes | Thermo Fisher Scientific - ES [https://www.thermofisher.com/us/en/home/life-science/protein-biology/protein-biology-learning-center/protein-biology-resource-library/pierce-protein-methods/fluorescent-probes.html]
- 4. Fluorescence Fundamentals | Thermo Fisher Scientific - US [https://www.thermofisher.com/us/en/home/references/molecular-probes-the-handbook/introduction-to-fluorescence-techniques.html]
- 5. New Strategies for Fluorescent Probe Design in Medical ... [https://pmc.ncbi.nlm.nih.gov/articles/PMC3241938/]
- 6. A Critical and Comparative Review of Fluorescent Tools for ... [https://pmc.ncbi.nlm.nih.gov/articles/PMC12034319/]
- 7. Fluorescence-based sensors for environmental monitoring ... [https://www.sciencedirect.com/science/article/abs/pii/S0026265X25027341]
- 8. Spectral Minds: Fluorescent Probes Reimagining the ... [https://pharmafeatures.com/spectral-minds-fluorescent-probes-reimagining-the-mechanisms-underlying-modern-diagnostic-and-drug-delivery-engineering/]
- 9. Molecular imaging using (nano)probes - RSC Publishing [https://pubs.rsc.org/en/content/articlehtml/2025/ra/d5ra03927d]
- 10. PET, ICT, ESIPT, FRET and AIE Approaches [https://pubmed.ncbi.nlm.nih.gov/39018001/]
- 11. Tetraphenylethylene (TPE)-Based AIE Luminogens [https://www.mdpi.com/2673-7256/5/3/23]
- 12. FRET as the tool for in vivo nanomedicine tracking [https://www.sciencedirect.com/science/article/pii/S016836592200390X]
- 13. A FRET-based off-on AIE nanoprobe enables instant and ... [https://pmc.ncbi.nlm.nih.gov/articles/PMC12203678/]
- 14. Recent Progress in Peptide-Based Fluorescent Probes ... [https://pmc.ncbi.nlm.nih.gov/articles/PMC12414470/]
- 15. AIE polymers for biosensing applications - RSC Publishing [https://pubs.rsc.org/en/content/articlehtml/2025/py/d5py00051c]
- 16. The application of carbon dot-based nanoprobes in ... [https://www.sciencedirect.com/science/article/abs/pii/S0010854525008264]
- 17. Carbon dots as probes in FLIM:a review of applications ... [https://pubs.rsc.org/en/content/articlelanding/2025/ra/d5ra05371d]
- 18. Fluorescent carbon quantum dots for heavy metal sensing [https://www.sciencedirect.com/science/article/abs/pii/S0048969724076307]
- 19. Regulation of the photophysical dynamics of metal ... [https://www.nature.com/articles/s41467-025-65024-3]
- 20. Atom-precise coinage metal nanoclusters for near-infrared ... [https://pubs.rsc.org/en/content/articlelanding/2025/cs/d5cs00383k]
- 21. Recent progress in atomically precise metal nanoclusters [https://www.sciencedirect.com/science/article/pii/S0010854525002036]
- 22. Chemical and mechanical modifications of flexible metal ... [https://pubs.rsc.org/en/content/articlehtml/2025/sc/d5sc02797g]
- 23. The formation mechanism and properties of carbon ... [https://pubs.rsc.org/en/content/articlelanding/2025/gc/d5gc03644e]
- 24. A Spectroscopic Investigation into the Stability of Carbon ... [https://pubmed.ncbi.nlm.nih.gov/39992324/]
- 25. Au QDs in Advanced Biomedicine: Fluorescent ... [https://www.mdpi.com/2624-845X/6/3/25]
- 26. Novel advancements in nanomaterials-based contrast agents ... [https://pubs.rsc.org/en/content/articlehtml/2025/na/d5na00596e]
- 27. Quantum dot-infused nanocomposites - RSC Publishing [https://pubs.rsc.org/en/content/articlehtml/2025/nr/d5nr00440c?page=search]
- 28. A review of combined imaging and therapeutic applications ... [https://www.frontiersin.org/journals/chemistry/articles/10.3389/fchem.2025.1595376/full]
- 29. Nanotechnology in medicine: a double-edged sword for ... [https://healthnanotechnology.biomedcentral.com/articles/10.1186/s44301-025-00008-2]
- 30. Sustainable Nanotechnology and Artificial Intelligence to ... [https://pmc.ncbi.nlm.nih.gov/articles/PMC12494091/]
- 31. Enhancing Disease Diagnosis and Targeted Therapy [https://pubmed.ncbi.nlm.nih.gov/40755465/]
- 32. Multiplexed Optical Nanobiosensing Technologies for ... [https://pmc.ncbi.nlm.nih.gov/articles/PMC12562344/]
- 33. Nanoparticles for Detection and Diagnosis - PMC [https://pmc.ncbi.nlm.nih.gov/articles/PMC2827652/]
- 34. Nanoparticles as a novel key driver for the isolation and ... [https://www.nature.com/articles/s41598-024-67221-4]
- 35. Circulating tumor cells: overcoming challenges of detecting ... [https://pmc.ncbi.nlm.nih.gov/articles/PMC12123222/]
- 36. Biomarkers for the detection of circulating tumor cells [https://www.sciencedirect.com/science/article/pii/S001448272500151X]
- 37. A highly sensitive method for detecting African swine fever virus in oral fluids from naturally infected pigs in Northern Vietnam | Scientific Reports [https://www.nature.com/articles/s41598-025-12139-8]
- 38. Strategic nucleic acid detection approaches for diagnosing African swine fever (ASF): navigating disease dynamics | Veterinary Research | Full Text [https://veterinaryresearch.biomedcentral.com/articles/10.1186/s13567-024-01386-8]
- 39. Rapid and sensitive RPA-Cas12a- fluorescence assay for... | PLOS One [https://journals.plos.org/plosone/article?id=10.1371/journal.pone.0254815]
- 40. Rapid detection of African swine fever virus using Cas12a-based portable paper diagnostics | Cell Discovery [https://www.nature.com/articles/s41421-020-0151-5]
- 41. Molecular imaging using (nano)probes - PubMed Central - NIH [https://pmc.ncbi.nlm.nih.gov/articles/PMC12257482/]
- 42. Proof-of-Concept Nanoparticle-Based Biosensor for ... [https://acs.figshare.com/articles/journal_contribution/Proof-of-Concept_Nanoparticle-Based_Biosensor_for_Detecting_the_African_Swine_Fever_Virus_Across_Multiple_Genotypes_Using_In_Silico_and_In_Vitro_Approaches/30421968]
- 43. Nano-fluorescence imaging: advancing lymphatic disease ... [https://pmc.ncbi.nlm.nih.gov/articles/PMC11635084/]
- 44. Real-Time Detection of LAMP Products of African Swine Fever Virus... [https://pmc.ncbi.nlm.nih.gov/articles/PMC9024557/]
- 45. The Enhanced Permeability and Retention (EPR) Effect [https://pmc.ncbi.nlm.nih.gov/articles/PMC8402171/]
- 46. Enhancement of EPR Effect for Passive Tumor Targeting [https://www.mdpi.com/2076-3417/15/6/3189]
- 47. Nanotechnology for Cancer Imaging [https://pmc.ncbi.nlm.nih.gov/articles/PMC8183257/]
- 48. Quantitative Analysis of the Enhanced Permeation and ... [https://journals.plos.org/plosone/article?id=10.1371/journal.pone.0123461]
- 49. Beyond the EPR effect: Intravital microscopy analysis of ... [https://www.sciencedirect.com/science/article/pii/S0169409X25000353]
- 50. Fit-free analysis of fluorescence lifetime imaging ... | Nature Protocols [https://www.nature.com/articles/s41596-018-0026-5?error=cookies_not_supported&code=dd9203ec-0f7b-4aa6-98ee-7e2751e65d66]
- 51. Live cell fluorescence microscopy—an end-to-end workflow for... [https://pmc.ncbi.nlm.nih.gov/articles/PMC11525050/]
- 52. Activatable fluorescent probes for real-time imaging-guided ... [https://www.sciencedirect.com/science/article/abs/pii/S0169409X23001084]
- 53. Targeted nanoparticles in imaging: paving the way for ... [https://pmc.ncbi.nlm.nih.gov/articles/PMC6943836/]
- 54. Multifunctional molecular theranostic agent for ... [https://www.sciencedirect.com/science/article/abs/pii/S0925400524017659]
- 55. Nanotechnology in medical imaging: probe design and ... [https://pmc.ncbi.nlm.nih.gov/articles/PMC2844987/]
- 56. Multimodal imaging approach to track theranostic nanoparticle ... [https://pubs.rsc.org/en/content/articlehtml/2025/nr/d5nr00447k]
- 57. A Nucleolin-Targeted Multimodal Nanoparticle Imaging Probe ... [https://jnm.snmjournals.org/content/51/1/98]
- 58. 上转换荧光探针辅助的光学成像技术在肿瘤显影中的应用 ... [https://www.jim.org.cn/CN/abstract/abstract15100.shtml]
- 59. Improvement of the signal to noise ratio for fluorescent ... [https://www.nature.com/articles/s41598-022-23426-z]
- 60. Simple Elimination of Background Fluorescence in ... [https://pmc.ncbi.nlm.nih.gov/articles/PMC5614400/]
- 61. How to reduce autofluorescence [https://www.ptglab.com/news/blog/how-to-reduce-autofluorescence/?srsltid=AfmBOopspXnLhvjLHA41rEo8NkpTi58GXhJHYKvq-ZwmuxVIYDPSn6DH]
- 62. Amplification and Background Reduction Techniques [https://fluorofinder.com/amplification-and-background-reduction-techniques/]
- 63. The Fluorescence Signal is Too Low [https://www.immudex.com/resources/blog/the-fluorescence-signal-is-too-low/]
- 64. Exploring mitochondrial phototoxicity: Mechanisms, ... [https://pubmed.ncbi.nlm.nih.gov/40633802/]
- 65. A general method to improve fluorophores for live-cell and ... [https://pmc.ncbi.nlm.nih.gov/articles/PMC4344395/]
- 66. Live Cell Imaging & Analysis [https://www.sartorius.com/en/products/live-cell-imaging-analysis]
- 67. Tuning nanoparticle core composition drives orthogonal ... [https://www.nature.com/articles/s41467-024-52029-7]
- 68. Minimizing near-infrared autofluorescence in preclinical ... [https://pmc.ncbi.nlm.nih.gov/articles/PMC10075996/]
- 69. Background in Fluorescence Imaging [https://www.thermofisher.com/us/en/home/life-science/cell-analysis/cell-analysis-learning-center/molecular-probes-school-of-fluorescence/imaging-basics/protocols-troubleshooting/troubleshooting/background-fluorescence.html]
- 70. Quantifying fluorescent nanoparticle uptake in mammalian ... [https://www.nature.com/articles/s41598-022-24480-3]
- 71. Eliminating nonspecific binding sites for highly reliable ... [https://pubmed.ncbi.nlm.nih.gov/33885541/]
- 72. Identification of Fluorescent Compounds with Non-Specific ... [https://journals.plos.org/plosone/article?id=10.1371/journal.pone.0028802]
- 73. Quantitative comparison of luminescence probes for ... [https://pubmed.ncbi.nlm.nih.gov/34198274/]
- 74. Advances in nucleic acid probe-based detection of gene point ... [https://pmc.ncbi.nlm.nih.gov/articles/PMC12507828/]
- 75. Very simple and ultra-sensitive fluorescence resonance ... [https://www.nature.com/articles/s41598-025-21858-x]
- 76. Efficient and rapid cell surface functionalization: a sub- ... [https://pmc.ncbi.nlm.nih.gov/articles/PMC12584132/]
- 77. Advances in targeted nanotherapeutics [https://pmc.ncbi.nlm.nih.gov/articles/PMC6879063/]
- 78. Recent Advances in Aptamers-Based Nanosystems for ... [https://pmc.ncbi.nlm.nih.gov/articles/PMC11873322/]
- 79. Antibody-functionalized lipid nanocarriers for RNA-based ... [https://pubs.rsc.org/en/content/articlehtml/2025/na/d5na00323g]
- 80. Advances in Antibody-Targeted Lipid Nanoparticles (Ab- ... [https://www.biochempeg.com/article/449.html]
- 81. The application and frontier progress of aptamers from ... [https://www.aimspress.com/article/doi/10.3934/bioeng.2025024?viewType=HTML]
- 82. An update on recent advances in fluorescent materials for ... [https://pubs.rsc.org/en/content/articlehtml/2025/ra/d5ra03102h]
- 83. Visualizing the Tumor Microenvironment: Molecular ... [https://pmc.ncbi.nlm.nih.gov/articles/PMC11676442/]
- 84. Deeply penetrating in vivo photoacoustic imaging using a ... [https://pmc.ncbi.nlm.nih.gov/articles/PMC3005157/]
- 85. PET/MRI: Technical Challenges and Recent Advances - PMC [https://pmc.ncbi.nlm.nih.gov/articles/PMC4762872/]
- 86. Multimodal photoacoustic-fluorescence microscopy for ... [https://www.sciencedirect.com/science/article/pii/S0030399225015312]
- 87. Impact of signal-to-noise ratio and contrast definition on the ... [https://pmc.ncbi.nlm.nih.gov/articles/PMC11256003/]
- 88. Benchmarking performance with sensitivity, specificity, ... [https://epi2me.nanoporetech.com/benchmarking-performance/]
- 89. Modular fluorescent nanoparticle DNA probes for detection ... [https://www.nature.com/articles/s41598-021-99084-4]
- 90. NIR-II-excited off-on-off fluorescent nanoprobes for ... [https://www.nature.com/articles/s41467-024-55096-y]
- 91. Factors determining drug delivery system translation [https://pubmed.ncbi.nlm.nih.gov/40865878/]
- 92. Regulatory pathways and guidelines for nanotechnology ... [https://www.frontiersin.org/journals/medicine/articles/10.3389/fmed.2025.1544393/full]
- 93. Overcoming regulatory hurdles in clinical translation of ... [https://www.diversatechnologies.com/overcoming-regulatory-hurdles-in-clinical-translation-of-nanomedicine/]
- 94. Factors determining drug delivery system translation [https://www.sciencedirect.com/science/article/abs/pii/S0168365925007795]
- 95. The Toxicological Profile of Active Pharmaceutical ... [https://pmc.ncbi.nlm.nih.gov/articles/PMC12115128/]
- 96. FDA Regulatory Pathways for LNP(Lipid Nano Particle) [https://www.regulatorymedicaldevice.com/2025/04/regulatory-pathway-fda-approval-lnp-mrna-therapeutics.html]